Standing Weighted Single-Leg Knee Raise: Form & Tips
Learn the Standing Weighted Single-Leg Knee Raise with a plate and rack support. Build hip flexor strength, better balance, and control with proper form.
Standing Weighted Single-Leg Knee Raise
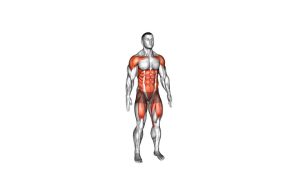
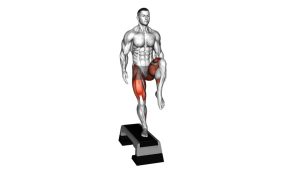
This exercise develops the ability to lift one thigh independently while maintaining a balanced standing position. The working hip flexors produce the lifting motion, while the standing leg provides stability. Additionally, the abdominal muscles help control the pelvis and prevent unnecessary trunk movement. Consequently, the exercise challenges coordination as well as muscular control.
Unlike a straight-leg raise, this variation keeps the working knee bent throughout most of the lift. As a result, the thigh travels upward while the lower leg remains relatively relaxed beneath the knee. The plate should remain securely controlled near the top of the thigh. However, the supporting hand must not carry the entire plate weight if the intention is to add resistance through the raised leg.
Quick Overview
| Body Part | Legs |
|---|---|
| Primary Muscle | Hip flexors, especially iliopsoas and rectus femoris |
| Secondary Muscle | Tensor fasciae latae, sartorius, abdominal stabilizers, obliques, and gluteus medius of the supporting leg |
| Equipment | Weight plate and stable rack bar or fixed support |
| Difficulty | Intermediate; requires controlled hip flexion, adequate balance, and secure plate handling |
Sets & Reps (By Goal)
Choose your repetitions according to your training objective. Initially, practice the movement without additional resistance until you can lift and lower the knee smoothly. Once your technique becomes consistent, introduce a light plate while maintaining the same controlled movement.
- Strength: 3–4 sets × 6–10 reps per leg, using a controlled plate load and 60–90 seconds of rest.
- Hypertrophy: 3–4 sets × 10–15 reps per leg, emphasizing muscular control and a slow lowering phase.
- Muscular endurance: 2–3 sets × 15–20 reps per leg with minimal resistance and 30–60 seconds of rest.
- Mobility and balance: 2–3 sets × 8–12 reps per leg, using bodyweight or very light resistance.
- Rehab-style control: 2–3 sets × 6–10 bodyweight reps per leg, only when appropriate and cleared by a qualified professional.
Progression rule: First improve balance, hip control, and movement consistency. Then gradually increase repetitions or add a small amount of resistance. However, never increase the plate weight if you must lean backward, swing the leg, or twist the pelvis to complete a repetition.
Setup / Starting Position
Prepare the Equipment and Standing Position
- Choose a secure support: Stand beside or within a stable exercise rack with a fixed horizontal bar positioned around hip height. Ensure the bar cannot rotate, slide, or move unexpectedly.
- Select a manageable weight plate: Begin with a light plate that you can comfortably control using one hand. Prefer a plate with a secure grip and smooth edges.
- Establish your stance: Stand upright with your feet approximately hip-width apart. Keep the supporting foot flat and distribute pressure evenly across the heel, midfoot, and forefoot.
- Grip the support bar: Hold the rack bar with the hand opposite the working leg. Use a firm but comfortable grip for balance rather than pulling your body upward.
- Position the plate: Hold the plate beside the front of the working thigh. As the knee rises, guide the plate securely onto the upper thigh without contacting the kneecap.
Establish Core and Hip Alignment
- Brace your abdominal muscles: Maintain a comfortable abdominal brace while keeping your ribs approximately stacked over your pelvis. Additionally, avoid excessive lower-back arching.
- Keep the shoulders relaxed: Maintain a relatively upright chest, neutral head position, and steady breathing. Meanwhile, avoid shrugging the shoulder holding the support.
- Prepare the working leg: Keep the knee relaxed and allow the thigh to begin from a comfortable lowered position. Before lifting, ensure your supporting leg feels stable and your hips remain level.
Setup tip: Practice several unloaded repetitions before adding the plate. This allows you to identify a comfortable hip-flexion range and establish reliable balance.
Execution (Step-by-Step)
Upward Phase: Lift the Working Knee
- Establish your balance: Stand tall on the supporting leg and maintain a light grip on the rack bar. Before moving, gently engage your abdominal muscles and keep your pelvis facing forward.
- Begin the hip-flexion movement: Slowly raise the working thigh forward while allowing the knee to remain bent. Consequently, the knee travels upward toward the torso while the lower leg hangs beneath it.
- Guide the weight plate: Move the plate with the working thigh and position it securely over the upper thigh as it rises. When appropriate, allow the thigh to support the plate. However, do not press forcefully into the knee joint or let the weight slide.
- Continue toward hip height: Raise the thigh until it approaches a comfortable horizontal position, if your mobility permits. Meanwhile, keep your supporting leg stable and avoid rotating the pelvis.
Peak Position and Controlled Lowering
- Pause at the highest position: Briefly hold the knee near the top while maintaining an upright torso and steady breathing. The working hip flexors should provide the lifting effort. Additionally, your supporting leg should remain balanced.
- Begin the lowering phase: Gradually lower the thigh toward the starting position. Keep the plate controlled with your hand and prevent sudden downward movement.
- Maintain trunk alignment: Avoid leaning forward excessively or swinging the working leg behind the body. Instead, allow the hip to return naturally while keeping your abdominal muscles engaged.
- Finish the repetition: Return the working foot toward the floor with control. Then restore your original standing position without dropping the plate or shifting abruptly.
- Repeat and change sides: Complete the prescribed repetitions before switching legs. Finally, use the opposite hand for rack support when training the other side.
Pro Tips & Common Mistakes
Pro Tips for Better Hip Flexor Activation
- Lead with the working knee: Focus on lifting the thigh forward rather than kicking the lower leg outward. This helps preserve the intended hip-flexion pattern.
- Keep the knee comfortably bent: Maintaining knee flexion reduces the long lever created by a straight leg. As a result, you can concentrate more effectively on controlled hip movement.
- Move slowly through the full repetition: Use approximately two seconds to raise the thigh, pause briefly, and lower for two to three seconds. However, adjust the tempo if maintaining control requires a slower pace.
- Use the rack for balance: Maintain a comfortable grip without hanging from the bar or pulling yourself upward. Ideally, your supporting leg should still provide most of the balance.
- Control the plate carefully: Position the resistance over the upper thigh, away from the kneecap. Furthermore, keep enough hand contact to prevent the plate from slipping or falling.
Common Mistakes to Avoid
- Leaning backward during the lift: Excessive backward leaning can substitute trunk movement for the intended hip-flexion action. Instead, reduce the height of the knee raise and maintain a more neutral torso.
- Swinging the working leg: Rapid movements rely on momentum and make resistance harder to control. Therefore, lower the plate weight and perform each repetition deliberately.
- Tilting or twisting the pelvis: Rotating the hips may create the appearance of greater knee-lifting height. Nevertheless, controlled movement within your available range is more useful than forced height.
- Using excessive plate weight: Heavy resistance can encourage hip compensation, poor balance, and an uncontrolled descent. Consequently, choose the lightest load that allows consistent technique.
- Placing pressure directly on the knee: Contact near the kneecap may cause discomfort and make the plate difficult to secure. Instead, maintain controlled contact over the muscular portion of the upper thigh.
- Rushing the lowering phase: Dropping the leg reduces control and increases the risk of losing balance. Therefore, lower slowly and reset your posture before beginning the next repetition.
- Holding your breath unnecessarily: Excessive breath-holding can increase strain during a relatively simple movement. Instead, breathe steadily and maintain a comfortable abdominal brace.
FAQ
Muscles Worked and Exercise Technique
What muscles does the Standing Weighted Single-Leg Knee Raise work?
The exercise primarily targets the iliopsoas and rectus femoris, which help lift the thigh toward the torso. Additionally, the sartorius and tensor fasciae latae assist hip flexion. The abdominal muscles help stabilize the trunk, while the supporting leg uses its hip stabilizers to maintain balance. Therefore, this movement trains hip flexion alongside single-leg coordination.
Is this exercise mainly for the hip flexors or abdominal muscles?
The primary lifting action comes from the hip flexors, not from abdominal crunching. However, the abdominals help resist excessive spinal extension and unwanted pelvic movement. As a result, the exercise can contribute to core stabilization without being a primary abdominal strengthening movement.
Should the working leg remain straight or bent?
The demonstrated variation uses a bent working knee throughout the lift. Unlike a straight-leg raise, the thigh moves upward while the lower leg stays beneath the knee. Therefore, focus on controlled thigh elevation rather than extending the leg forward.
Training Frequency, Progression, and Safety
Can beginners perform the Standing Weighted Single-Leg Knee Raise?
Beginners can practice the same movement without a weight plate while holding a stable support. Initially, use a limited range and perform slow repetitions until balance improves. Once the movement becomes comfortable and consistent, a light plate may be introduced gradually. However, weighted repetitions are better suited to people who already control bodyweight knee raises.
How high should I lift my knee?
A comfortable target is to raise the thigh toward hip height without leaning backward or twisting. However, individual hip mobility varies, so not everyone needs to reach a horizontal thigh position. Instead, stop at the highest point where your pelvis and lower back remain controlled.
How often should I train this exercise?
For strength development, two or three sessions per week can provide a practical starting point. Additionally, lighter bodyweight repetitions may be incorporated into warm-ups or balance practice. Nevertheless, allow adequate recovery when soreness or fatigue affects your technique.
Does the weight plate actually increase hip flexor resistance?
A plate can increase resistance when its weight acts downward on the raised thigh. However, if your hand supports most of the plate’s weight, the additional hip-flexion demand may be relatively small. Therefore, keep the plate securely positioned and use a light load that can be controlled safely. Never force pressure through the kneecap.
Why do I feel discomfort in my lower back during the movement?
Lower-back discomfort may occur when the torso leans backward excessively or the pelvis loses its stable position. Additionally, excessive loading or an uncomfortable range may contribute to symptoms. Reduce resistance and movement height first. However, stop training and seek professional assessment if pain persists or worsens.
Can I perform this exercise without a weight plate?
Yes. The bodyweight standing knee raise uses the same basic hip-flexion movement. Furthermore, removing the plate makes it easier to focus on balance and technique. Consequently, bodyweight practice is a useful starting variation before progressing to external resistance.
Recommended Equipment
Appropriate equipment can make plate-held knee raises easier to control and more comfortable. However, specialized accessories are not required. Prioritize a manageable plate and a secure support before adding other training tools.
- Rubber-Coated Weight Plate — provides adjustable external resistance for the working thigh; choose a light, manageable weight with comfortable edges
- Weight Plate With Grip Handles — makes one-handed plate control more secure during the upward and downward phases
- Adjustable Half Power Rack — provides a stable structure for a properly secured horizontal support bar during single-leg balance exercises
- Non-Slip Exercise Mat — offers a dedicated training surface; use only a firm, flat mat that does not reduce standing stability
- Adjustable Ankle Weights — offers an alternative progression for standing leg raises, although resistance placement changes the exercise mechanics
Equipment tip: Choose a light plate with a secure handhold and avoid unstable or unsecured rack attachments. Additionally, inspect the training area before each set to ensure adequate clearance. For best results, prioritize balance, controlled hip movement, and safe resistance placement rather than maximum load.