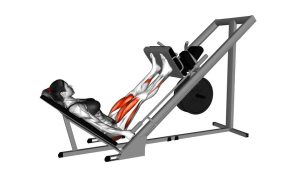
Sled 45-Degree Narrow-Stance Leg Press: Form, Muscles & Tips
Learn the Sled 45-Degree Narrow-Stance Leg Press with proper quad-focused form, sets by goal, safe knee tracking, common mistakes, and FAQs.
Sled 45-Degree Narrow-Stance Leg Press
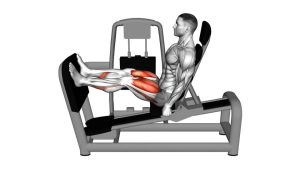
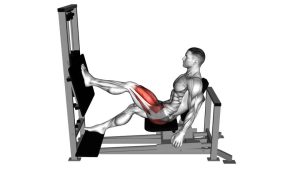
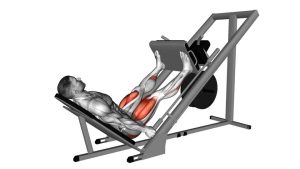
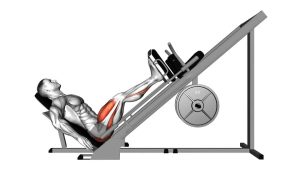
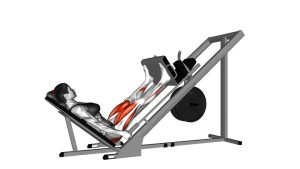
The Sled 45-Degree Narrow-Stance Leg Press is particularly useful for developing thigh strength and improving controlled knee extension. Because the machine supports the torso, it reduces the balance demands associated with free-weight squats.
Additionally, placing the feet relatively close together changes the pressing position while maintaining significant quadriceps involvement. However, a narrow stance does not isolate an individual quadriceps muscle. Proper depth, controlled resistance, and consistent technique remain essential for effective training.
Throughout each repetition, the hips should remain against the seat while both legs press the sled along its inclined rails. Furthermore, the knees should follow the direction of the toes without collapsing inward.
Quick Overview
| Body Part | Legs |
|---|---|
| Primary Muscle | Quadriceps femoris (vastus lateralis, vastus medialis, vastus intermedius, and rectus femoris) |
| Secondary Muscle | Gluteus maximus, adductor magnus, hamstrings and calf muscles as stabilizers |
| Equipment | 45-degree plate-loaded sled leg press machine and suitable weight plates |
| Difficulty | Beginner to Intermediate, depending on resistance, mobility, and movement control |
Sets & Reps (By Goal)
- Beginner technique: 2–3 sets × 10–12 reps using light resistance, controlled depth, and 60–90 seconds of rest. First, develop consistent foot placement and smooth knee tracking before increasing weight.
- Muscle hypertrophy: 3–4 sets × 8–12 reps using a challenging but manageable load, with 90–150 seconds of rest. Additionally, use a controlled lowering phase to maintain tension throughout the quadriceps.
- Lower-body strength: 3–5 sets × 5–8 reps with progressively heavier resistance and 2–3 minutes of rest. However, heavier loading should never compromise knee alignment or lower-back stability.
- Muscular endurance: 2–3 sets × 15–20 reps with lighter resistance and 60–90 seconds of rest. Consequently, the working muscles experience longer periods of continuous effort.
- Controlled mobility / rehab-style training: 2–3 sets × 8–12 slow repetitions using a comfortable range of motion and very light resistance. For rehabilitation, follow a qualified professional’s individualized guidance.
Progression rule: Begin with a resistance that permits smooth repetitions without lifting the hips or shifting the feet. Once all prescribed repetitions feel controlled, gradually increase the resistance. For example, add the smallest practical weight increment while maintaining the same movement depth and tempo. Nevertheless, prioritize consistent technique over the total weight displayed on the machine.
Setup / Starting Position
Machine Position and Narrow Foot Placement
- Adjust the machine: Sit on the 45-degree leg press with your back firmly supported by the inclined backrest. Ensure the seat position allows comfortable knee and hip movement.
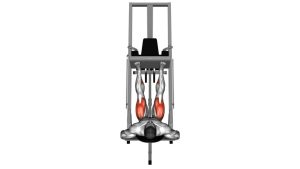
- Position your feet: Place both feet relatively close together, approximately hip-width or slightly narrower. However, avoid an excessively narrow position that prevents natural knee alignment.
- Choose platform height: Position the feet around the middle of the footplate as a starting point. Then adjust slightly according to ankle mobility, body proportions, and comfort.
- Maintain full-foot contact: Keep both heels and the balls of your feet securely against the platform. Additionally, distribute pressure evenly instead of pressing exclusively through the toes.
- Align the knees: Point the knees in the same general direction as the toes. Meanwhile, maintain enough space between the legs to prevent the knees from collapsing inward.
- Secure your upper body: Keep the head, upper back, lower back, and pelvis supported against the seat. Hold the side handles to maintain consistent body positioning.
Prepare for the First Repetition
Before moving the sled, select a manageable load and confirm that the machine is functioning correctly. Next, press the platform into a supported starting position and disengage the safety mechanism according to the manufacturer’s instructions.
Setup tip: Avoid positioning your feet so low that the heels lift during the descent. Similarly, do not force an extremely close stance if it causes knee, hip, or ankle discomfort. Instead, choose the narrowest comfortable position that preserves stable and natural movement.
Execution (Step-by-Step)
Controlled Pressing and Lowering Technique
- Establish the starting position: Begin with both feet firmly planted on the footplate and your legs partially extended. Keep the knees slightly bent while maintaining full contact between your back and the seat.
- Lower the weighted sled: Gradually bend both knees and hips, allowing the platform to travel toward your body. Meanwhile, keep the descent smooth instead of letting gravity control the movement.
- Maintain knee alignment: As the knees bend, guide them in line with the toes. Additionally, prevent the heels from lifting and avoid allowing the knees to collapse inward.
- Reach a comfortable depth: Continue lowering until you achieve a useful range of motion without rounding the lower back. However, stop earlier if the pelvis begins lifting away from the seat.
- Press the sled upward: Push through the entire foot, emphasizing stable pressure through the midfoot and heel. Consequently, the knees and hips extend together as the sled travels upward along its inclined rails.
- Control the top position: Finish with the legs almost straight while maintaining control of the resistance. Nevertheless, avoid aggressively locking the knees or allowing the weight to rest on the joints.
- Repeat with consistent form: Begin the next lowering phase without bouncing or suddenly changing direction. Furthermore, maintain the same foot placement, pressing path, and controlled depth throughout the set.
- Secure the machine: After completing the final repetition, engage the machine’s safety catches according to its operating instructions. Finally, verify that the sled is securely supported before removing your feet.
Breathing and Movement Tempo
Inhale during the controlled lowering phase. Then exhale while pressing the sled upward, maintaining comfortable abdominal tension. For most training sets, use approximately 2–3 seconds to lower and 1–2 seconds to press.
Additionally, avoid rushing the transition between lowering and pressing. A smooth change of direction helps maintain control and reduces reliance on momentum.
Pro Tips & Common Mistakes
Improve Quadriceps Training and Movement Control
- Use a comfortable narrow stance: Keep the feet relatively close without forcing the ankles or knees into an unnatural position. Consequently, you can maintain better alignment throughout the pressing movement.
- Keep your entire foot planted: Avoid allowing the heels to rise during the lowering phase. Instead, maintain stable pressure across the footplate.
- Prevent excessive knee collapse: Keep the knees aligned with the toes as you lower and press. Additionally, reduce the resistance if alignment becomes difficult.
- Control the lowering phase: Avoid dropping the weighted sled quickly. A slower descent increases movement control and maintains muscular tension.
- Do not force excessive depth: Lower only as far as your hip mobility and body position allow. Otherwise, the pelvis may roll backward and create unnecessary lower-back stress.
- Avoid aggressive knee lockout: Stop just short of forcefully snapping the knees straight. Furthermore, maintain muscular control at the top rather than abruptly resting against the joints.
- Keep your lower back supported: Avoid lifting the hips or rounding the spine to achieve extra depth. Instead, adjust the range of motion to suit your body proportions.
- Use progressive resistance: Increase the load gradually after achieving your prescribed repetitions with consistent technique. However, avoid comparing the total sled weight across different machines because their mechanics can vary.
- Maintain symmetrical movement: Press evenly through both legs without shifting more weight onto one side. Additionally, check that both knees extend at approximately the same rate.
- Combine with balanced leg training: Pair narrow-stance leg presses with suitable hamstring, glute, and calf exercises. As a result, your lower-body program can address several major muscle groups rather than emphasizing knee extension alone.
Training tip: Focus on maintaining a repeatable range of motion before increasing resistance. Although a narrow stance can alter the movement mechanics, foot placement alone does not guarantee greater activation of a specific quadriceps head. Therefore, consistent execution and suitable training volume remain more important than chasing an extremely close stance.
FAQ
Muscle Activation and Exercise Benefits
What muscles does the Sled 45-Degree Narrow-Stance Leg Press work?
The exercise primarily targets the quadriceps, which extend the knees during the pressing phase. Additionally, the gluteus maximus and adductor magnus contribute to hip extension. Meanwhile, the hamstrings and calf muscles help stabilize the lower limbs.
Because both knees and hips move together, the narrow-stance leg press remains a compound lower-body exercise. Consequently, it can support both strength development and muscle hypertrophy.
Does a narrow stance target the quadriceps more than a wide stance?
A narrow stance changes foot positioning and may influence knee and hip mechanics. However, it does not automatically isolate the quadriceps or guarantee greater activation of the inner thigh muscles.
Instead, quadriceps involvement depends on several factors, including movement depth, resistance, body proportions, and technique. Therefore, choose a stance that allows comfortable knee tracking and consistent muscular effort.
Foot Placement and Range of Motion
How close should my feet be during a narrow-stance leg press?
Begin with the feet approximately hip-width apart or slightly narrower. Then adjust the distance according to your mobility and the machine’s footplate dimensions.
Nevertheless, avoid forcing the feet together if doing so makes the knees collapse inward. A comfortable narrow stance should still permit stable foot contact and natural knee alignment throughout every repetition.
How deep should I lower the sled?
Lower the sled until you reach a comfortable degree of knee and hip flexion while maintaining contact with the backrest. Ideally, the movement should provide sufficient muscular tension without compromising spinal position.
However, individual mobility and limb proportions influence the available depth. If the pelvis begins rolling away from the seat, reduce the range of motion. Therefore, a controlled depth is preferable to forcing the knees toward the chest.
Should my knees move over my toes during the leg press?
Some forward knee movement is normal during a leg press. More importantly, the knees should generally track in the same direction as the toes.
Additionally, keep the feet planted and avoid sudden changes in knee alignment. If discomfort develops, adjust your foot placement, resistance, or depth. Persistent pain should be assessed by a qualified healthcare professional.
Training Frequency and Progression
Is the Sled 45-Degree Narrow-Stance Leg Press suitable for beginners?
Yes, beginners can perform this exercise when they understand the machine’s safety mechanisms and use manageable resistance. Furthermore, the supported seated position reduces balance demands compared with many free-weight leg exercises.
Start with light loads and practice smooth repetitions. Once knee tracking, foot stability, and movement depth become consistent, gradually increase the training challenge.
How often should I perform narrow-stance leg presses?
Most trainees can include leg presses within their regular lower-body training routine. For example, one or two sessions per week may be appropriate, depending on total training volume and recovery.
Additionally, allow sufficient recovery between demanding quadriceps sessions. If soreness affects movement quality, reduce the workload or adjust your training schedule accordingly.
Can narrow-stance leg presses replace squats?
Leg presses can effectively strengthen the quadriceps and other lower-body muscles. However, they do not reproduce every movement demand of a free-weight squat, particularly balance and trunk stabilization.
Therefore, both exercises can serve useful roles in a training program. For example, leg presses provide additional supported lower-body volume, while squats can develop broader movement coordination and strength.
What should I do if my knees hurt during the exercise?
First, stop the painful movement and avoid forcing another repetition. Next, review your foot placement, resistance, and range of motion.
Although reducing the load may help with technique-related discomfort, pain should not be ignored. If symptoms continue or worsen, consult a qualified healthcare professional before resuming demanding leg press training.
Recommended Equipment
- 45-Degree Plate-Loaded Leg Press Machine — the primary equipment used for inclined sled pressing, offering a supported lower-body strength-training position
- Olympic Weight Plates — compatible plates can provide adjustable resistance for progressive overload on suitable plate-loaded leg press machines
- Flat-Sole Training Shoes — provide a stable, non-slip base that can help maintain consistent foot contact during pressing movements
- Mini Loop Resistance Bands — useful for separate hip activation, glute warm-ups, and lower-body accessory exercises before training
- Strength Training Workout Logbook — helps track sets, repetitions, resistance, and training progression across lower-body workout sessions
Equipment tip: Choose a leg press machine with a stable frame, suitable footplate, secure safety catches, and appropriate weight capacity. Additionally, confirm that any weight plates match the machine’s specifications. Above all, inspect the equipment before loading it and follow the manufacturer’s operating instructions.