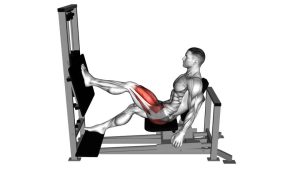
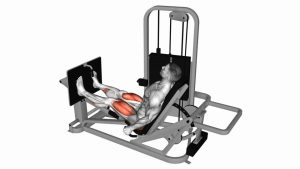
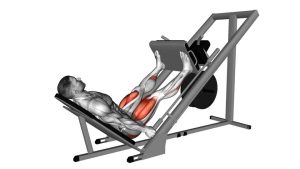
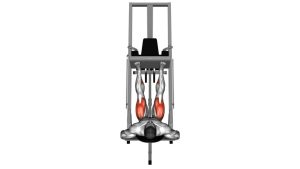
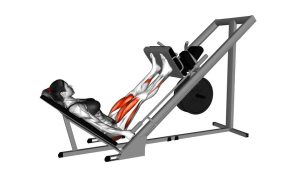
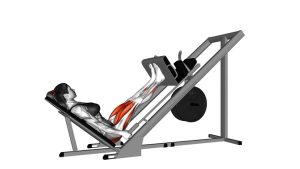
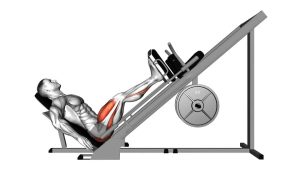
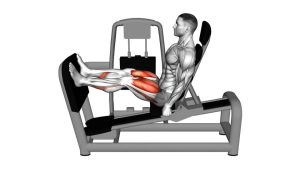
Sled 45-Degree Wide-Stance Leg Press: Form & Tips
Learn the Sled 45-Degree Wide-Stance Leg Press with proper foot placement, knee tracking, sets, muscles worked, and safe tips for stronger legs.
Sled 45-Degree Wide-Stance Leg Press
The 45-degree wide-stance leg press is useful for developing lower-body strength, muscular size, and controlled pressing mechanics. Because the machine supports the upper body, it reduces the balance demands associated with free-weight squats. However, the legs still perform substantial work as the knees and hips extend against resistance.
Additionally, the wider foot position allows the hips to move through a different alignment than a conventional close-stance press. As a result, some athletes find the position comfortable for training the thighs, glutes, and inner-leg muscles. Nevertheless, stance width should always match individual hip mobility and joint comfort rather than forcing an excessively wide position.
Quick Overview
| Body Part | Legs |
|---|---|
| Primary Muscle | Quadriceps (Rectus femoris, Vastus lateralis, Vastus medialis, Vastus intermedius) and Gluteus maximus |
| Secondary Muscle | Adductor magnus, Hamstrings (assisting hip extension and stabilization), Gluteus medius, and Calf stabilizers |
| Equipment | 45-degree plate-loaded sled leg press machine with an adjustable backrest, foot platform, and safety stops |
| Difficulty | Beginner to Intermediate, depending on resistance, hip mobility, and control of the sled |
Sets & Reps (By Goal)
- Strength: Perform 3–5 sets × 5–8 repetitions with challenging but controlled resistance. Rest approximately 2–3 minutes between sets. Prioritize consistent depth and smooth extension instead of attempting maximal loads with poor technique.
- Muscle hypertrophy: Complete 3–4 sets × 8–15 repetitions using moderate-to-heavy resistance. Rest for 90–150 seconds between sets. Additionally, use a controlled lowering phase to maintain muscular tension throughout the movement.
- Muscular endurance: Perform 2–3 sets × 15–20 repetitions with lighter resistance. Rest approximately 45–75 seconds between sets. Consequently, the focus shifts toward maintaining technique as fatigue gradually increases.
- Beginner technique and control: Start with 2–3 sets × 10–12 repetitions using a manageable load. Allow 60–90 seconds of rest. Moreover, practice the same foot position, knee tracking, and comfortable movement depth during every repetition.
- Rehab-style strengthening: When cleared by a qualified healthcare professional, perform 2–3 sets × 10–15 controlled repetitions with light resistance and an approved range of motion. Avoid painful positions, and increase the training demand gradually.
Progression rule: First establish comfortable depth, stable foot pressure, and consistent knee alignment. Then increase repetitions within your chosen range before adding resistance. For example, once all planned sets reach the upper repetition target with clean technique, increase the load by the smallest practical increment. However, never sacrifice movement control simply to lift heavier weight.
Setup / Starting Position
- Adjust the machine: Sit in the 45-degree leg press with your back fully supported against the angled pad. Adjust the seat and safety stops according to the machine instructions and your available hip mobility.
- Position your feet widely: Place both feet wider than shoulder width on the platform. Additionally, use a slight outward toe angle that allows the knees to follow a comfortable path. Avoid forcing the feet into an excessively wide stance.
- Establish full-foot pressure: Keep the heels, midfoot, and forefoot securely against the platform. As a result, the legs can distribute pressure more evenly instead of relying primarily on the toes.
- Secure the upper body: Position your head, upper back, and pelvis firmly against the seat. Next, hold the machine’s side handles to stabilize your torso without pulling your body forward.
- Align the knees: Point both knees generally in the same direction as the toes. Meanwhile, keep the legs symmetrical and avoid letting either knee collapse inward or drift excessively outward.
- Prepare the sled: Extend the legs enough to support the platform before releasing the safety locks. However, keep a slight bend in the knees rather than forcefully locking them. Confirm that you can control the load before beginning.
- Brace and breathe: Engage the abdominal muscles gently and keep the ribs and pelvis supported. Finally, take a controlled breath and prepare to lower the sled without rounding the lower back.
Tip: Start with a moderate stance width rather than the widest possible position. If the hips feel pinched or the knees cannot track comfortably, adjust the stance until the movement feels stable and natural.
Execution (Step-by-Step)
- Establish the starting position: Support the sled with both legs in a nearly extended position while maintaining a slight knee bend. Keep your back supported, and ensure that both feet remain firmly planted on the wide foot platform.
- Begin the lowering phase: Gradually bend the knees and hips, allowing the sled to travel downward along its inclined rails. Meanwhile, maintain an even distribution of pressure across both feet. Avoid releasing the weight too quickly.
- Guide the knees outward: As the knees bend, keep them aligned with the direction of the toes. Consequently, the hips can move through the selected range without unnecessary inward knee collapse. Do not force the knees farther outward than your natural alignment allows.
- Reach a comfortable bottom position: Lower the platform until the thighs move toward the torso while the pelvis stays against the backrest. However, stop before the lower back begins rounding or the hips lift away. The deepest possible position is not always the safest or most productive.
- Initiate the pressing phase: Push evenly through the heels, midfoot, and forefoot to drive the sled upward. At the same time, extend both knees and hips without bouncing from the bottom position. Keep your torso stable against the support pad.
- Maintain controlled leg alignment: Continue pressing until the legs approach full extension. Throughout this phase, prevent the knees from moving inward and avoid shifting pressure onto the outer edges of the feet.
- Finish without forceful lockout: Stop just short of aggressively locking the knees. Additionally, avoid jerking the sled or allowing the joints to absorb a sudden impact at the top of the repetition.
- Repeat with consistent technique: Bend the knees again to begin the next controlled lowering phase. After completing the prescribed repetitions, return the sled to the supported position and carefully engage the machine’s safety locks before stepping away.
Pro Tips & Common Mistakes
- Choose a comfortable wide stance: Wider foot placement changes hip alignment and may increase adductor involvement. However, an excessively wide stance can restrict comfortable movement and create unnecessary joint strain.
- Maintain complete foot contact: Press through the whole foot rather than lifting the heels or pushing only through the toes. Consequently, force remains more evenly distributed throughout the repetition.
- Keep the knees aligned: Avoid allowing the knees to collapse inward during either phase. Instead, guide them naturally in the direction of the toes while maintaining a consistent stance.
- Protect the lower back: Keep the pelvis and lower back supported against the seat. If the hips begin lifting at the bottom, reduce the depth and reassess your foot placement.
- Control the lowering phase: Take approximately 2–3 seconds to lower the sled when learning the exercise. Additionally, avoid bouncing off the bottom position to initiate the next press.
- Avoid aggressive knee lockout: Extend the legs smoothly without forcing the knees into a rigid position. Therefore, maintain muscular control instead of relying on passive joint support.
- Use manageable resistance: Loading the machine with excessive weight often encourages partial repetitions or pelvic movement. Instead, choose a load that allows consistent depth and balanced effort.
- Maintain symmetrical pressure: Both legs should contribute to moving the sled. If one side dominates, reduce the resistance and concentrate on controlled, even pressing.
- Coordinate breathing: Inhale during the lowering phase and exhale through the pressing phase when appropriate for your load. For heavier sets, use a controlled brace without prolonged unnecessary breath-holding.
- Progress gradually: Increase resistance only after achieving reliable technique. Furthermore, monitor knee comfort, hip mobility, and recovery before introducing more demanding training sessions.
FAQ
Muscles Worked and Exercise Benefits
What muscles does the Sled 45-Degree Wide-Stance Leg Press work?
The exercise primarily works the quadriceps and gluteus maximus through coordinated knee and hip extension. Additionally, the adductor magnus contributes to hip extension and stabilization. The hamstrings, gluteus medius, and calf muscles also assist with joint stability and movement control. However, exact muscle contribution varies with stance width, depth, individual anatomy, and resistance.
Does the wide-stance leg press target the glutes more than a narrow stance?
A wider stance changes hip positioning and may alter the contribution of the glutes and adductors. However, it does not automatically guarantee greater glute activation for every athlete. The gluteus maximus remains important during hip extension, especially through a comfortable range of hip flexion. Therefore, prioritize stable technique and sufficient depth rather than making the stance excessively wide.
Is the 45-degree wide-stance leg press effective for quadriceps growth?
Yes. The quadriceps produce substantial knee-extension force during the pressing phase. Furthermore, the machine allows progressive resistance without demanding the same balance as a free-weight squat. For muscle growth, use controlled repetitions, appropriate training volume, and gradual overload. Nevertheless, consistent range of motion and recovery remain more important than simply increasing the weight.
Proper Technique and Joint Comfort
How wide should my feet be on the leg press platform?
Start with your feet slightly wider than shoulder width and turn the toes outward to a comfortable degree. Next, check whether the knees can follow the toes without discomfort or excessive inward movement. Because hip structure and mobility differ between individuals, there is no single perfect stance width. Therefore, adjust the position until both legs move smoothly and symmetrically.
How deep should I lower the sled during each repetition?
Lower the sled as far as you can while keeping the hips and lower back supported against the seat. Ideally, the knees bend through a comfortable and repeatable range without pelvic rounding. However, do not force the thighs against the torso or allow the hips to roll upward. If your pelvis moves away from the backrest, reduce the depth before continuing.
Should I completely straighten my knees at the top?
Approach full extension while maintaining muscular control. However, avoid forcefully snapping the knees into lockout, especially when using heavy resistance. Instead, finish with a slight, controlled knee bend before beginning the next repetition. This technique helps prevent sudden loading changes and supports smoother movement throughout the set.
Training Frequency and Progression
Is the Sled 45-Degree Wide-Stance Leg Press suitable for beginners?
Yes, beginners can learn this exercise with a manageable load and proper machine setup. Because the backrest supports the torso, the movement requires less balance than many standing exercises. Nevertheless, beginners must learn the safety mechanisms, foot placement, and comfortable depth before increasing resistance. Start with lighter sets and gradually develop confidence with the sled.
How often should I include the wide-stance leg press in my workouts?
Many athletes can include it in one or two weekly lower-body sessions, depending on training volume and recovery. For example, it can follow squats or serve as the primary machine-based leg exercise. Additionally, alternating demanding and lighter sessions may help manage fatigue. Allow sufficient recovery between challenging workouts, especially when soreness or performance changes indicate incomplete recovery.
Can I replace squats with the wide-stance leg press?
The leg press can build substantial lower-body strength and muscle. However, it does not reproduce every demand of a standing squat. Squats involve more balance, trunk stabilization, and whole-body coordination. Therefore, the leg press can complement squats or replace them when appropriate for your goals and limitations. Choose exercises according to training needs rather than assuming both movements provide identical benefits.
When should I increase the weight on the 45-degree leg press?
Increase resistance after completing all planned repetitions with consistent depth, stable foot pressure, and reliable knee tracking. For instance, once you comfortably reach the upper repetition target, add the smallest available weight increment. Then reassess your technique before progressing further. If your heels lift, hips shift, or knees collapse inward, reduce the load and restore control.
Recommended Equipment
- Flat-Sole Weightlifting Training Shoes — provide a stable, grippy base for maintaining consistent foot pressure on the leg press platform
- Resistance Loop Bands Set — useful for glute activation drills, hip warm-ups, and controlled lower-body preparation
- Weightlifting Knee Sleeves — offer optional compression and warmth during leg workouts without replacing proper technique
- Olympic Weight Plates — allow progressive resistance on compatible plate-loaded 45-degree leg press machines
- Fitness Workout Logbook — helps track sets, repetitions, resistance, and training progress across lower-body sessions
Tip: Choose equipment that supports stability, comfort, and progressive training. Additionally, confirm that weight plates fit your machine’s specifications before purchasing. Supportive accessories can be helpful, but they should never replace controlled technique, appropriate resistance, or proper use of the machine’s safety mechanisms.