Bodyweight Curtsy Squat: Proper Form, Muscles & Tips
Learn the bodyweight curtsy squat with step-by-step form, muscles worked, sets by goal, balance tips, common mistakes, and safe progression advice.
Bodyweight Curtsy Squat
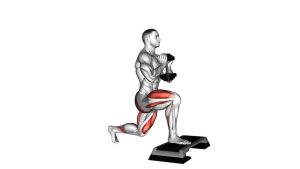
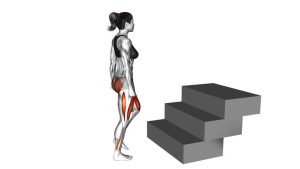
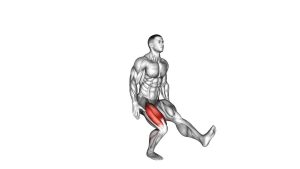
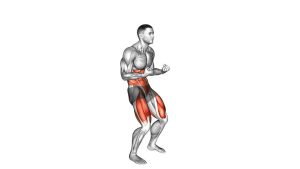
The Bodyweight Curtsy Squat, also called a Curtsy Lunge or Cross-Behind Lunge, combines a diagonal backward step with controlled hip and knee flexion. Consequently, the working leg supports most of the body weight while the rear leg assists with balance. The quadriceps help control knee movement, while the glutes contribute to hip extension and stability.
Furthermore, the cross-behind position challenges coordination because the feet move outside a conventional forward-and-backward pattern. Therefore, this exercise can complement squats, reverse lunges, and other unilateral leg movements in a balanced training program. However, maintaining comfortable knee and hip alignment is more important than reaching maximum depth.
Quick Overview
| Body Part | Legs |
|---|---|
| Primary Muscle | Quadriceps and gluteus maximus |
| Secondary Muscle | Gluteus medius, hip adductors, hamstrings, and calves |
| Equipment | None (bodyweight exercise; optional support or added resistance) |
| Difficulty | Intermediate (beginners may use support and a reduced range) |
Sets & Reps (By Goal)
Curtsy squat repetitions should match your strength, mobility, and balance abilities. Because the movement places additional demands on hip stability, begin with controlled bodyweight repetitions. Moreover, complete the same number of repetitions on both sides to maintain balanced training volume.
- Strength: 3–4 sets × 6–10 reps per leg. Rest 60–90 seconds between sets. Use slow, controlled repetitions and progress resistance only after mastering alignment.
- Hypertrophy (Muscle Growth): 3–4 sets × 10–15 reps per leg. Rest 60–90 seconds. Additionally, use progressive resistance when bodyweight repetitions become too easy.
- Muscular Endurance: 2–3 sets × 15–20 reps per leg. Rest 30–60 seconds. Maintain consistent form rather than increasing speed.
- Mobility and Coordination: 2–3 sets × 8–12 reps per leg. Use a comfortable depth and a controlled lowering phase to practice smooth hip movement.
- Rehab-Style Control: 1–2 sets × 5–8 shallow reps per leg, only when appropriate for your condition and approved by a qualified professional. Support may be necessary to reduce balance demands.
Progression rule: First improve balance, knee tracking, and comfortable depth. Next, increase repetitions or slow the lowering phase. Finally, consider adding light dumbbells or a weighted vest when every bodyweight repetition remains stable and pain-free.
Setup / Starting Position
Proper setup helps prevent unnecessary twisting and keeps the movement focused on the legs and hips. Before beginning, choose a firm, non-slip surface with enough room to step diagonally. Additionally, ensure that your stance feels stable and comfortable.
- Stand upright: Position your feet approximately hip-width apart. Keep your chest lifted, shoulders relaxed, and head facing forward.
- Position your arms: Bend your elbows and bring your hands together in front of your chest. Alternatively, extend your arms slightly forward for additional balance.
- Engage your core: Gently brace your abdominal muscles while maintaining a neutral spine. Avoid excessively arching or rounding your lower back.
- Choose your supporting leg: Shift your weight slightly onto one foot. Meanwhile, keep the supporting foot flat and firmly connected to the floor.
- Prepare the crossing leg: Keep the opposite foot light and ready to travel diagonally backward. Ensure the step comes from the hip rather than twisting the planted knee.
- Set your gaze: Look forward at a stationary point. Consequently, maintaining balance becomes easier as the crossing movement begins.
Setup tip: If the crossed-leg stance feels unstable, practice a smaller diagonal step. A stable wall or railing can also provide temporary assistance while learning the movement.
Execution (Step-by-Step)
The curtsy squat involves a diagonal backward step, a controlled lowering phase, and a smooth return to standing. Throughout the movement, keep your torso relatively upright and your core engaged. Most importantly, avoid forcing knee rotation to achieve a deeper position.
- Establish your starting position: Stand tall with your feet hip-width apart and your hands together in front of your chest. Keep both knees relaxed rather than completely locked.
- Shift weight onto the working leg: Transfer most of your body weight onto one foot. Meanwhile, maintain firm contact through the heel, midfoot, and forefoot.
- Step diagonally backward: Move the opposite leg behind and across the supporting leg. Allow the rear foot to land comfortably without twisting the front knee.
- Begin lowering your hips: Bend the supporting knee and hip while allowing the rear knee to descend toward the floor. Keep the movement smooth and controlled.
- Maintain proper alignment: Keep your torso relatively upright and your shoulders level. Additionally, allow the front knee to track naturally in the same direction as the supporting foot.
- Reach a comfortable bottom position: Lower until you feel appropriate muscular effort without joint discomfort. The rear knee may approach the floor, but touching the ground is unnecessary.
- Drive upward through the front leg: Press through the supporting foot while extending the knee and hip. Consequently, your body rises back toward the original standing height.
- Return the rear foot: Bring the crossing leg forward to the starting position. Avoid pushing explosively or allowing the torso to swing.
- Reset and repeat: Reestablish your balance before beginning another repetition. Then, continue on the same side or alternate legs according to your workout plan.
Pro Tips & Common Mistakes
The Bodyweight Curtsy Squat becomes more effective when movement quality takes priority over repetition speed. Although the exercise appears simple, the crossing step requires careful coordination between the hips, knees, and ankles. Therefore, use the following cues to improve consistency and avoid unnecessary joint stress.
- Keep the front foot planted: Maintain steady contact through the entire supporting foot. Avoid rolling excessively onto the inside or outside edge.
- Do not cross too far behind: An exaggerated crossing step can increase twisting demands on the hip and knee. Instead, choose a diagonal distance you can control comfortably.
- Maintain comfortable knee alignment: Allow the front knee to follow the direction of the toes. Additionally, avoid forcing the knee inward as the hips descend.
- Control the lowering phase: Descend over approximately 2–3 seconds. As a result, you can develop better awareness of balance and positioning.
- Keep your chest lifted: Maintain a relatively upright torso without excessively arching your back. However, a small natural forward lean is acceptable.
- Avoid pushing too hard from the rear foot: The supporting leg should perform most of the work. Otherwise, the movement may become less effective for unilateral strength development.
- Do not force maximum depth: A shallow curtsy squat performed correctly is preferable to a deep repetition with poor alignment.
- Keep your hips controlled: Avoid excessive twisting or dropping to one side. Instead, maintain a comfortable pelvic position throughout the movement.
- Breathe naturally: Inhale during the lowering phase and exhale while rising. Furthermore, avoid holding your breath unnecessarily.
- Practice both sides equally: Complete matching repetitions for each leg. Consequently, your training remains balanced even when one side feels less coordinated.
- Use support when necessary: Hold a stable railing or wall if balance becomes challenging. Then, gradually reduce assistance as control improves.
- Progress gradually: Master controlled bodyweight repetitions before introducing additional resistance. Finally, stop increasing difficulty if knee tracking or balance worsens.
Coaching tip: Think “step behind, lower smoothly, push through the front foot, and stand tall.” Consistent alignment and controlled repetitions are more valuable than excessive crossing distance.
FAQ
Curtsy Squat Technique and Muscle Activation
What muscles does the Bodyweight Curtsy Squat work?
The Bodyweight Curtsy Squat primarily targets the quadriceps and gluteus maximus. Additionally, the gluteus medius, adductors, hamstrings, and calf muscles contribute to movement control. Because the exercise uses a crossing step, the core and hip stabilizers also help maintain balance.
Is a Curtsy Squat the same as a Curtsy Lunge?
Yes. These names commonly describe the same cross-behind lower-body movement. In both variations, one leg steps diagonally backward while the body lowers. However, individual demonstrations may differ in depth, foot placement, and whether the legs alternate.
Should I feel Curtsy Squats in my glutes or quadriceps?
You may feel the exercise in both muscle groups. The quadriceps help extend and stabilize the supporting knee, while the glutes contribute to hip extension. Additionally, the lateral hip muscles help control the pelvis during the crossing movement. Muscle emphasis can vary with anatomy, depth, technique, and resistance.
Why do I lose balance during Curtsy Squats?
Balance difficulties often result from crossing too far, moving quickly, or using a narrow, uncomfortable stance. Furthermore, limited hip control can make the descending phase feel unstable. To improve balance, shorten the crossing step and reduce depth. Alternatively, hold a stable support while practicing.
Curtsy Squat Progression, Modifications and Safety
Are Bodyweight Curtsy Squats suitable for beginners?
Beginners may perform a simplified version when they have adequate balance and comfortable knee movement. However, the diagonal stepping pattern is generally more challenging than a basic squat. Therefore, start with a shallow range and light support. Progress only when both legs remain stable.
How many Curtsy Squats should I perform?
For general strength and coordination, begin with 2–3 sets of 8–12 repetitions per leg. Additionally, rest approximately 45–90 seconds between sets. Adjust the volume according to your training experience and recovery. Consistent technique should determine when you progress.
Can I add dumbbells to Curtsy Squats?
Yes. Once bodyweight repetitions feel stable, light dumbbells can provide additional resistance. However, adding weight increases the demands on your supporting leg and balance. Therefore, begin with small increases and maintain controlled knee and hip alignment.
Are Curtsy Squats safe for sensitive knees?
Comfort depends on individual anatomy, strength, mobility, and any existing knee condition. Because the crossing step may increase rotational demands, some people find this exercise uncomfortable. If knee discomfort occurs, reduce the crossing distance or choose a conventional reverse lunge. Persistent pain requires professional assessment.
Can Curtsy Squats help improve balance?
Yes. The movement challenges balance by requiring one leg to support most of the body weight. Additionally, the hips and core must coordinate to control the descending and rising phases. Over time, consistent practice may improve confidence and coordination during unilateral movements. However, results depend on regular training and appropriate progression.
What is the best alternative to a Curtsy Squat?
A reverse lunge is a useful alternative because it trains similar lower-body muscles without requiring the rear leg to cross behind. Alternatively, split squats and supported lunges provide options for developing unilateral strength. Choose the exercise that allows comfortable movement and reliable knee control.
Recommended Equipment
The Bodyweight Curtsy Squat requires no equipment. However, a few optional training accessories can improve comfort, support preparation, or add resistance. Most importantly, select equipment that matches your experience and maintains safe movement mechanics.
- Non-Slip Exercise Mat — provides a grippy workout surface for home training. Choose a firm, stable mat rather than thick, unstable cushioning.
- Cross-Training Shoes — provide supportive footwear and floor grip during standing lower-body exercises, balance drills, and controlled lunges.
- Fabric Resistance Loop Bands — useful for complementary glute activation exercises, lateral walks, and hip-strengthening warm-ups before lower-body workouts.
- Hex Dumbbells — allow gradual loading once bodyweight curtsy squats become comfortable and your balance remains consistent.
- Adjustable Weighted Vest — adds external resistance while keeping the hands free. Use only after mastering controlled bodyweight repetitions.
Equipment tip: Start with bodyweight training and prioritize stable footing. Additionally, introduce resistance gradually rather than increasing difficulty through excessive crossing distance or depth. The best equipment supports consistent technique without compromising balance or joint comfort.