Static Lunge Kick: Proper Form, Muscles Worked & Tips
Learn the Static Lunge Kick with controlled forward leg extensions, proper balance, muscles worked, sets, common mistakes, and safer bodyweight progressions.
Static Lunge Kick
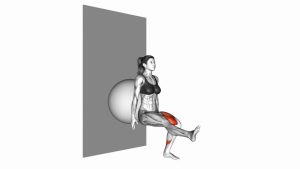
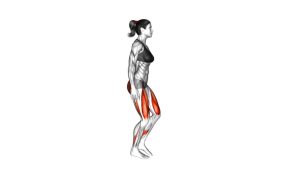
The Static Lunge Kick requires considerable leg strength, balance, mobility, and muscular endurance. Throughout the movement, the supporting leg remains deeply bent. Meanwhile, the opposite leg extends forward before returning to its original position.
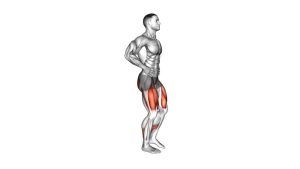
Because the supporting leg works continuously, the quadriceps experience sustained muscular tension. Additionally, the gluteal muscles help control the hips as the moving leg changes position. The abdominal muscles also contribute by limiting unnecessary torso movement.
Although this exercise resembles a single-leg squat variation, the demonstrated movement begins from a low staggered stance. Therefore, it should not be confused with a full pistol squat. The emphasis remains on maintaining the low position while performing a controlled forward kick.
Quick Overview
| Body Part | Legs |
|---|---|
| Primary Muscle | Quadriceps femoris, particularly the vastus lateralis, vastus medialis, vastus intermedius, and rectus femoris |
| Secondary Muscle | Gluteus maximus, gluteus medius, hip flexors, hamstrings, calves, and core stabilizers |
| Equipment | None required (optional: exercise mat or stable support for balance assistance) |
| Difficulty | Advanced — requires substantial lower-body strength, single-leg balance, and controlled knee and ankle mobility |
Sets & Reps (By Goal)
- Balance and technique: 2–3 sets × 4–6 controlled kicks per leg. Rest 60–90 seconds between sets.
- Lower-body strength: 3–4 sets × 5–8 reps per leg. Maintain a steady low position and rest 90–120 seconds between sets.
- Muscular endurance: 2–3 sets × 8–12 controlled reps per leg. Use a comfortable depth and rest 60–90 seconds.
- Coordination and control: 2–3 sets × 5–6 reps per leg. Pause briefly during each forward extension.
- Bodyweight conditioning: 2–3 rounds × 20–30 seconds per leg. Prioritize clean repetitions over speed.
Choosing the Right Training Volume
Begin with fewer repetitions if maintaining balance becomes difficult. For example, four precise kicks are more valuable than ten unstable repetitions. Additionally, allow sufficient recovery between sets because the supporting quadriceps work continuously.
Progression rule: First improve your balance and control at a comfortable depth. Next, increase repetitions or gradually extend the leg farther forward. Finally, progress to longer holds only when you can maintain stable alignment without excessive strain.
Setup / Starting Position
- Begin in a staggered stance: Position one foot slightly ahead of the other. Keep your torso facing forward and your shoulders relaxed.
- Lower into a deep lunge position: Bend both knees and carefully lower your hips. However, stop at a depth you can control comfortably.
- Establish the supporting leg: Shift your weight toward the rear supporting leg. In the demonstrated variation, the rear heel is raised while the ball of the foot supports the body.
- Position the forward leg: Keep the front knee bent with the foot positioned ahead of your supporting leg. This leg will perform the forward extension.
- Extend both arms forward: Raise your arms to approximately shoulder height. Meanwhile, keep your elbows comfortably straight to help counterbalance the lower body.
- Brace your core: Engage your abdominal muscles without holding your breath. Additionally, maintain a relatively neutral spine and avoid excessive rounding.
- Establish your balance: Before lifting the moving foot, confirm that the supporting leg can maintain your body position. Use external support if necessary.
Foot Position and Balance Preparation
The supporting foot should remain stable throughout the exercise. In particular, avoid rolling excessively toward the inside or outside of the foot. Although the demonstration uses a raised heel, beginners may benefit from practicing simpler supported positions before attempting this variation.
Starting position tip: Keep your hips low, chest reasonably upright, and eyes looking forward. As a result, your arms can help balance the body while the moving leg prepares to extend.
Execution (Step-by-Step)
- Set the low position: Maintain a deep, controlled staggered-leg stance. Keep the supporting knee bent and your arms extended forward for balance.
- Transfer your weight: Gradually shift enough weight onto the rear supporting foot to free the front leg. However, avoid sudden changes in your center of gravity.
- Lift the moving foot: Gently raise the forward foot from the floor. Meanwhile, maintain the supporting leg’s position without pushing your hips upward.
- Extend the leg forward: Straighten the moving knee in a smooth, controlled motion. Continue extending the leg until it approaches a comfortable horizontal position.
- Maintain the low squat hold: Keep the supporting knee bent while the forward leg extends. Additionally, engage the quadriceps and glutes to prevent unnecessary movement.
- Control the extended position: Briefly maintain the forward leg extension. Keep your torso steady and avoid throwing the leg forward with momentum.
- Return the moving leg: Slowly bend the extended knee and bring the foot toward its original position. Consequently, the moving leg returns without requiring the body to stand.
- Complete the repetition: Return to the original low staggered stance while keeping your balance. Then repeat the movement with the same leg.
- Switch sides: After completing the prescribed repetitions, carefully rise and reset. Next, reverse your leg positions and repeat the exercise.
Movement Tempo and Control
Use approximately two seconds to extend the moving leg and two seconds to return. Additionally, a brief pause can improve awareness of the extended position. Nevertheless, avoid prolonged holds if they cause excessive shaking or discomfort.
The supporting knee should remain relatively stable throughout each repetition. Meanwhile, the movement should primarily occur through the extending and bending knee of the forward leg.
Pro Tips & Common Mistakes
Pro Tips for Better Technique
- Maintain a controlled low position: Keep the supporting leg bent throughout the kick. Therefore, avoid standing up between repetitions.
- Keep the arms extended: Use your arms as counterbalances. Additionally, avoid swinging them during the forward kick.
- Move the free leg smoothly: Extend the moving knee without snapping or locking it forcefully.
- Control the supporting knee: Keep the knee aligned with the direction of the supporting toes. Meanwhile, avoid allowing the knee to collapse inward.
- Use a comfortable depth: Choose a position that matches your strength and mobility. As a result, you can focus on control instead of struggling to maintain balance.
- Maintain steady breathing: Exhale gently during the forward extension and inhale as the moving leg returns.
Common Mistakes to Avoid
- Standing up during the kick: Rising between repetitions removes much of the sustained muscular tension. Instead, maintain your chosen low position.
- Using excessive momentum: Throwing the leg forward can disturb balance and reduce muscular control. Therefore, move at a deliberate pace.
- Rounding the lower back excessively: Poor torso positioning may make the movement less stable. Instead, brace your core and maintain comfortable alignment.
- Forcing the leg completely straight: Maximum extension is unnecessary when it compromises posture or balance. Gradually improve your comfortable range.
- Allowing the supporting foot to shift: Uncontrolled foot movement can make the low position unstable. Consequently, reduce the depth or use assistance.
- Ignoring muscle fatigue: Excessive shaking may indicate that the supporting muscles are becoming fatigued. Therefore, stop the set before technique deteriorates.
Pro tip: Practice supported split squats and shallow single-leg balance drills before progressing to the full Static Lunge Kick. Moreover, improving ankle mobility and quadriceps endurance may make the exercise more manageable.
FAQ
Technique and Muscles Worked
What muscles does the Static Lunge Kick work?
The Static Lunge Kick primarily challenges the quadriceps of the supporting leg. These muscles maintain the bent-knee position throughout the exercise.
Additionally, the glutes, calves, and core stabilizers help maintain balance. The moving leg also recruits its quadriceps during knee extension, while the hip flexors help keep the leg lifted.
Is the Static Lunge Kick the same as a pistol squat?
No. Although both exercises challenge balance and lower-body strength, their movement patterns are different.
A traditional pistol squat involves lowering and raising the body on one supporting leg, generally with the supporting heel grounded. In contrast, the demonstrated Static Lunge Kick maintains a low staggered position while the forward leg extends and returns.
Should my supporting heel remain raised?
In the demonstrated version, the rear supporting heel remains elevated. Therefore, the ankle and calf muscles contribute significantly to balance.
However, this position requires adequate strength and control. If the raised-heel position feels unstable or uncomfortable, practice a supported variation rather than forcing the original movement.
How far should I extend the kicking leg?
Extend the moving leg only as far as you can maintain control. Ideally, the knee approaches a straight position while the foot remains lifted.
However, a shorter extension is acceptable when balance or flexibility is limited. As your technique improves, gradually increase the range without using momentum.
Training, Progression, and Safety
Is the Static Lunge Kick suitable for beginners?
The full movement is generally better suited to advanced exercisers because it requires substantial lower-body strength and balance.
Nevertheless, beginners can prepare through supported split squats, regular lunges, and controlled single-leg balance exercises. Additionally, using a stable support can reduce the balance demands during early practice.
Why do my quadriceps burn during the exercise?
The supporting quadriceps maintain considerable tension because the knee stays bent throughout the set. Consequently, muscular fatigue can develop quickly.
Mild muscular burning during demanding repetitions may be expected. However, sharp knee pain or unusual joint discomfort should not be ignored. Stop the exercise if these symptoms occur.
How can I improve my balance during Static Lunge Kicks?
Begin by practicing a comfortable low lunge hold without kicking. Next, try lifting the forward foot briefly while holding a stable support.
Once your balance improves, gradually extend the moving leg farther forward. Additionally, maintaining a steady gaze and controlled breathing can help limit unnecessary movement.
How often should I perform the Static Lunge Kick?
Start with one or two training sessions per week, depending on your current strength and recovery. Because the supporting leg works continuously, this movement can become demanding even with relatively few repetitions.
Therefore, allow adequate recovery between challenging sessions. As your balance and muscular endurance improve, increase training volume gradually.
Can I perform this exercise at home without equipment?
Yes. The Static Lunge Kick requires no external resistance and can be performed using bodyweight alone.
However, choose a level, non-slip surface with sufficient space around your body. Additionally, keep a stable support nearby if you are still developing balance.
Who should avoid or modify the Static Lunge Kick?
Individuals with significant knee discomfort, ankle instability, or difficulty controlling deep knee flexion may need a simpler variation.
Furthermore, anyone recovering from a lower-body injury should obtain appropriate professional guidance before attempting this demanding movement. A supported or shallower variation may be more suitable.
Recommended Equipment (Optional)
- Non-Slip Exercise Mat — provides a suitable exercise surface for controlled bodyweight training and warm-up movements
- Portable Balance Support Bar — offers stable hand support during assisted low lunge and balance practice
- High-Density Yoga Blocks — useful for supported mobility drills and modified starting positions during exercise preparation
- Mini Resistance Loop Bands — useful for glute activation, hip strengthening, and lower-body preparation
- Ankle Mobility Slant Board — supports separate calf stretching and ankle mobility exercises as part of a warm-up routine
Equipment tip: The Static Lunge Kick does not require any special equipment. However, a reliable support and a suitable training surface can make early practice more manageable. Additionally, resistance bands and mobility tools can help prepare the hips and ankles through separate warm-up exercises.