Lever Seated Leg Extension: Form, Muscles & Tips
Learn the lever seated leg extension with proper machine setup, quad-focused form, controlled reps, common mistakes, sets by goal, safety tips, and FAQs.
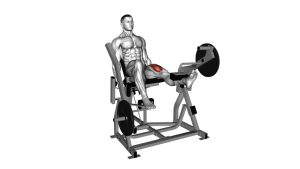
Lever Seated Leg Extension
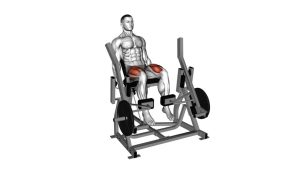
The Lever Seated Leg Extension is particularly useful for developing the quadriceps because the machine provides a stable environment for focused knee-extension training. As a result, beginners can learn to contract their thigh muscles without managing the balance demands of squats or lunges.
In addition, experienced lifters can use this exercise to increase quadriceps training volume after compound movements. The exercise works all four quadriceps muscles: the rectus femoris, vastus lateralis, vastus medialis, and vastus intermedius. However, proper machine adjustment and a comfortable range of motion remain essential for effective training.
Quick Overview
| Body Part | Legs |
|---|---|
| Primary Muscle | Quadriceps femoris: rectus femoris, vastus lateralis, vastus medialis, and vastus intermedius |
| Secondary Muscle | Hip flexors and trunk stabilizers provide minor positioning support; the quadriceps remain the primary working muscles |
| Equipment | Seated leg extension machine with adjustable seat, backrest, shin pad, and resistance mechanism |
| Difficulty | Beginner, with progressive resistance suitable for intermediate and advanced strength training |
Sets & Reps (By Goal)
- Strength: Perform 3–5 sets of 6–10 repetitions with challenging but manageable resistance. Rest for 90–150 seconds between sets. However, prioritize controlled knee extension rather than moving the heaviest possible weight.
- Hypertrophy (Muscle Growth): Complete 3–4 sets of 10–15 repetitions. Use a smooth lifting phase and a controlled lowering phase lasting approximately 2–3 seconds. Rest for 60–90 seconds between sets.
- Muscular Endurance: Perform 2–3 sets of 15–25 repetitions using lighter resistance. Maintain consistent movement quality, steady breathing, and short rest periods of approximately 30–60 seconds.
- Mobility and Movement Control: Complete 2 sets of 12–15 gentle repetitions with very light resistance. Focus on smooth knee movement through a comfortable range rather than fatigue or maximum loading.
- Rehabilitation-Style Training: Perform 1–3 sets of 8–15 controlled repetitions only when appropriate for your condition. Use a clinician-approved range, resistance, and tempo, especially following knee injuries or surgical procedures.
Progression rule: Begin with a resistance that allows every repetition to remain controlled. Once you consistently complete the target repetitions without excessive momentum or discomfort, increase the load gradually. Alternatively, improve lowering control before adding weight. Always maintain the same comfortable range of motion as resistance increases.
Setup / Starting Position
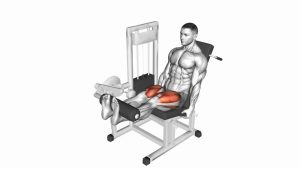
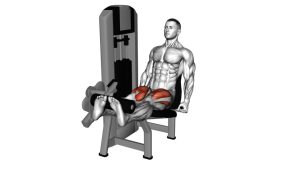
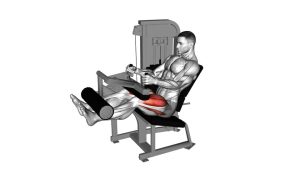
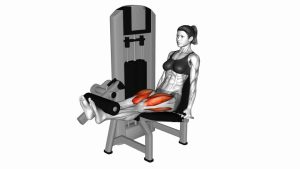
- Adjust the seat and backrest: Sit on the leg extension machine and position your back firmly against the support. Adjust the seat so your knees align closely with the machine’s pivot axis.
- Position your thighs: Keep both thighs supported by the seat. Your knees should extend just beyond the front edge of the seat without uncomfortable pressure behind the joints.
- Set the padded roller: Position the lower-leg pad across the front of your shins, just above the ankles. Avoid placing it directly over the feet or excessively high against the calves.
- Establish your starting angle: Begin with both knees bent within a comfortable range. Adjust the machine’s starting position if necessary, particularly when knee mobility is limited.
- Grip the handles: Hold the machine’s side handles securely. Keep your shoulders relaxed, torso stable, and hips firmly against the seat. This creates a consistent position for controlled knee extension.
- Select the resistance: Choose a light or moderate starting weight. Before beginning the set, perform a gentle practice repetition to confirm that the machine moves smoothly and comfortably.
Machine Alignment and Starting Control
Correct alignment helps the resistance follow the intended path around the knee joint. Therefore, check that the padded roller moves comfortably without forcing your feet inward or outward.
In addition, keep your hips seated and avoid arching your lower back to compensate for heavy resistance. Your upper body should remain relatively still while both lower legs perform the movement.
Execution (Step-by-Step)
- Establish the starting position: Sit upright with your back supported, hands gripping the handles, and both knees bent. Keep the padded roller resting securely against your lower shins.
- Initiate knee extension: Contract your quadriceps to raise the padded lever forward and upward. Extend both knees together while keeping your thighs supported by the seat.
- Continue the lifting phase: Raise your lower legs in a smooth, controlled arc. Meanwhile, keep your hips stationary and avoid leaning backward to generate additional momentum.
- Approach the top position: Continue extending your knees until your lower legs approach a straight position. However, stop within your comfortable range rather than forcing a hard lockout.
- Pause and contract: Briefly hold the extended position for approximately one second. Focus on maintaining quadriceps tension while breathing naturally and keeping your torso stable.
- Control the lowering phase: Gradually bend both knees and allow the padded roller to descend. Lower the resistance for approximately 2–3 seconds instead of letting gravity pull your legs downward.
- Return and repeat: Stop at your chosen starting angle, maintaining tension and control. Then begin the next repetition without bouncing, swinging, or allowing the weight stack to crash.
Understanding the Lifting and Lowering Phases
During the concentric phase, your quadriceps shorten as both knees extend against the machine’s resistance. Consequently, the padded lever moves upward while the thighs remain supported.
During the eccentric phase, the quadriceps lengthen under tension as the knees gradually bend. This controlled return is equally important for maintaining consistent training quality. Therefore, resist the temptation to rush back toward the starting position.
Pro Tips & Common Mistakes
- Align your knees correctly: Position the knee joints near the machine’s pivot axis. Incorrect alignment may create uncomfortable pressure or alter the intended movement path.
- Avoid excessive resistance: Heavy weights often encourage swinging, shortened repetitions, and unnecessary upper-body movement. Instead, choose a load you can control from beginning to end.
- Keep your hips against the seat: Lifting your hips changes your body position and can reduce movement consistency. Therefore, maintain firm contact with the seat throughout each repetition.
- Control the eccentric phase: Do not allow the padded lever to fall rapidly after reaching the top. Instead, lower the weight deliberately while maintaining quadriceps engagement.
- Avoid forceful knee lockout: Straighten your legs only as far as your comfortable range allows. A controlled finish is preferable to aggressively snapping the knees into extension.
- Maintain consistent foot positioning: Keep both feet relaxed and approximately neutral throughout the repetition. Avoid exaggerated inward or outward foot rotation to force a particular quadriceps muscle to work.
- Do not bounce at the bottom: Sudden rebounds can create unnecessary momentum and reduce muscular control. Instead, transition smoothly from the lowering phase into the next lift.
- Use a suitable range of motion: Work through a comfortable range that allows stable positioning and controlled resistance. Moreover, adjust the movement when pain or mobility limitations appear.
- Breathe throughout the movement: Exhale naturally as you extend your knees, then inhale during the controlled return. Avoid unnecessary breath-holding during ordinary moderate-load repetitions.
- Combine with compound leg training: Leg extensions complement exercises such as squats, split squats, and leg presses. However, they primarily target knee extension rather than replacing comprehensive lower-body strength training.
FAQ
Muscles Worked and Proper Technique
What muscles does the Lever Seated Leg Extension work?
The Lever Seated Leg Extension primarily targets the quadriceps femoris, consisting of the rectus femoris, vastus lateralis, vastus medialis, and vastus intermedius. Together, these muscles extend the knee. Although the hip flexors and trunk muscles help maintain positioning, their contribution is relatively small compared with the quadriceps. Therefore, this movement is classified as a quadriceps isolation exercise.
Is the Lever Seated Leg Extension suitable for beginners?
Yes. The seated machine provides external support, allowing beginners to concentrate on knee extension without significant balance demands. However, the seat, backrest, and shin pad must be adjusted correctly. Start with light resistance and perform controlled repetitions before increasing the load. As technique improves, you can gradually progress toward more challenging sets.
Should I fully straighten my knees during leg extensions?
Aim to extend your knees through a comfortable, controlled range without forcefully snapping into lockout. For many people, this means approaching a straight-leg position while maintaining muscular tension. However, the appropriate endpoint depends on individual comfort, machine design, and any relevant clinical restrictions. Avoid pushing through sharp pain or forcing additional movement.
Training Progression and Knee Comfort
How many sets and repetitions should I perform?
For muscle growth, a practical starting point is 3–4 sets of 10–15 repetitions. Meanwhile, strength-focused sessions may use 3–5 sets of 6–10 repetitions with appropriate resistance. Beginners can start with fewer sets while developing consistent technique. Ultimately, choose a workload that matches your training experience, recovery capacity, and overall leg program.
Are seated leg extensions safe for my knees?
Seated leg extensions can be an appropriate strengthening exercise when performed with suitable resistance, alignment, and movement range. However, knee conditions and recovery requirements vary between individuals. If you have persistent knee pain, recent surgery, ligament injuries, or significant joint symptoms, consult a qualified healthcare professional. In addition, avoid loading ranges or intensities that provoke your symptoms.
Recommended Equipment
- Seated Leg Extension and Leg Curl Machine — provides adjustable resistance for dedicated quadriceps extensions and selected hamstring curl movements
- Adjustable Weight Bench with Leg Developer — offers a compact home-gym alternative for seated leg extensions when equipped with a compatible leg developer
- Resistance Bands Set with Anchor — useful for alternative knee-extension resistance exercises and additional lower-body training at home
- Adjustable Ankle Weights — allow gradual resistance adjustments for selected seated knee-extension variations outside the machine
- High-Density Foam Roller — supports optional quadriceps self-massage and general lower-body warm-up or recovery routines
Tip: Prioritize equipment with secure construction, appropriate resistance adjustments, and comfortable positioning. For home training, verify that any leg developer attachment fits its intended bench. In addition, remember that bands and ankle weights provide exercise alternatives rather than identical resistance to a dedicated leg extension machine.