Landmine Front Squat: Proper Form, Muscles Worked & Tips
Learn the landmine front squat with proper setup, depth, and control. Build stronger quads and glutes with step-by-step form, sets, tips, and FAQs.
Landmine Front Squat
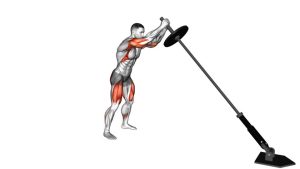
The Landmine Front Squat is an effective choice for building lower-body strength, developing quadriceps size, and improving squat coordination. Because the resistance sits in front of the body, the exercise encourages active core bracing and a relatively upright torso. Additionally, the anchored barbell creates a predictable movement path that some lifters find easier to control.
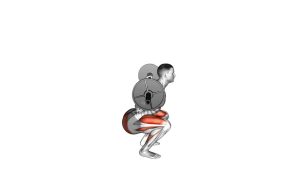
As demonstrated in the movement, both feet remain planted while the knees and hips bend together. The athlete descends into a deep squat before driving upward to standing. Meanwhile, the hands continue supporting the barbell near the upper chest. Although the quadriceps receive significant emphasis, the glutes and hip adductors also contribute. Therefore, the exercise works well in strength, hypertrophy, and general lower-body training programs.
Quick Overview
| Body Part | Legs |
|---|---|
| Primary Muscle | Quadriceps (Rectus femoris, Vastus lateralis, Vastus medialis, Vastus intermedius) |
| Secondary Muscle | Gluteus maximus, adductor magnus, core stabilizers, spinal erectors, and calves |
| Equipment | Barbell, landmine attachment, weight plates, and secure plate collars |
| Difficulty | Beginner to Intermediate, depending on resistance, squat depth, and movement control |
Sets & Reps (By Goal)
- Beginner technique and control: 2–3 sets × 8–10 reps with light resistance. Focus on learning the bar path, maintaining balance, and controlling the descent. Rest approximately 60–90 seconds between sets.
- Muscle strength: 4–5 sets × 4–6 reps with a challenging but manageable load. Maintain a stable torso and consistent squat depth. Additionally, allow 2–3 minutes of rest for better recovery between heavy sets.
- Muscle hypertrophy: 3–4 sets × 8–12 reps using moderate resistance. Lower the body over approximately 2–3 seconds before driving upward. As a result, the quadriceps and glutes receive controlled mechanical loading. Rest around 60–120 seconds between sets.
- Quadriceps emphasis: 3–4 sets × 10–15 reps with a comfortable, upright squat pattern. Allow the knees to travel naturally forward while keeping the feet grounded. However, never sacrifice balance or joint comfort to increase knee travel.
- Muscular endurance and conditioning: 2–3 sets × 15–20 controlled reps with lighter resistance. Maintain consistent breathing and avoid rushing the final repetitions. Alternatively, use short timed sets when technique remains reliable.
Progression rule: Begin by mastering the full movement with light resistance. Next, improve squat depth, stability, and repetition consistency. Once every repetition feels controlled, gradually increase the weight or training volume. However, avoid increasing resistance if your heels rise, knees collapse inward, or lower back loses its stable position. The best progression combines clean technique, appropriate resistance, and gradual overload.
Setup / Starting Position
Landmine Position and Grip
- Secure the landmine attachment: Place one end of an appropriate barbell into a properly installed landmine pivot. Ensure the attachment remains stable and cannot slide or lift unexpectedly. Then load the opposite end with suitable weight plates and secure them with compatible collars.
- Position yourself correctly: Stand facing the landmine anchor with your feet approximately shoulder-width apart. Turn your toes slightly outward if that feels natural for your hip structure. Additionally, choose a distance that allows the barbell to move comfortably without pulling your torso excessively forward.
- Hold the loaded end near your chest: Bring the free end of the barbell into a supported front-loaded position. Grip it securely with both hands, keeping your elbows bent and relatively close to your torso. Meanwhile, position the hands so the plates and sleeve do not interfere with your grip.
- Establish a stable body position: Stand tall with your chest lifted, shoulders controlled, and spine in a comfortable neutral alignment. Brace your abdominal muscles without holding unnecessary tension in the neck. Furthermore, distribute pressure across the heel, big-toe base, and little-toe base of each foot.
- Prepare for the descent: Keep your gaze generally forward and your knees softly unlocked. Take a controlled breath and engage your core before lowering. Finally, confirm that both feet are stable and the barbell remains close to your upper chest.
Starting Position Checkpoint
Before beginning, check the alignment of your ankles, knees, hips, and torso. Your weight should feel balanced rather than concentrated on your toes. In addition, your wrists should remain comfortable while supporting the barbell. If the setup feels awkward, adjust your distance from the anchor before starting the set.
Execution (Step-by-Step)
Controlled Descent and Squat Depth
- Brace your core and begin lowering: From the upright starting position, inhale and gently tighten your abdominal muscles. Next, bend your knees and hips together to initiate the squat. Keep the loaded barbell close to your chest as your body begins moving downward.
- Lower through both legs: Continue bending the knees while allowing the hips to travel downward and slightly backward. Maintain balanced pressure through both feet. Meanwhile, let your knees follow the natural direction of your toes without collapsing inward.
- Maintain upper-body control: Keep your torso relatively upright while the barbell travels along the landmine’s fixed arc. Avoid extending your arms forward or letting the load pull your shoulders down. Instead, maintain a secure chest-level hold and stable spinal alignment.
- Reach a comfortable squat depth: Descend as far as your mobility and control allow. The demonstrated movement reaches a deep squat with substantial knee and hip flexion. However, your working depth may be shallower until you develop sufficient mobility and stability. Keep both heels planted whenever possible.
- Drive upward through the feet: Push evenly through both feet to begin the ascending phase. Extend the knees and hips together while maintaining your abdominal brace. As you rise, continue supporting the barbell near your chest without turning the movement into a press.
- Return to standing and repeat: Continue extending both legs until you reach a tall, balanced standing position. Exhale naturally through the effort while avoiding excessive backward leaning. Finally, stabilize the barbell, reset your breathing, and begin the next controlled repetition.
Pro Tips & Common Mistakes
Technique Tips for Better Squat Control
- Keep the barbell close to your chest: The hands should support the loaded end throughout the repetition. If you push it forward, the exercise becomes harder to stabilize and may strain your upper body. Therefore, maintain a comfortable grip and avoid unnecessary arm movement.
- Maintain full-foot pressure: Avoid shifting completely onto your toes or lifting your heels during the descent. Instead, distribute your weight through the entire foot while allowing natural ankle movement. As a result, you can maintain better balance and transfer force more consistently.
- Control your knee alignment: Allow the knees to move forward and outward naturally according to your stance. However, avoid uncontrolled inward collapse, especially during the upward phase. If your knees become unstable, reduce the resistance and practice slower repetitions.
- Avoid excessive forward leaning: Keep your chest lifted and abdominal muscles engaged. Although some torso movement is natural, excessive bending can shift the exercise away from the intended squat pattern. Therefore, choose a stance and anchor distance that allow comfortable movement.
- Do not force maximum depth: A deep squat can provide a useful range of motion when performed with control. Nevertheless, forcing extra depth may cause your heels to rise or your lower back to round. Instead, gradually improve your usable squat range while maintaining stable positions.
- Use controlled rather than explosive repetitions: Lower your body smoothly and avoid collapsing into the bottom position. Then drive upward with steady force while keeping your feet grounded. Additionally, avoid bouncing aggressively to create momentum from the deepest position.
- Increase resistance gradually: Adding more weight can help develop strength and muscle when technique remains consistent. However, excessive loading often causes shorter repetitions, poor bracing, or unstable knee movement. Consequently, prioritize quality repetitions before increasing the plates.
Practical Training Advice
For stronger quadriceps, perform the Landmine Front Squat through a controlled, comfortable range of motion. Meanwhile, maintain consistent tension instead of rushing between repetitions. Combining this exercise with other leg movements can support balanced lower-body development.
For example, Romanian deadlifts can provide additional hip-hinge training. Likewise, calf raises and unilateral leg exercises can complement a complete lower-body program. Above all, choose a training volume you can recover from while maintaining good form.
FAQ
Muscles Worked and Exercise Benefits
What muscles does the Landmine Front Squat work?
The Landmine Front Squat primarily targets the quadriceps, which control knee flexion during lowering and extend the knees during standing. Additionally, the gluteus maximus contributes to hip extension. The adductor magnus also assists the movement, particularly as the hips extend.
Meanwhile, the abdominal muscles and spinal erectors help stabilize the torso against the front-loaded resistance. Although the exercise emphasizes the thighs, it remains a compound movement involving several major muscle groups. Therefore, it is useful for developing coordinated lower-body strength.
Is the Landmine Front Squat good for beginners?
Yes, the Landmine Front Squat can be suitable for beginners when the load and setup are appropriate. Because one end of the barbell is anchored, the movement follows a predictable arc. As a result, some beginners find the exercise easier to learn than traditional barbell front squats.
However, proper positioning and balance remain important. Start with a light load and practice a comfortable squat depth. Additionally, learn to brace your core and maintain stable foot pressure before increasing resistance. A qualified trainer can help if the movement feels unfamiliar.
Should I perform deep Landmine Front Squats?
Squat depth depends on your available hip and ankle mobility, strength, and individual comfort. The demonstrated exercise includes a deep descent, with the hips lowering substantially below their starting position. However, not everyone needs to reach the same depth.
Instead, lower until you can maintain good foot contact, controlled knee movement, and a stable torso. Over time, you may gradually increase depth as your mobility and strength improve. Additionally, avoid forcing the knees or hips into uncomfortable positions simply to squat lower.
Technique, Progression, and Safety
Why do my heels lift or my torso lean forward during Landmine Squats?
Heel lifting may occur because of limited ankle mobility, an unsuitable stance, or excessive forward weight shifting. Meanwhile, significant torso leaning may result from poor bracing, an awkward anchor distance, or resistance that is too heavy. These issues can also appear when squat depth exceeds your current control.
First, reduce the load and shorten the movement to a manageable range. Next, experiment with a slightly different foot position while maintaining balanced pressure. Additionally, keep the barbell close to your chest and allow your knees to bend naturally. If discomfort persists, seek individual coaching.
How can I make the Landmine Front Squat more challenging?
Once your technique becomes consistent, gradually increase the weight loaded onto the barbell. Alternatively, add repetitions, increase the number of sets, or slow the lowering phase. For hypertrophy, controlled sets of approximately 8–12 repetitions can provide a practical starting point.
However, progression should never come at the expense of stability or comfortable joint movement. Maintain the same controlled depth as resistance increases. Furthermore, monitor your recovery and avoid raising training volume too quickly. If you have an existing knee, hip, or back condition, consult a qualified healthcare professional before progressing.
Recommended Equipment
- Barbell Landmine Attachment — secures one end of the barbell in a rotating pivot for controlled landmine squat movements
- Olympic Barbell — provides the main resistance tool for landmine squats and other compound strength exercises
- Olympic Weight Plates — allow gradual resistance progression for quadriceps, glute, and overall lower-body strength development
- Landmine Squat Handle Attachment — optional accessory that provides an alternative grip for compatible landmine squat setups
- Olympic Barbell Collars — help keep weight plates secured on the loaded sleeve during controlled landmine exercises
Equipment tip: Select a landmine attachment compatible with your barbell and training environment. Additionally, verify that the plates, collars, and any optional handles fit securely together. For beginners, start with manageable resistance before adding heavier plates. Most importantly, keep the landmine pivot stable and ensure sufficient space for the barbell to move safely.