Band One-Arm Overhead Biceps Curl: Form, Muscles Worked, Sets, Tips & FAQ
Learn how to do the Band One-Arm Overhead Biceps Curl with proper form. Discover muscles worked, setup, step-by-step execution, sets and reps by goal, common mistakes, FAQs, and recommended equipment.
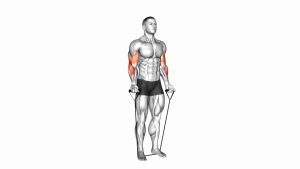
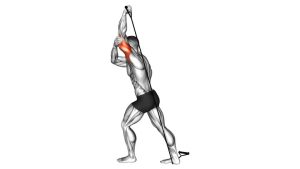
Band One-Arm Overhead Biceps Curl
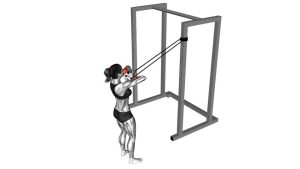
This exercise works best when performed with strict elbow control and a smooth tempo. In the video, the movement stays clean by keeping the arm overhead and the torso stable while the forearm travels through a controlled curl path. You should feel the biceps doing most of the work, especially near the peak contraction, rather than the shoulder, traps, or lower back.
Quick Overview
| Body Part | Biceps |
|---|---|
| Primary Muscle | Biceps brachii |
| Secondary Muscle | Brachialis, forearm flexors, shoulder stabilizers |
| Equipment | Resistance band with handle or grip point |
| Difficulty | Beginner to Intermediate |
Sets & Reps (By Goal)
- Muscle building: 3–4 sets × 8–15 reps per arm with 45–75 seconds rest
- Technique and control: 2–3 sets × 10–12 slow reps per arm with light band tension
- End-of-workout pump: 2–3 sets × 12–20 reps per arm with short 30–45 seconds rest
- Home arm training: 3 sets × 10–15 reps per arm paired with another curl or row variation
Progression rule: Add reps before increasing band resistance. Only move to a stronger band when you can keep the elbow fixed overhead, maintain posture, and lower the band under full control.
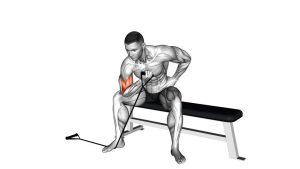
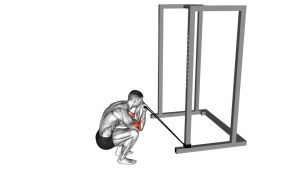
Setup / Starting Position
- Anchor the band securely: Step on the band or set it under a stable low anchor so the resistance runs upward to your working hand.
- Grip with one hand: Hold the handle or band firmly with the palm positioned comfortably and wrist neutral.
- Raise the arm overhead: Bring the working arm up so the elbow points upward and stays close to your head.
- Stand tall: Brace your core, keep your ribs down, and avoid leaning backward to create fake range.
- Start extended: Begin with the elbow nearly straight overhead while keeping tension on the band.
Tip: A slight staggered stance can improve balance and make it easier to resist the band without twisting the torso.
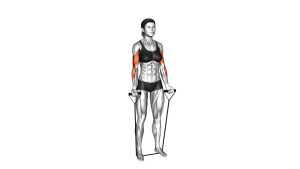
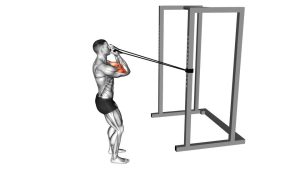
Execution (Step-by-Step)
- Lock in the upper arm: Keep your elbow lifted and as still as possible throughout the rep.
- Begin the curl: Flex the elbow and bring your hand down through a controlled arc behind or beside your head.
- Keep the shoulder quiet: Do not let the elbow swing forward or drift away from the head just to finish the rep.
- Squeeze the biceps: Pause briefly near peak contraction when the elbow is deeply bent and the band is under the most tension.
- Lower slowly: Extend the elbow back to the starting overhead position without letting the band snap you upward.
- Repeat smoothly: Maintain a consistent rhythm and keep tension on the band from rep to rep.
Pro Tips & Common Mistakes
- Keep the elbow high: The more the upper arm shifts around, the less isolated the curl becomes.
- Use controlled reps: A slow lowering phase increases tension and makes the exercise much more effective.
- Don’t lean back: Rib flare and back arching usually mean the band is too heavy or the core is too loose.
- Avoid wrist collapse: Keep the wrist stacked so the forearm and biceps stay in a stronger pulling line.
- Don’t rush the stretch: Let the elbow extend with control to get full value from the overhead position.
- Train both sides evenly: Match reps and quality from arm to arm instead of chasing only the stronger side.
FAQ
What part of the biceps does this exercise emphasize?
The overhead arm position can place extra emphasis on the long head of the biceps because it trains the muscle while the arm is elevated and under stretch.
Should my elbow move during the rep?
A tiny amount of natural movement is normal, but the goal is to keep the upper arm mostly fixed. Too much elbow drift turns the exercise into a shoulder-assisted curl.
Can beginners use this exercise?
Yes. Beginners can use a light resistance band and focus on slow, clean reps. It is often easier to learn with moderate tension rather than a very heavy band.
What if the overhead position feels uncomfortable?
Reduce the range, use a lighter band, or switch to a more basic standing band curl. If overhead shoulder positioning causes pain, do not force it.
Is this better than a regular band curl?
It is not automatically better, just different. A regular band curl is simpler and more stable, while this variation adds an overhead angle that can challenge control and provide a different tension profile.
Recommended Equipment
- Resistance Band Set with Handles — versatile option for progressive arm training, home workouts, and easier load adjustments
- Single Resistance Exercise Band with Handles — simple setup for focused single-arm curls without needing a full kit
- Resistance Band Handles — helpful if you already own bands and want a more secure, comfortable grip
- Door Anchor for Resistance Bands — useful for expanding anchor options and creating more training angles at home
- Exercise Mat — improves footing and comfort during standing band work, especially on hard or slippery floors
Tip: For this movement, prioritize bands with comfortable handles and predictable resistance so you can focus on elbow control instead of fighting unstable grip or awkward setup.