Band Reverse Spider Curl: Form, Sets, Tips & FAQ
Learn how to do the Band Reverse Spider Curl with proper form to build brachialis, brachioradialis, and upper-arm strength. Includes setup, execution, sets by goal, mistakes, FAQs, and recommended equipment.
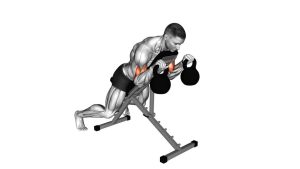
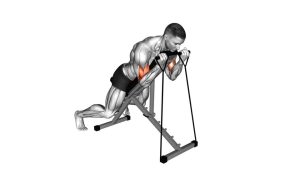
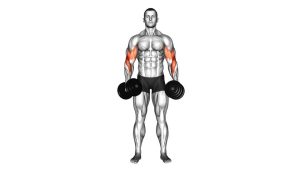
Band Reverse Spider Curl
This variation is excellent for lifters who want to build thicker-looking arms, improve elbow-flexor strength, and reduce cheating during curls. The incline chest-supported position limits body English, while the reverse grip shifts part of the workload away from a classic supinated biceps curl and toward the forearms and brachialis. Keep each rep strict, avoid shrugging, and let the elbows do the work.
Quick Overview
| Body Part | Biceps |
|---|---|
| Primary Muscle | Brachialis |
| Secondary Muscle | Brachioradialis, Biceps Brachii |
| Equipment | Resistance band, incline bench, optional band anchor |
| Difficulty | Beginner to Intermediate |
Sets & Reps (By Goal)
- Muscle growth: 3–4 sets × 10–15 reps with 45–75 seconds of rest
- Strength-endurance: 2–4 sets × 12–20 reps with controlled tempo and short rest
- Technique / mind-muscle work: 2–3 sets × 8–12 reps using lighter tension and a slower lowering phase
- Finisher for arm day: 2–3 sets × 12–20 reps close to technical failure
Progression rule: Add reps first, then increase band tension only when you can keep the elbows fixed, wrists neutral, and the eccentric phase smooth from top to bottom.
Setup / Starting Position
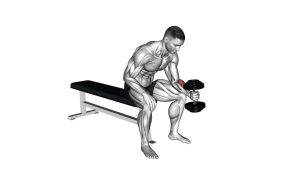
- Set the bench: Adjust an incline bench to a moderate angle and position yourself chest-down so your torso is fully supported.
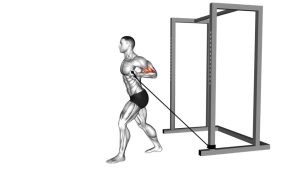
- Anchor the band: Secure the resistance band low enough so the tension pulls downward as your arms hang under the bench.
- Grab the handles: Use a pronated grip with palms facing down and hands about shoulder-width apart, or slightly narrower if comfortable.
- Let the arms hang: Start with the elbows extended under the shoulders and the upper arms pointed toward the floor.
- Brace lightly: Keep your chest on the pad, neck neutral, shoulders down, and core lightly engaged so the torso stays still.
Tip: The best setup lets the band stay under tension at the bottom without pulling you out of position.
Execution (Step-by-Step)
- Start from a full stretch: Let the arms extend fully while keeping slight softness in the elbows and a neutral wrist position.
- Curl by bending the elbows: Pull the handles upward in a smooth arc while keeping your upper arms mostly fixed.
- Maintain the reverse grip: Keep palms facing down and avoid twisting into a supinated curl during the lift.
- Squeeze at the top: Pause briefly when your forearms approach your upper arms, focusing on brachialis and forearm contraction.
- Lower under control: Slowly extend the elbows back to the start without letting the band snap your arms down.
Pro Tips & Common Mistakes
- Keep the chest glued to the pad: Lifting the torso reduces isolation and turns the rep into a cheat curl.
- Lead with the elbows, not the wrists: The wrists should stay neutral rather than folding back under tension.
- Use a full but controlled range: Get a stretch at the bottom and a strong squeeze at the top without bouncing.
- Don’t rush the eccentric: The lowering phase is one of the best parts of this movement for arm growth.
- Avoid excessive shoulder motion: The upper arms should stay relatively stable so the elbows remain the main moving joint.
- Choose the right band: Too much tension often causes wrist strain and sloppy reps before the target muscles are fully challenged.
FAQ
What muscles does the Band Reverse Spider Curl work most?
It mainly emphasizes the brachialis and brachioradialis, with the biceps brachii also assisting. The pronated grip reduces the classic “peak biceps” feel and shifts more work toward the upper arm and forearm flexors.
Why use a reverse grip instead of a normal spider curl grip?
A reverse grip changes the line of pull and generally increases involvement from the brachialis and forearm muscles. It is a good choice when you want arm thickness, grip-related carryover, or variety in your curl training.
Is a resistance band as effective as dumbbells for this movement?
Bands can be very effective because they provide continuous tension, especially near the top of the curl. Dumbbells feel different because of gravity, but bands are excellent for high-quality reps, constant resistance, and joint-friendly arm work.
How heavy should the band be?
Use a band that lets you complete the target reps with strict form and no wrist collapse. If you cannot control the eccentric or keep your elbows steady, the tension is too high.
Can beginners do the Band Reverse Spider Curl?
Yes. Beginners can use a light band and focus on posture, elbow control, and steady tempo. It is often easier to learn than heavy free-weight reverse curls because the bench support limits cheating.
Recommended Equipment
- Resistance Bands Set with Handles — versatile for curls, presses, rows, and progressive tension adjustments
- Adjustable Incline Weight Bench — provides stable chest support for strict spider curl positioning
- Door Anchor for Resistance Bands — helps create a secure low anchor point when training at home
- Non-Slip Exercise Mat — improves setup stability and protects floors during band training
- Lifting Straps / Grip Support — optional for reducing grip fatigue during higher-volume band sessions
Tip: For most users, a good adjustable bench and a quality band set will cover nearly everything needed for this exercise.