Bodyweight Forward Lunge: Proper Form, Muscles & Tips
Master the Bodyweight Forward Lunge with proper form, step-by-step instructions, muscles worked, sets and reps, common mistakes, and expert training tips.
Bodyweight Forward Lunge
Understanding the Bodyweight Forward Lunge
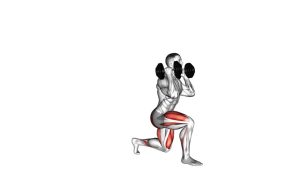
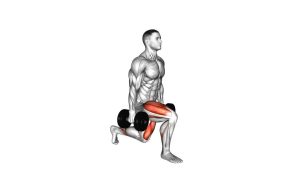
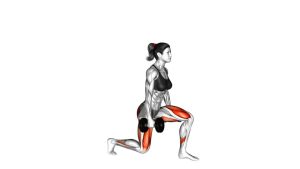
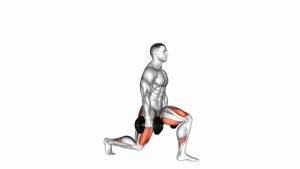
The Bodyweight Forward Lunge strengthens the lower body through a controlled stepping movement. First, one foot moves forward while the opposite leg remains behind. Next, both knees bend as the hips descend between the legs. Finally, the front leg drives the body upward before returning to the starting position.
Throughout the movement, the quadriceps control knee flexion and contribute to knee extension. Meanwhile, the gluteus maximus helps control the hip and generate force during the upward phase. Additionally, the core and hip stabilizers maintain balance.
Benefits of Forward Lunges
Forward lunges improve unilateral strength and challenge coordination. Furthermore, they allow each leg to perform a substantial share of the work. Consequently, they can help athletes identify differences in strength or control between their legs.
Because the movement requires no equipment, it fits home workouts and gym routines. Moreover, beginners can adjust the depth and stride length to match their current ability.
Quick Overview
| Body Part | Legs |
|---|---|
| Primary Muscle | Quadriceps femoris and Gluteus maximus |
| Secondary Muscle | Hamstrings, Adductor magnus, Gluteus medius, Calves, and Core stabilizers |
| Equipment | None — Bodyweight |
| Difficulty | Beginner to Intermediate |
Sets & Reps (By Goal)
Strength Development
For strength development, prioritize controlled repetitions and stable foot placement. Additionally, use a challenging but manageable range of motion. As your strength improves, external resistance may become necessary for further progression.
- Sets: 3–4
- Reps: 6–10 per leg
- Rest: 60–120 seconds
- Tempo: 2 seconds down, controlled upward drive
Muscle Hypertrophy
For muscle growth, perform consistent repetitions with sufficient muscular effort. Furthermore, use a controlled descent to maintain tension. However, avoid sacrificing balance to complete additional repetitions.
- Sets: 3–4
- Reps: 10–15 per leg
- Rest: 60–90 seconds
- Tempo: 3 seconds down, 1 second up
Muscular Endurance
Endurance training emphasizes repeated muscular contractions over longer sets. Therefore, use lighter effort and a consistent rhythm. Nevertheless, stop the set when technique begins to deteriorate.
- Sets: 2–3
- Reps: 15–20 per leg
- Rest: 30–60 seconds
Balance and Mobility
Forward lunges also challenge dynamic balance. For example, a slower descent increases the demand for controlled positioning. Additionally, a brief pause can improve awareness of hip, knee, and ankle alignment.
- Sets: 2–3
- Reps: 6–10 per leg
- Rest: 30–60 seconds
Rehabilitation-Style Control
For rehabilitation-style practice, use a comfortable movement range and professional guidance when needed. Initially, a supported or shallow lunge may be more appropriate. Subsequently, depth and repetitions can increase according to individual tolerance.
- Sets: 1–3
- Reps: 5–8 per leg
- Rest: 60–90 seconds
- Intensity: Comfortable and controlled
Progression Rule: Improve movement quality first. Next, increase repetitions or range of motion. Finally, add resistance when balance and technique remain reliable.
Setup / Starting Position
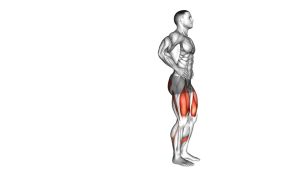
Establish the Correct Standing Position
- Stand upright: Position your feet approximately hip-width apart. Additionally, choose a firm, non-slip surface.
- Place your hands: Rest both hands on your hips, matching the video. Meanwhile, keep your shoulders relaxed.
- Engage your core: Brace your abdominal muscles gently. However, continue breathing naturally.
- Align your torso: Maintain a neutral head position and comfortably lifted chest.
- Prepare your balance: Distribute weight evenly before stepping forward.
Select an Appropriate Stride Length
A suitable stride allows both knees to bend comfortably. Therefore, avoid excessively long or narrow steps. Instead, choose a distance that permits a stable split stance.
Furthermore, maintain some sideways separation between your feet. This positioning helps prevent unnecessary balance problems. As a result, the lowering phase becomes easier to control.
Prepare for the First Repetition
Before stepping, keep your gaze forward and your torso stable. Next, select the stepping leg and prepare to transfer weight smoothly. Above all, avoid rushing the initial movement.
Execution (Step-by-Step)
Phase 1: Step Forward
- Initiate the step: Move one foot forward while the opposite foot remains behind your body.
- Plant the front foot: Establish stable contact with the floor. Meanwhile, allow the rear heel to rise naturally.
- Stabilize your body: Keep your hands on your hips and your torso relatively upright.
During this phase, avoid placing the feet directly along one narrow line. Instead, maintain enough sideways spacing for balance. Consequently, the next phase becomes easier to perform smoothly.
Phase 2: Lower Into the Lunge
- Bend both knees: Lower your hips between the legs using a controlled movement.
- Track the front knee: Keep the knee moving in the same general direction as the toes.
- Control the rear knee: Allow it to descend toward the floor. However, avoid striking the ground.
As your body descends, the quadriceps control the front knee. Meanwhile, the gluteal muscles help stabilize the hips. Additionally, the abdominal muscles resist excessive trunk movement.
Phase 3: Reach the Bottom Position
- Find a comfortable depth: Lower until the front thigh approaches parallel with the floor, if comfortable.
- Maintain front-foot contact: Keep the foot planted while the rear heel remains elevated.
- Pause briefly: Maintain balance without relaxing into the knee or hip joints.
At the bottom, both knees may approach approximately 90 degrees of flexion. However, exact angles depend on individual anatomy and stride length. Therefore, prioritize comfortable alignment rather than forcing a specific position.
Phase 4: Push Back Up
- Drive through the front foot: Extend the front knee and hip to raise your body.
- Maintain alignment: Keep the front knee tracking comfortably over the foot.
- Return backward: Step the forward foot back toward its original standing position.
During the upward phase, the quadriceps extend the knee. Simultaneously, the gluteus maximus contributes to hip extension. As a result, the body rises from the lowered split stance.
Phase 5: Complete the Repetition
- Regain your stance: Bring the stepping foot back beside the supporting foot.
- Reset your posture: Stand upright and stabilize your breathing.
- Continue training: Repeat on the same leg or alternate legs according to your program.
After completing the repetition, avoid immediately rushing into the next step. Instead, regain balance before continuing. This approach helps maintain consistent movement quality throughout the set.
Pro Tips & Common Mistakes
Professional Technique Tips
- Maintain stable foot placement: Keep enough sideways separation between your feet to improve balance.
- Control the lowering phase: Descend smoothly rather than dropping quickly into the bottom position.
- Use the entire front foot: Maintain stable pressure through the heel and forefoot.
- Keep the torso controlled: Avoid excessive leaning or twisting. However, a small natural forward inclination is acceptable.
- Coordinate breathing: Inhale during the descent. Then, exhale while rising.
Mistake 1: Taking an Unstable Step
An excessively narrow stance can make balance difficult. Therefore, avoid stepping directly in front of the opposite foot. Instead, maintain comfortable sideways spacing.
Mistake 2: Allowing the Knee to Collapse Inward
Inward knee collapse may indicate insufficient movement control. Consequently, the exercise can become less stable. To correct this, reduce depth and focus on consistent knee tracking.
Mistake 3: Dropping Too Quickly
Excessive speed reduces control during the lowering phase. Moreover, it may make the rear knee contact the floor forcefully. Therefore, descend gradually and maintain muscular tension.
Mistake 4: Relying Excessively on the Rear Leg
The rear leg assists with balance. However, the front leg should provide much of the upward drive. Therefore, focus on pressing through the planted front foot while rising.
Mistake 5: Using an Uncomfortable Stride
A very long step may challenge hip mobility and balance. Conversely, an extremely short step may restrict comfortable knee movement. As a result, moderate stride lengths are often easier to control.
Mistake 6: Losing Upper-Body Alignment
Excessive torso rotation can interfere with balance. Instead, maintain a stable pelvis and controlled trunk. Additionally, keep your gaze forward throughout the movement.
How to Improve Your Forward Lunge
Initially, practice shallow repetitions with a stable support if needed. Next, gradually increase depth as balance improves. Furthermore, use slower repetitions to refine control.
Once technique becomes reliable, increase repetitions or add resistance. However, avoid progressing several training variables simultaneously. Instead, make small adjustments while monitoring movement quality.
FAQ
Muscles Worked and Beginner Questions
What muscles do Bodyweight Forward Lunges work?
Forward lunges primarily strengthen the quadriceps and gluteus maximus. Additionally, the hamstrings, adductors, calves, and core assist with stability. Therefore, this exercise provides a comprehensive lower-body challenge.
Are Forward Lunges suitable for beginners?
Yes, beginners can perform forward lunges when balance and mobility are sufficient. However, the stepping motion may initially feel challenging. Therefore, supported or shallow variations can provide an easier starting point.
How many Forward Lunges should I perform?
For general fitness, start with 2–3 sets of 8–12 repetitions per leg. Subsequently, adjust the volume according to your training goal. Above all, maintain consistent technique throughout every set.
Forward Lunge Technique and Exercise Differences
What is the difference between Forward and Reverse Lunges?
Forward lunges involve stepping forward before lowering the body. In contrast, reverse lunges begin with a backward step. Although both movements train similar muscles, their balance and stepping demands differ.
Can my front knee travel beyond my toes?
Yes, some forward knee travel is normal. However, movement should remain controlled and comfortable. Therefore, focus on stable knee tracking instead of forcing an unnatural position.
Can Forward Lunges build muscle without weights?
Yes, bodyweight lunges can stimulate muscle growth, especially for beginners. However, stronger athletes may eventually require additional resistance. Consequently, progressive overload remains important for continued development.
Training Frequency and Exercise Benefits
Are Forward Lunges better than Squats?
Neither exercise is universally superior. Squats emphasize bilateral lower-body strength, whereas lunges challenge each leg more independently. Therefore, combining both movements can provide complementary training benefits.
Can I perform Forward Lunges every day?
Light technique practice may be appropriate on consecutive days. However, demanding training sessions require adequate recovery. Therefore, adjust frequency according to fatigue and overall training volume.
Balance Problems and Advanced Progressions
Why do I lose balance during Forward Lunges?
Balance problems may result from narrow steps or insufficient single-leg control. First, reduce your stride length if needed. Next, maintain comfortable sideways spacing. Additionally, use a stable support while developing coordination.
How can I make Forward Lunges harder?
Begin by increasing repetitions or slowing the lowering phase. Next, introduce brief pauses near the bottom. Finally, progress to dumbbell lunges when your balance and technique remain consistent.
Recommended Equipment (Optional)
1. Non-Slip Exercise Mat
A non-slip exercise mat provides a convenient surface for stretching and floor-based warm-ups. Additionally, it helps organize your workout space. However, perform standing lunges on a firm, stable surface.
View Non-Slip Exercise Mats on Amazon
2. Resistance Loop Bands
Resistance loop bands support supplementary hip-strengthening exercises. For example, lateral band walks challenge the gluteus medius. Furthermore, these bands are compact and convenient for home training.
View Resistance Loop Bands on Amazon
3. Adjustable Dumbbell Set
Adjustable dumbbells allow gradual resistance progression. Consequently, they can make forward lunges more challenging as strength improves. However, establish reliable balance before introducing heavier loads.
View Adjustable Dumbbells on Amazon
4. Foam Balance Pad
A foam balance pad can complement separate balance-training exercises. Additionally, it provides a progression for controlled single-leg standing drills. Nevertheless, perform forward lunges on stable ground rather than an unstable foam surface.
View Foam Balance Pads on Amazon
5. Mini Resistance Band Set
Mini resistance bands are useful for hip activation and accessory work. For instance, standing hip abductions can complement lunge training. Moreover, these bands offer convenient resistance options for home workouts.
View Mini Resistance Band Sets on Amazon
Affiliate Disclosure: Some product links may be affiliate links. If you purchase through these links, ManiacMuscle may earn a commission at no additional cost to you.