Elbow-to-Knee Sit-Up: Form, Core Benefits, Sets, Tips & FAQ
Learn the Elbow-to-Knee Sit-Up for stronger abs and obliques. Get setup, step-by-step form, sets, mistakes, FAQs, and equipment tips.
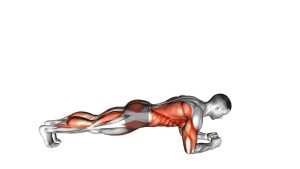
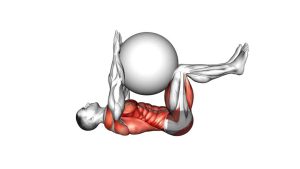
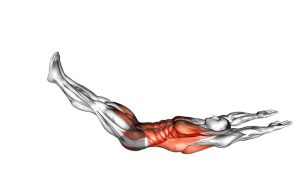
Elbow-to-Knee Sit-Up
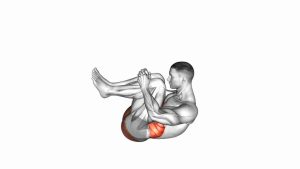
This exercise works best when the movement stays controlled from start to finish. First, the torso lifts from the floor. Then, one knee moves toward the upper body while the opposite elbow travels toward it. As a result, the abs and obliques work together to flex and rotate the trunk. However, the movement should not become a fast neck-pulling motion.
Quick Overview
| Body Part | Abs |
|---|---|
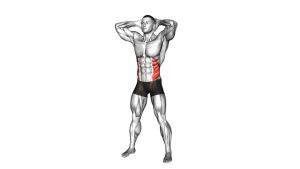
| Primary Muscle | Rectus abdominis |
| Secondary Muscle | Obliques, hip flexors, deep core stabilizers |
| Equipment | No equipment required; exercise mat optional |
| Difficulty | Beginner to intermediate, depending on speed, control, and range |
Sets & Reps (By Goal)
- Core activation: 2–3 sets × 8–10 reps per side with slow control.
- Muscular endurance: 3–4 sets × 12–16 total reps with steady breathing.
- Ab and oblique strength: 3–4 sets × 8–12 reps per side with a brief squeeze at the top.
- Home workout finisher: 2–3 rounds × 30–45 seconds at a controlled pace.
Progression rule: Add reps before adding speed. Once your elbow-to-knee contact stays clean and controlled, you can increase total volume or use a slower lowering phase.
Setup / Starting Position
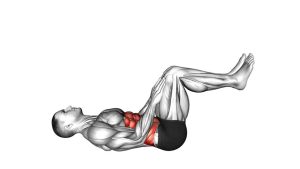
- Lie on your back: Start on the floor with your knees bent and feet planted.
- Place your hands near your head: Keep the elbows open, but do not pull on the neck.
- Brace the core lightly: Keep your ribs controlled before you begin the sit-up.
- Set the lower body: Keep one foot planted while the opposite knee prepares to move toward the torso.
- Start with control: Keep the movement smooth, because the video shows a full floor-to-contact repetition rather than a small pulse.
Tip: A mat can make the floor position more comfortable, especially during repeated sets.
Execution (Step-by-Step)
- Begin from the floor: Lie back with knees bent, feet planted, and hands near the head.
- Lift the torso: Curl your head, shoulders, and upper back away from the floor as your abs engage.
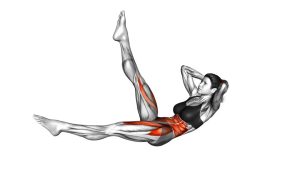
- Bring knee and elbow together: Move one knee toward your chest while guiding the opposite elbow toward that knee.
- Reach the top position: Pause briefly when the elbow and knee come close together or touch.
- Control the return: Lower your torso and leg back toward the starting position without dropping suddenly.
- Repeat with rhythm: Continue for the planned reps while keeping each repetition smooth and coordinated.
Pro Tips & Common Mistakes
- Lift through the abs first: Do not start the rep by pulling your head with your hands.
- Move elbow and knee together: The exercise works better when the upper and lower body meet in the middle.
- Use a controlled lowering phase: Do not collapse back to the floor after the top position.
- Avoid rushing: Fast reps often reduce core tension and turn the movement into momentum.
- Keep the feet stable: A steady base helps you control the sit-up portion.
- Do not over-rotate: Rotate only enough to guide the elbow toward the opposite knee.
- Breathe with the rep: Exhale as you lift and bring the elbow toward the knee, then inhale as you return.
FAQ
What muscles does the Elbow-to-Knee Sit-Up work?
The main target is the rectus abdominis, while the obliques assist during the cross-body elbow-to-knee motion. Additionally, the hip flexors help bring the knee toward the torso.
Is this exercise good for obliques?
Yes. Because the elbow travels toward the opposite knee, the trunk rotates slightly. Therefore, the obliques help create and control the cross-body movement.
Should my elbow touch my knee every rep?
Touching is useful if you can do it without pulling your neck or rushing. However, coming close with strong control is better than forcing contact with poor form.
Why do I feel this more in my hip flexors?
You may be lifting the leg too aggressively or using momentum. To fix this, slow the rep down, brace the abs first, and focus on bringing the torso and knee together evenly.
Can beginners do Elbow-to-Knee Sit-Ups?
Beginners can use this exercise if they can perform a controlled sit-up pattern. If it feels too difficult, start with basic crunches or smaller elbow-to-knee crunches before using the full sit-up range.
Recommended Equipment (Optional)
- Exercise Mat — adds comfort and support during floor-based sit-up repetitions
- Ab Mat — provides optional lumbar support for sit-up variations
- Non-Slip Fitness Mat — helps keep the body stable during repeated floor movement
- Adjustable Ankle Weights — optional advanced progression for users who already control the movement well
- Core Sliders — useful for related core variations and controlled knee-drive drills
Tip: Equipment is optional. For this exercise, clean form, controlled tempo, and a comfortable floor surface matter more than added resistance.