Lever Seated Crunch Chest Pad: Form, Benefits, Sets, Tips & FAQ
Learn the Lever Seated Crunch with chest pad for stronger abs. Get setup, form cues, sets by goal, common mistakes, FAQs, and gear tips.
Lever Seated Crunch (Chest Pad)
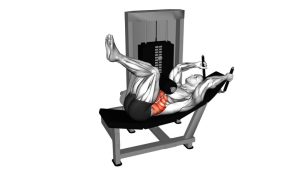
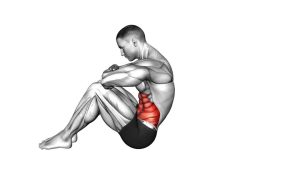
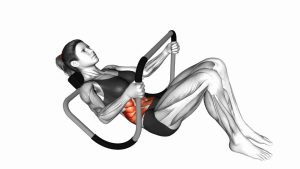
This exercise is designed to train the rectus abdominis through a controlled forward spinal-flexion pattern. In the uploaded video, the movement starts from an upright seated position, then the torso flexes forward into the chest pad before returning slowly to neutral. Therefore, the main goal is not to swing the body, but to keep the hips fixed while the abs control both the crunch and the return.
Since the lower body stays locked in place, the movement should feel focused around the front of the core. However, the best reps still require control. Move slowly, keep the chest connected to the pad, and avoid rushing the return phase.
Quick Overview
| Body Part | Abs |
|---|---|
| Primary Muscle | Rectus abdominis |
| Secondary Muscle | Obliques, deep core stabilizers, hip flexors as minor stabilizers |
| Equipment | Lever seated crunch machine with chest pad |
| Difficulty | Beginner to intermediate, depending on machine load and control |
Sets & Reps (By Goal)
- Beginner technique practice: 2–3 sets × 10–12 reps with light resistance and slow control.
- Core strength: 3–4 sets × 8–12 reps with a moderate load and a brief squeeze at the bottom.
- Muscle growth: 3–5 sets × 10–15 reps with controlled tempo and progressive loading.
- Core endurance: 2–4 sets × 15–20 reps with light-to-moderate resistance and steady breathing.
- Finisher work: 1–3 sets × 12–20 reps after larger lifts, without using momentum.
Progression rule: First improve control and range. After that, increase the machine resistance gradually while keeping the torso movement smooth and the hips stable.
Setup / Starting Position
- Sit on the machine: Place your hips fully on the seat and keep your lower body fixed under the available pads.
- Set your chest against the pad: Position the chest pad so your upper torso can press into it comfortably.
- Hold the handles: Grip the side handles or machine grips for stability without pulling aggressively.
- Start upright: Keep your spine tall, ribs stacked, and shoulders relaxed before the first rep.
- Brace lightly: Tighten your midsection before moving so the crunch begins from your abs rather than from a sudden body swing.
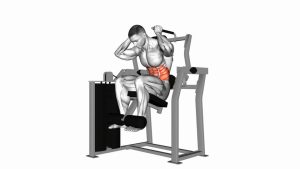
In the video, the start position is upright and stable. Therefore, each repetition should begin from a controlled seated posture before the torso curls forward.
Execution (Step-by-Step)
- Begin from the upright seated position: Keep the hips fixed and chest connected to the pad.
- Crunch forward: Curl your torso down and forward by contracting your abs, allowing the chest pad to travel with you.
- Keep the movement controlled: Avoid jerking the handles or driving with the legs.
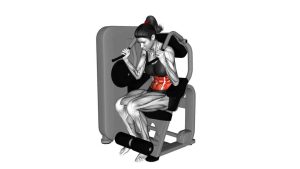
- Reach the bottom position: Pause briefly when your torso is flexed forward and your abs feel shortened.
- Return slowly: Let your torso rise back toward the starting position with control instead of letting the machine pull you back.
- Reset before the next rep: Regain an upright posture, brace again, and repeat with the same smooth tempo.
Pro Tips & Common Mistakes
Pro Tips
- Move through the torso: Focus on curling your ribcage toward your pelvis instead of simply pushing your chest into the pad.
- Control both directions: The lowering phase and the return phase should both feel deliberate.
- Use a steady tempo: A good rhythm is 2 seconds forward, a short squeeze, then 2–3 seconds back.
- Keep the hips seated: When the hips stay anchored, the abs can do more of the work.
- Exhale during the crunch: Breathing out as you flex forward can help your abs contract more effectively.
Common Mistakes
- Using too much weight: Heavy resistance often turns the exercise into a full-body pull instead of an ab crunch.
- Rushing the return: Letting the machine pull you back reduces control and can stress the lower back.
- Pulling hard with the arms: The handles should stabilize you, not dominate the movement.
- Rocking the hips: If your hips lift or shift, reduce the load and reset your seat position.
- Over-rounding aggressively: Crunch forward with control, but do not force a painful or excessive range.
FAQ
What muscles does the Lever Seated Crunch with chest pad work?
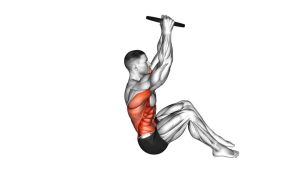
It mainly targets the rectus abdominis, which is the front abdominal muscle responsible for trunk flexion. The obliques and deeper core muscles may also help stabilize the movement.
Is the seated crunch machine good for beginners?
Yes, it can be beginner-friendly because the machine guides the movement path. However, beginners should start with light resistance and focus on slow, clean reps before increasing the load.
Should I go heavy on this exercise?
Not at first. A moderate load works better when you can control the forward crunch and the return. If the arms, hips, or lower back take over, the weight is probably too heavy.
Where should I feel this exercise?
You should feel it mostly in the front of your abs. If you feel it mainly in your lower back, hip flexors, or neck, reduce the resistance and slow down the movement.
How is this different from a floor crunch?
A floor crunch uses body weight and requires you to control your own position. Meanwhile, the lever seated crunch uses a machine, a chest pad, and adjustable resistance to create a guided crunch pattern.
Can I use this exercise for ab muscle growth?
Yes. Because the machine can be loaded progressively, it can support ab hypertrophy when performed with controlled reps, enough volume, and consistent progression.
Recommended Equipment
- Ab Crunch Machine — useful for recreating a guided crunch pattern in a home or garage gym.
- Adjustable Weight Bench — helpful for other core exercises such as decline crunches and supported ab work.
- Exercise Mat — ideal for warm-up core drills, floor crunches, and mobility work before machine training.
- Weightlifting Gloves — can improve grip comfort when holding machine handles during higher-rep sets.
- Fitness Log Book — helps track sets, reps, resistance, and progression over time.
Tip: Choose equipment that supports controlled training. For this exercise, better form and steady progression matter more than simply adding more weight.