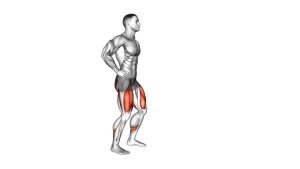
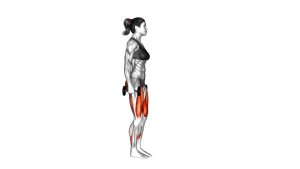
Split Sprinter High Lunge: Form, Muscles, Sets & Tips
Master the Split Sprinter High Lunge with step-by-step form, muscles worked, sets, common mistakes, and tips for stronger legs, balance, and control.
Split Sprinter High Lunge
The Split Sprinter High Lunge combines a deep split-stance position with a controlled upward leg drive. Unlike a conventional stationary lunge, the movement involves a larger change in torso angle and a dynamic transition between low and high positions. Therefore, the working leg must produce force while the hips and trunk maintain balance.
Additionally, this exercise develops coordination between the quadriceps, gluteus maximus, and core stabilizers. The rear leg assists with balance and moves naturally as the body rises. However, the exercise does not require an exaggerated knee drive or a deliberate jump. Instead, the goal is a smooth, repeatable transition with controlled foot placement and stable alignment.
Quick Overview
| Body Part | Legs |
|---|---|
| Primary Muscle | Quadriceps and gluteus maximus |
| Secondary Muscle | Hamstrings, hip flexors, gluteus medius, adductors, calves, and core stabilizers |
| Equipment | None required (bodyweight exercise); optional exercise mat or yoga blocks |
| Difficulty | Intermediate, depending on lower-body mobility, balance, and movement control |
Sets & Reps (By Goal)
Training volume should match your experience and ability to maintain good technique. Because this exercise challenges balance, beginners should prioritize movement quality before increasing repetitions or speed.
- Strength: 3–4 sets × 6–10 reps per leg, using a deliberate upward drive and 60–90 seconds of rest. Focus on strong hip and knee extension without losing balance.
- Hypertrophy: 3–4 sets × 8–12 reps per leg, with a controlled lowering phase. Additionally, maintain consistent muscular tension throughout each repetition.
- Muscular endurance: 2–4 sets × 12–20 reps per leg, using a steady rhythm and 30–60 seconds of rest. However, reduce the repetitions if technique begins to deteriorate.
- Balance and coordination: 2–3 sets × 6–10 reps per leg. Pause briefly in the high position before returning to the low stance. Consequently, each repetition emphasizes stability rather than speed.
- Mobility and movement control: 2–3 sets × 6–8 slow reps per leg. Use a comfortable depth while allowing the hips and ankles to move naturally. Furthermore, keep the breathing relaxed.
- Return-to-training practice: When cleared by a qualified professional, begin with 1–2 sets × 5–6 slow, supported repetitions per leg. A simpler stationary lunge may be more appropriate during early recovery.
Progression rule: First improve balance, range of motion, and repetition quality. Next, increase repetitions or reduce assistance. Finally, progress to a faster upward drive or carefully add external resistance once the bodyweight variation feels stable.
Setup / Starting Position
Establish the Low Sprinter Position
- Choose a clear training area: Stand on a stable, non-slip surface with enough space to extend one leg backward. Additionally, remove objects that could interfere with your balance or foot placement.
- Step into a split stance: Place one foot forward and extend the opposite leg behind you. Keep the front foot flat while supporting the rear foot primarily through its toes.
- Lower into a sprinter lunge: Bend the front knee and lower your hips toward the floor. Meanwhile, allow the rear knee to bend slightly while keeping it lifted.
- Lean forward from the hips: Angle your torso toward the front thigh without excessively rounding your back. Keep the neck in a comfortable position and direct your gaze slightly forward.
- Position your hands: Reach both hands toward the floor beside the front foot. However, touching the ground is optional if mobility or balance is limited. Yoga blocks can provide an elevated surface for additional support.
- Brace your core: Engage the abdominal muscles gently while maintaining natural breathing. Additionally, keep the shoulders relaxed and distribute your weight securely through the supporting feet.
Check Your Alignment Before Moving
Before starting, confirm that the front knee follows the direction of the toes. Your hips should feel stable rather than twisted. Furthermore, the front heel should remain comfortably planted during the initial upward drive.
Setup tip: Use a shorter stance or a shallower lunge if your back rounds excessively or the front heel lifts. As your control improves, gradually explore a deeper starting position.
Execution (Step-by-Step)
Drive from the Low Position
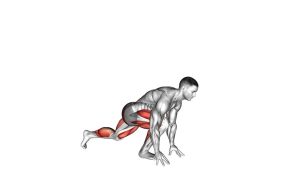
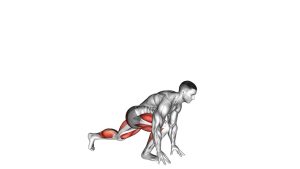
- Begin in the sprinter stance: Position one foot forward, extend the opposite leg backward, and lower the torso. Keep your fingertips near the floor while maintaining a stable front foot.
- Shift force into the front leg: Press through the front foot, emphasizing balanced pressure across the heel and midfoot. At the same time, engage the quadriceps and glutes to initiate the upward movement.
- Extend the front knee and hip: Drive your body upward while gradually straightening the working leg. Simultaneously, lift your chest and bring the torso toward a more upright position.
- Allow the rear leg to follow: As the body rises, the rear foot may travel slightly forward and closer to the front leg. However, avoid swinging the rear knee aggressively toward your chest.
- Reach the high position: Finish in a nearly upright stance with the legs substantially straighter and the feet still slightly staggered. Meanwhile, allow the arms to hang naturally in front of the body.
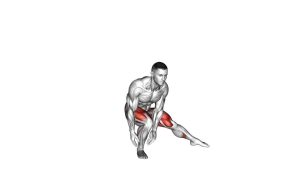
- Begin the controlled descent: Bend the front knee and hinge forward from the hips. Next, guide the hands downward while allowing the rear leg to travel backward again.
- Return to the low sprinter stance: Lower your hips toward the original position while maintaining front-knee alignment. Then, reach the hands toward the floor without forcing extra range.
- Repeat and change sides: Continue the low-to-high transition with the same leading leg. After completing the prescribed repetitions, switch legs and repeat the exercise on the opposite side.
Maintain a Controlled Movement Rhythm
The upward phase should feel purposeful and coordinated. However, beginners should avoid rushing through the transition. A useful starting rhythm is approximately one to two seconds upward and two seconds downward.
As your technique improves, you may perform the upward drive more dynamically. Nevertheless, maintain stable foot placement and avoid turning the movement into an uncontrolled jump.
Pro Tips & Common Mistakes
Improve Technique and Muscle Engagement
- Drive through the front foot: Keep pressure distributed through the heel and midfoot. This helps the quadriceps and glutes produce force without excessive forward tipping.
- Keep the front knee aligned: Track the knee in the same direction as the toes. Additionally, avoid allowing the knee to collapse inward during either phase.
- Control the torso transition: Rise through the hips and legs rather than throwing the chest backward. Consequently, the movement stays coordinated and easier to balance.
- Avoid excessive lower-back extension: Keep the ribs comfortably stacked over the pelvis as you rise. Instead of leaning backward, finish in a natural upright posture.
- Do not force floor contact: Reaching the floor should not require painful stretching or excessive spinal rounding. Therefore, use a smaller range or elevated hand support when necessary.
- Keep the rear leg relaxed and coordinated: Let it move naturally during the transition. However, avoid deliberately turning the exercise into a high-knee running drill.
- Do not add an unnecessary jump: The demonstrated exercise uses a dynamic upward rise. Although the movement may be performed quickly, a forceful jumping action is not required.
- Control the lowering phase: Bend the front knee gradually while sending the rear leg backward. Additionally, avoid dropping suddenly into the deepest position.
- Keep your breathing natural: Exhale during the upward drive and inhale while returning downward. Meanwhile, avoid unnecessarily holding your breath.
- Train both sides equally: Complete comparable repetitions with each leading leg. If one side is less stable, reduce the range until movement quality becomes more consistent.
Progress Without Sacrificing Form
For better results, develop consistent bodyweight technique before increasing difficulty. Once your repetitions feel smooth, you can increase volume or introduce a slightly faster upward drive.
Additionally, light dumbbells may increase the strength challenge during a modified version. However, weighted repetitions should not compromise your balance or your ability to control the descent.
FAQ
Muscles Worked and Exercise Benefits
What muscles does the Split Sprinter High Lunge work?
The Split Sprinter High Lunge primarily works the quadriceps and gluteus maximus. These muscles help extend the front knee and hip during the upward drive. Additionally, the hamstrings, calves, hip stabilizers, and abdominal muscles contribute to movement control. Consequently, the exercise challenges several lower-body muscles while developing coordination.
Is the Split Sprinter High Lunge good for leg strength?
Yes, this exercise can help develop lower-body strength and muscular endurance, particularly in the working front leg. Moreover, its unilateral emphasis challenges balance and hip stability. However, substantial maximal-strength development generally requires additional progressive resistance training. Therefore, use this movement alongside other lower-body exercises when strength is your primary goal.
Does this exercise target the glutes or quadriceps more?
Both muscle groups contribute significantly to the movement. The quadriceps help extend the front knee, while the glutes help extend the hip as the torso rises. However, muscle emphasis changes with stance length, joint angles, and individual movement mechanics. Therefore, focus on balanced technique rather than forcing an exaggerated glute- or quad-dominant position.
Technique, Balance, and Progression
Is the Split Sprinter High Lunge suitable for beginners?
Beginners may find the full movement challenging because it combines a deep stance with dynamic balance. However, a shorter stance and smaller movement range can make the exercise more manageable. Additionally, placing the hands on sturdy elevated supports can reduce balance demands. Start slowly and progress only when your technique remains consistent.
Should the rear leg move forward during the exercise?
Yes, the rear leg can move slightly forward as the body rises toward the high position. However, the movement does not require lifting the rear knee toward the chest. Instead, the rear leg follows the natural transition while helping maintain balance. During the descent, it travels backward into the original low sprinter stance.
Should I jump when performing the Split Sprinter High Lunge?
No deliberate jump is required for the demonstrated variation. Instead, drive upward through the front leg and rise into a controlled, nearly upright position. Although the upward movement can become faster with practice, it should remain coordinated. Therefore, avoid adding an explosive jumping phase unless you are intentionally performing a different exercise variation.
Why do I lose balance during the upward transition?
Balance difficulties may result from a stance that is too narrow, excessive speed, or inconsistent foot pressure. Additionally, limited ankle mobility or reduced hip control can make the transition harder. First, slow the movement and maintain firm contact with the floor. Then, shorten the range and gradually increase difficulty as stability improves.
Training Frequency, Equipment, and Safety
How often should I perform the Split Sprinter High Lunge?
For most healthy exercisers, two to three sessions per week can be a practical starting point. However, your total lower-body training volume and recovery should determine the frequency. Additionally, avoid performing demanding repetitions when fatigue significantly reduces balance or knee control. Allow sufficient recovery between challenging leg sessions.
Can I perform this exercise without equipment?
Yes. The Split Sprinter High Lunge is a bodyweight exercise and requires no specialized equipment. Nevertheless, a non-slip exercise mat may improve comfort during floor-level practice. Yoga blocks can also help when reaching the floor feels uncomfortable. However, neither accessory is necessary for the standard variation.
Can I add dumbbells to make the exercise harder?
Yes, a modified weighted version may increase lower-body loading once you have developed reliable balance and technique. However, holding dumbbells changes the arm position and may limit the ability to reach the floor. Therefore, begin with light weights and maintain a comfortable stance. Avoid increasing resistance if your movement quality deteriorates.
Who should be cautious with the Split Sprinter High Lunge?
People experiencing knee pain, hip pain, severe balance difficulties, or a recent lower-body injury should approach this movement cautiously. Because the exercise includes a deep stance and dynamic transition, it may not suit every rehabilitation stage. Instead, consider a supported stationary lunge or another simpler variation. Seek individualized professional guidance when needed.
Recommended Equipment
The Split Sprinter High Lunge requires no equipment. However, the following optional accessories can support training comfort, technique practice, and future strength progression.
- Non-Slip Exercise Mat — provides a comfortable training surface for floor-level sprinter positions and mobility practice
- Non-Slip Yoga Blocks Set — offers elevated hand support when reaching the floor is difficult or balance is limited
- Mini Loop Resistance Bands Set — useful for supplementary glute activation, lateral walking drills, and hip stability training
- Non-Slip Cross-Training Shoes — helps provide reliable floor traction and stable foot support during dynamic lower-body exercises
- Adjustable Dumbbell Pair — allows gradual resistance progression in appropriately modified lunge variations after mastering bodyweight form
Equipment tip: Begin with bodyweight training and prioritize safe foot placement. Additionally, choose accessories that match your current mobility and strength level. When adding resistance, progress gradually without sacrificing balance or control.