Standing Two-Side Bend: Core Side Bend Form, Benefits, Sets & Tips
Learn the Standing Two-Side Bend to train obliques, improve lateral core control, and move safely with step-by-step form, sets, tips, FAQ, and gear.
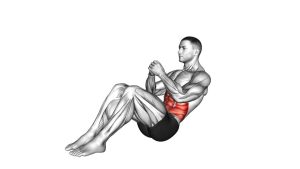
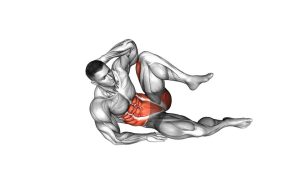
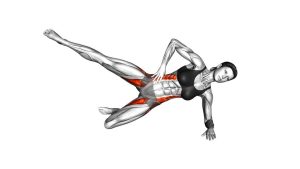
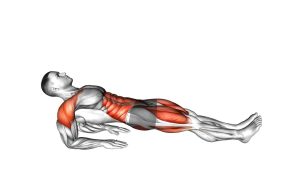
Standing Two-Side Bend (Bent Arm)
This exercise is most effective when the movement comes from the waist and side trunk rather than from hip shifting, shoulder twisting, or bouncing. Therefore, keep your feet grounded, your elbows open, and your chest facing forward. As you bend, move through a comfortable range only. Then, return to the center with control before repeating the same motion to the opposite side.
Although the drill looks simple, it still requires clean posture and steady breathing. Moreover, the bent-arm position helps keep the upper body organized, so the obliques and lateral trunk muscles can guide the movement. For best results, treat each repetition as a smooth side bend, not a fast stretch.
Quick Overview
| Body Part | Core |
|---|---|
| Primary Muscle | Obliques |
| Secondary Muscle | Rectus abdominis, transverse abdominis, spinal stabilizers, lower back stabilizers |
| Equipment | None |
| Difficulty | Beginner |
Sets & Reps (By Goal)
- Beginner core control: 2–3 sets × 8–12 reps per side with a slow, steady tempo.
- Warm-up mobility: 1–2 sets × 10–15 alternating reps before core, leg, or full-body training.
- Oblique endurance: 3–4 sets × 12–20 reps per side while keeping the torso controlled.
- Desk-break movement: 1–2 easy sets × 6–10 reps per side to reduce stiffness and reset posture.
Progression rule: First improve control, range, and smoothness. After that, add more reps or a slower tempo. Avoid adding speed, because momentum can reduce core engagement and increase spinal strain.
Setup / Starting Position
- Stand tall: Place your feet about hip-width to shoulder-width apart, with weight balanced evenly.
- Bend the arms: Bring both hands near the head or lightly behind the head, then keep the elbows open.
- Stack the torso: Keep your ribs controlled, chest lifted, and spine long before moving.
- Set the lower body: Keep the knees soft and the hips steady so the side bend comes from the trunk.
- Face forward: Keep your head aligned with your torso and avoid turning the chest during the bend.
Tip: Before each rep, imagine your body moving between two walls. This cue helps reduce twisting, forward leaning, and unnecessary hip movement.
Execution (Step-by-Step)
- Start in the center: Stand upright with your elbows open, feet grounded, and core lightly engaged.
- Bend to one side: Slowly move your torso sideways by shortening one side of your waist.
- Keep the hips quiet: Allow the trunk to bend, but do not push the hips far in the opposite direction.
- Control the end range: Pause briefly when you reach a comfortable side bend without bouncing.
- Return to neutral: Lift your torso back to the center using your obliques and trunk stabilizers.
- Repeat opposite side: Bend to the other side with the same speed, range, and control.
- Continue alternating: Move side to side smoothly while keeping your breathing relaxed.
Pro Tips & Common Mistakes
Pro Tips
- Move slowly: A controlled tempo helps the obliques guide the motion instead of relying on momentum.
- Keep both feet grounded: Stable feet make it easier to isolate the side bend through the trunk.
- Match both sides: Use the same range of motion on the left and right side whenever possible.
- Breathe naturally: Exhale gently as you bend, then inhale as you return to the center.
- Keep the elbows open: This supports the bent-arm posture shown in the video and prevents collapsing forward.
Common Mistakes
- Twisting the torso: Turning the chest changes the movement from a side bend into rotation.
- Bouncing at the bottom: Fast pulsing can irritate the spine and reduce clean muscle control.
- Shifting the hips too much: Large hip movement makes the exercise less focused on the obliques.
- Pulling on the head: Hands should stay light. Do not yank the neck to create more range.
- Leaning forward: Keep the chest open so the movement stays lateral instead of becoming a forward crunch.
FAQ
What muscles does the Standing Two-Side Bend work?
The main target is the obliques, especially during the side-bending and return-to-center phases. Additionally, the rectus abdominis, transverse abdominis, spinal stabilizers, and lower back stabilizers help control posture throughout the movement.
Is the Standing Two-Side Bend good for beginners?
Yes. This exercise is beginner-friendly because it uses bodyweight only and allows a comfortable range of motion. However, beginners should move slowly, avoid bouncing, and keep the hips stable.
Should I feel this exercise in my lower back?
You may feel light stabilizing work around the lower back, but the movement should not create sharp pain or pinching. Instead, most of the effort should feel like controlled work through the sides of the waist and core.
Can I use this as a warm-up?
Yes. Because it is low-impact and rhythmic, it can work well before core training, bodyweight workouts, or general mobility sessions. For warm-ups, use easy reps and avoid forcing the range.
Do I need weights for this exercise?
No. The video demonstrates the movement without visible equipment. Therefore, bodyweight is enough for learning the pattern, improving control, and practicing smooth side-to-side trunk motion.
Recommended Equipment (Optional)
- Exercise Mat — useful for warm-ups, cooldowns, and floor-based core work after standing drills.
- Resistance Bands Set — helpful for pairing side bends with anti-rotation and upper-body stability exercises.
- Core Sliders — good for adding more bodyweight core variations once basic control improves.
- Foam Roller — useful for gentle mobility work around the back, lats, and hips before training.
- Yoga Blocks — helpful for supported mobility drills and controlled stretching sessions.
Equipment is optional for this exercise. However, these tools can support a more complete core and mobility routine around the same training goal.