Lying Elbow-to-Knee Crunch: Form, Benefits, Sets & Tips
Learn the lying elbow-to-knee crunch for stronger abs and obliques. Step-by-step form, sets, mistakes, FAQs, and equipment tips.
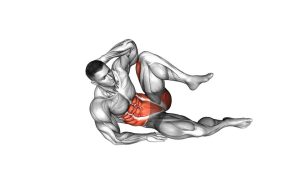
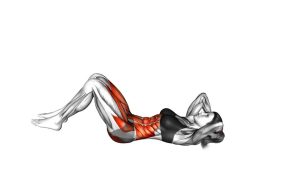
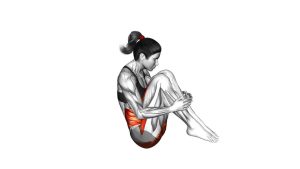
Lying Elbow-to-Knee Crunch
This exercise works best when the movement stays smooth, compact, and controlled. Your goal is not to yank the elbow into the knee. Instead, lift the shoulder blades, rotate through the upper torso, and bring the rib cage toward the opposite hip. A clean repetition should feel like the abs are pulling the body upward, while the neck and hip flexors stay relaxed.
The figure-4 leg position also helps create a clear target for the crunch. Because one ankle rests near the opposite knee, the body naturally rotates toward the raised side. This makes the exercise useful for building abdominal strength, improving trunk coordination, and adding variety to basic crunch training.
Quick Overview
| Body Part | Core |
|---|---|
| Primary Muscle | Rectus abdominis |
| Secondary Muscle | Internal obliques, external obliques, transverse abdominis, hip flexors |
| Equipment | No equipment required; optional exercise mat |
| Difficulty | Beginner to intermediate |
Sets & Reps (By Goal)
- Beginner core control: 2–3 sets of 8–10 reps per side with slow, clean form.
- Muscle endurance: 3–4 sets of 12–18 reps per side with short rest periods.
- Oblique emphasis: 3 sets of 10–15 reps per side with a 1-second squeeze at the top.
- Warm-up activation: 1–2 sets of 8–12 reps per side before a core or lower-body workout.
- Home ab finisher: 2–3 rounds of 30–45 seconds per side using controlled tempo.
Progression rule: Add reps first, then add a longer top squeeze. Once you can control each side without neck pulling or leg movement, progress by slowing the lowering phase.
Setup / Starting Position
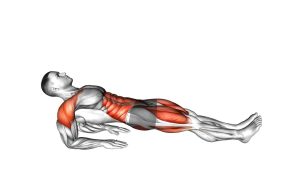
- Lie on your back: Start on a flat surface with your spine neutral and your head resting comfortably on the floor.
- Create the figure-4 position: Bend one knee and place that foot on the floor. Cross the opposite ankle over the planted-side knee.
- Place your hands behind your head: Keep your fingertips light. Your hands support the head, but they should not pull it forward.
- Open the elbows: Let the elbows stay wide enough to avoid neck rounding. A slight natural bend is fine.
- Brace gently: Draw the ribs down and tighten the abs lightly before starting the crunch.
- Set your target: Aim the opposite elbow toward the raised knee, but do not force contact.
A good starting position should feel stable. If the planted foot slides, move it closer to your hips or use an exercise mat with better grip.
Execution (Step-by-Step)
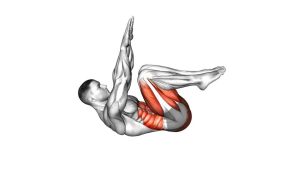
- Exhale and begin the crunch: Lift your head and shoulder blades from the floor using your abdominal muscles.
- Rotate toward the raised knee: Turn your upper torso slightly so the opposite elbow travels toward the crossed-leg side.
- Keep the movement compact: Focus on bringing the ribs toward the pelvis rather than swinging the elbow across the body.
- Squeeze at the top: Pause briefly when your abs and obliques feel fully contracted.
- Lower with control: Return your shoulders and head to the floor without dropping quickly.
- Repeat on the same side: Complete all reps before switching legs, or alternate sides if your program calls for it.
Pro Tips & Common Mistakes
Pro Tips
- Think ribs to opposite hip: This cue usually creates better oblique engagement than thinking only about elbow-to-knee contact.
- Exhale during the lift: A strong exhale helps the abs contract and reduces unnecessary tension in the neck.
- Pause briefly at the top: Holding for one second improves control and prevents rushed reps.
- Keep the lower body quiet: The crossed leg should stay stable while the torso does the work.
- Use a slow descent: Lowering with control increases time under tension and improves core strength.
Common Mistakes
- Pulling the head forward: This turns the exercise into a neck strain instead of an ab exercise.
- Collapsing the elbows inward: Narrow elbows often encourage pulling and reduce clean rotation.
- Using momentum: Fast swinging reps reduce tension on the abs and increase stress on the spine.
- Over-rotating: Twisting too far can shift the movement away from controlled crunch mechanics.
- Lifting the lower back aggressively: Keep the movement focused on the upper back and rib cage.
FAQ
What muscles does the lying elbow-to-knee crunch work?
The exercise mainly targets the rectus abdominis. It also trains the internal and external obliques because the upper body rotates toward the opposite knee.
Is the elbow supposed to touch the knee?
No. Touching is not required. Many people get better results by stopping slightly short and squeezing the abs instead of forcing the elbow across the body.
Is this exercise good for beginners?
Yes, it can be beginner-friendly when performed slowly. Beginners should use a small range of motion, keep the hands light, and avoid pulling the neck.
Why do I feel this in my neck?
Neck tension usually happens when the hands pull the head or the chin juts forward. Keep your fingertips light, relax the jaw, and lift from the ribs instead of the head.
Can I do lying elbow-to-knee crunches every day?
You can perform light sets often, but daily high-volume crunch training is not necessary. Most people do well with 2–4 sessions per week, depending on recovery and total core volume.
How is this different from a bicycle crunch?
A bicycle crunch usually alternates sides and involves more leg movement. The lying elbow-to-knee crunch is more controlled, uses a figure-4 position, and focuses on one side at a time.
Recommended Equipment
- Exercise Mat — provides cushioning for the spine, head, and hips during floor-based core work.
- Thick Yoga Mat — useful if you need extra comfort for crunches, mobility drills, and stretching.
- Ab Mat — helps support the lower back during some crunch variations and core exercises.
- Non-Slip Workout Mat — helps prevent foot sliding while you hold the figure-4 position.
- Core Sliders — optional tool for progressing into more dynamic core and oblique exercises later.
Choose equipment that improves comfort and control. This exercise does not require heavy tools, so a stable mat is usually the most useful option.