Weighted V-Up Passes with Pad: Core Form, Sets, Tips & FAQ
Learn Weighted V-Up Passes with Pad to train abs, hip flexors, coordination, and core control with step-by-step form, sets, tips, FAQs, and gear.
Weighted V-Up Passes with Pad
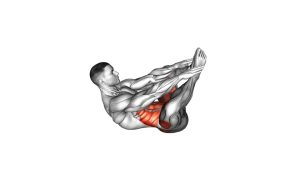
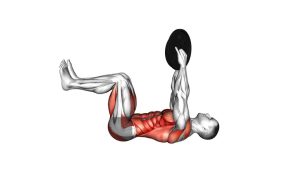
This exercise works best when every repetition is controlled from the floor to the top position and back down again. First, the pad starts in the hands while the body is fully extended. Then, the arms and legs rise together until the body forms a V shape. At the top, the pad transfers from hands to feet. After that, the body lowers under control before the pad is passed back again on the next rep.
Quick Overview
| Body Part | Core |
|---|---|
| Primary Muscle | Rectus abdominis |
| Secondary Muscle | Hip flexors, obliques, transverse abdominis, shoulders |
| Equipment | Foam pad, small exercise pad, light medicine ball, or soft training block |
| Difficulty | Advanced because it requires strength, coordination, and controlled object transfer |
Sets & Reps (By Goal)
- Core strength: 3–4 sets × 6–10 full passes, resting 60–90 seconds between sets.
- Core endurance: 2–3 sets × 10–14 controlled reps with a lighter object and steady breathing.
- Skill and coordination: 2–4 sets × 5–8 slow reps, focusing on clean hand-to-foot and foot-to-hand transfers.
- Advanced ab finisher: 2–3 sets × 8–12 reps near the end of a core workout, keeping every descent controlled.
Progression rule: First improve control, then increase reps. After that, use a slightly heavier or larger object only if the lower back stays stable and the pass remains smooth.
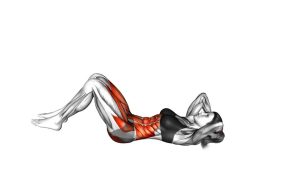
Setup / Starting Position
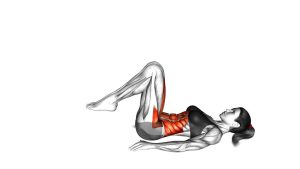
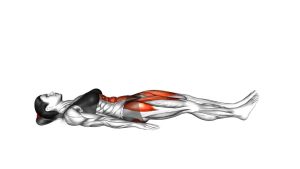
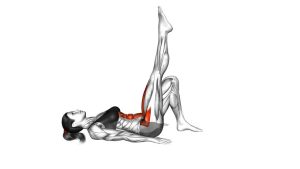
- Lie on your back: Start flat on the floor with your legs extended and your arms reaching overhead.
- Hold the pad: Grip the pad or soft object with both hands before the first lift.
- Brace your core: Lightly tighten your abs so your lower back does not arch away from the floor.
- Lengthen your body: Keep the arms long, legs straight or slightly bent, and toes pointed forward.
- Prepare to lift together: Before moving, think about bringing the hands and feet toward the same meeting point above the torso.
Tip: If full straight-leg reps are too difficult, bend the knees slightly while keeping the movement controlled.
Execution (Step-by-Step)
- Start fully extended: Keep the pad in your hands, arms overhead, and legs long.
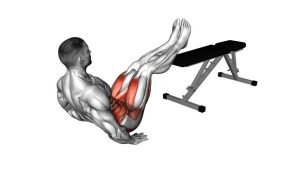
- Lift arms and legs together: Curl the torso upward while raising the legs toward the hands.
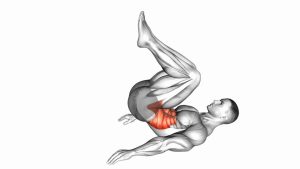
- Form the V position: Bring the hands and feet close together near the top without rushing.
- Pass the pad to your feet: Secure the pad between the feet, then release it from your hands.
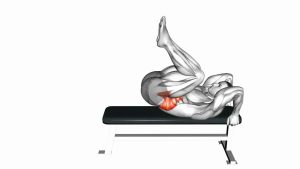
- Lower with control: Extend the arms overhead and lower the legs while the feet hold the pad.
- Repeat the lift: Raise the arms and legs again, bringing the pad back toward your hands.
- Return the pad to your hands: At the top, transfer the pad from feet to hands smoothly.
- Finish the cycle: Lower back to the extended position and continue for the target reps.
Pro Tips & Common Mistakes
- Use a soft object first: A foam pad is easier and safer than a heavy object when learning the pass.
- Control the lowering phase: Do not drop your legs quickly, because that usually causes the lower back to arch.
- Avoid neck pulling: Keep the neck long and let the abs lift the torso instead of forcing the head forward.
- Do not swing: Momentum makes the pass easier, but it reduces core tension and form quality.
- Keep the pass close: Transfer the pad near the top of the V-up so you do not overreach or lose balance.
- Scale when needed: Bend the knees, reduce range, or use no object until your reps are clean.
- Breathe with control: Exhale as you lift and pass, then inhale as you lower back down.
FAQ
What muscles do Weighted V-Up Passes with Pad work?
They mainly target the rectus abdominis. In addition, the hip flexors help raise the legs, while the obliques and deep core muscles stabilize the body during each pass.
Is this exercise beginner-friendly?
Not usually. Because the movement requires a V-up, object transfer, and controlled lowering, it is better for intermediate to advanced trainees. Beginners can start with bent-knee tuck-ups or basic V-ups first.
Can I use a medicine ball instead of a pad?
Yes, but only after you can perform the movement with control. A soft pad is better for learning because it is easier to grip with the feet and safer if you lose control.
Why does my lower back lift during the exercise?
Your lower back may lift if the object is too heavy, your legs lower too far, or your core loses tension. Therefore, reduce the range of motion, bend your knees slightly, or use a lighter object.
How do I make Weighted V-Up Passes easier?
Use a lighter pad, bend the knees, perform fewer reps, or pause between each pass. Also, you can practice regular V-ups before adding the hand-to-foot transfer.
Recommended Equipment
- Foam Exercise Pad — a soft, lightweight option for learning clean hand-to-foot passes.
- Soft Medicine Ball — useful for progressing the exercise once control improves.
- Thick Exercise Mat — provides floor comfort during repeated V-up reps.
- Small Pilates Ball — an easy-to-grip alternative for lighter core pass variations.
- Adjustable Ankle Weights — optional advanced progression for stronger athletes after mastering bodyweight control.
Tip: Choose soft and easy-to-control equipment first. Moreover, avoid heavy tools until the pass, lift, and descent stay smooth.