Side Push-Up: Proper Form, Sets, Muscles Worked, Tips & FAQ
Learn how to do the Side Push-Up with proper form to build triceps strength, upper-arm stability, and core control. Includes step-by-step technique, sets by goal, mistakes, FAQs, and recommended equipment.
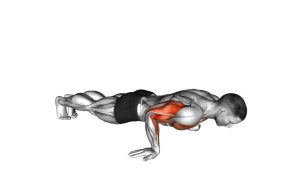
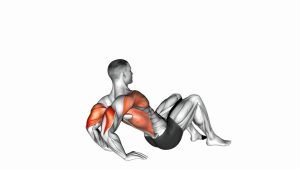
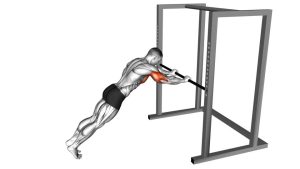
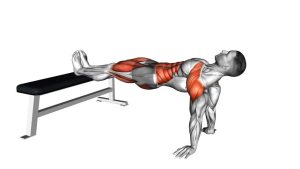
Side Push-Up
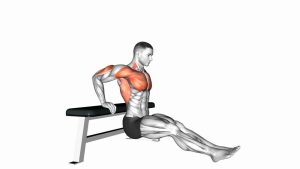
This exercise works best when you stay tight through the torso and keep the pressing arm doing the work. You should feel strong effort in the triceps, some involvement from the front shoulder, and steady activation through the core to prevent rotation. Smooth reps matter more than range or speed.
Quick Overview
| Body Part | Triceps |
|---|---|
| Primary Muscle | Triceps brachii |
| Secondary Muscle | Anterior deltoid, chest stabilizers, obliques, and deep core muscles |
| Equipment | Bodyweight only (optional: exercise mat or push-up handles) |
| Difficulty | Intermediate |
Sets & Reps (By Goal)
- Strength: 3–5 sets × 4–8 reps per side, 75–120 sec rest
- Muscle growth: 3–4 sets × 8–12 reps per side, 45–75 sec rest
- Control and stability: 2–4 sets × 6–10 slow reps per side, 45–60 sec rest
- Bodyweight finisher: 2–3 sets × near technical failure with clean form
Progression rule: First improve control, range, and symmetry between sides. Then add reps, slower tempo, pauses, or a harder leverage position.
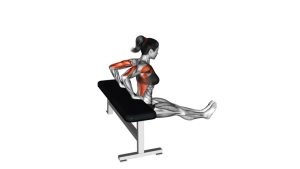
Setup / Starting Position
- Lie or position yourself sideways: Set up on the floor in a side-oriented position with one arm acting as the main pressing arm.
- Place the working hand firmly: Keep the palm planted near the torso with the wrist stacked comfortably under the pressing line.
- Align the elbow: Keep it tucked relatively close to the body rather than flared out wide.
- Brace your core: Tighten your abs and obliques so your hips and shoulders move together.
- Set your head and spine: Keep a neutral neck and avoid letting the torso twist before the rep begins.
Tip: If balance feels shaky, slow the movement down and focus on keeping your ribcage and hips stacked throughout the rep.
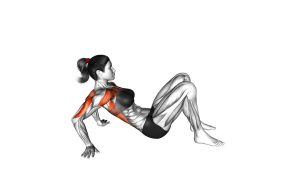
Execution (Step-by-Step)
- Brace before you move: Tighten your torso and lock in your body position so the rep starts from a stable base.
- Lower under control: Bend the working elbow and bring your torso downward slowly while keeping the elbow close to your side.
- Pause near the bottom: Stop just before losing shoulder or torso alignment.
- Press through the palm: Extend the elbow to push your body back up without twisting or jerking.
- Finish tall and steady: Return to the top position with full-body tension and repeat on the same side before switching if needed.
Pro Tips & Common Mistakes
- Keep the elbow close: This increases triceps involvement and helps protect shoulder position.
- Use a slow eccentric: A controlled lowering phase builds more strength and stability than rushing through the rep.
- Do not twist the torso: The core should resist rotation from start to finish.
- Avoid collapsing at the bottom: Maintain space in the shoulder and stay active through the planted hand.
- Do not bounce: Press smoothly instead of using momentum off the floor.
- Match both sides: Train your weaker side with the same quality and range as your stronger side.
FAQ
What muscles does the Side Push-Up work the most?
The Side Push-Up mainly targets the triceps. It also challenges the front deltoid, chest stabilizers, and the core because your body has to resist rotation while pressing.
Is the Side Push-Up harder than a regular push-up?
For most people, yes. Because more load is shifted toward one arm and the body must stay stable from a side-oriented position, it usually feels more demanding on the triceps and core than a standard push-up.
Can beginners do this exercise?
Beginners may need to start with easier regressions such as incline push-ups, close-grip push-ups, or partial-range side push-ups before performing full controlled reps.
How can I make the Side Push-Up more effective?
Slow down the lowering phase, pause briefly near the bottom, and focus on clean elbow tracking and full-body tension. Better control usually makes the movement harder and more productive.
What if my wrist feels uncomfortable?
Try using push-up handles, adjusting hand angle, or placing your hand on a more comfortable surface. If discomfort remains, reduce volume or choose a variation that is friendlier on the wrist.
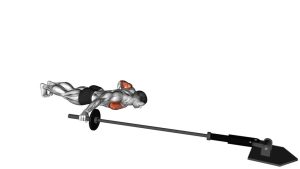
Recommended Equipment
- Push-Up Handles / Push-Up Bars — can improve wrist comfort and create a more stable pressing position
- Thick Non-Slip Exercise Mat — adds comfort for floor-based reps and helps reduce slipping
- Elbow Compression Sleeve — useful for warmth and support during higher-volume arm training
- Resistance Bands Set — great for warm-ups, triceps activation, and easier regression work
- Portable Ergonomic Push-Up Stands — a practical option for home training and repeated bodyweight pressing sessions
Tip: Choose equipment that improves comfort and control, not just difficulty. Better setup usually leads to better reps.