Wall-Supported Handstand Push-Up: Form, Muscles Worked, Sets, Tips & FAQ
Learn the Wall-Supported Handstand Push-Up with proper setup, step-by-step form, muscles worked, sets by goal, common mistakes, FAQs, and recommended Amazon equipment for safer inverted pressing practice.
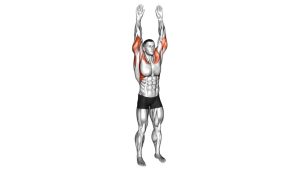
Wall-Supported Handstand Push-Up
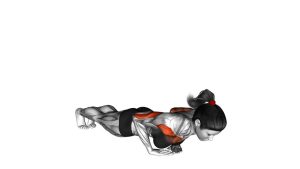
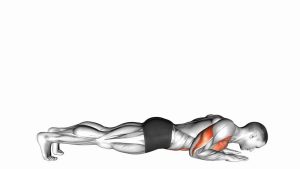
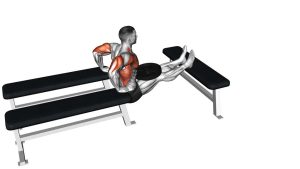
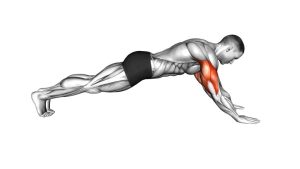
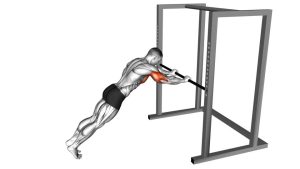
This exercise works best when you stay tight from head to toe and keep the movement controlled. You should feel the front delts, triceps, and upper-body stabilizers working hard, while your core helps keep your body stacked. The wall provides balance support, but the pressing effort should still come from your shoulders and arms rather than excessive arching or kicking.
Quick Overview
| Body Part | Shoulders |
|---|---|
| Primary Muscle | Anterior deltoids |
| Secondary Muscle | Triceps, upper chest, upper traps, serratus anterior, core stabilizers |
| Equipment | Bodyweight, wall, optional head pad or mat |
| Difficulty | Advanced |
Sets & Reps (By Goal)
- Strength: 3–5 sets × 3–6 reps (90–150 sec rest)
- Muscle building: 3–4 sets × 6–10 reps (60–90 sec rest)
- Skill practice: 4–6 sets × 1–4 clean reps (full focus on control, 60–120 sec rest)
- Progression work: 3–4 sets × 5–8 reps using reduced range, abmat support, or negatives only
Progression rule: Add reps first, then increase range of motion or reduce assistance. Do not chase volume if your body line collapses or the descent becomes uncontrolled.
Setup / Starting Position
- Place your hands: Set your palms on the floor about shoulder-width apart, fingers spread for balance and grip.
- Face the wall: Kick up or walk into a wall-supported handstand so your heels or feet lightly contact the wall.
- Stack your joints: Keep wrists, elbows, shoulders, hips, and ankles aligned as much as possible.
- Brace the core: Squeeze the glutes, tighten the abs, and avoid over-arching the lower back.
- Set the shoulders: Push tall through the shoulders so the upper traps and serratus help stabilize the position.
Tip: If full handstand push-ups are too advanced, start with partial range reps or controlled negatives using a cushion under the head.
Execution (Step-by-Step)
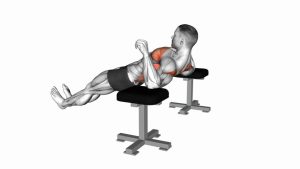
- Start at lockout: Hold a stable wall-supported handstand with arms straight and core tight.
- Lower under control: Bend the elbows and let the head travel down toward the floor in a smooth, controlled path.
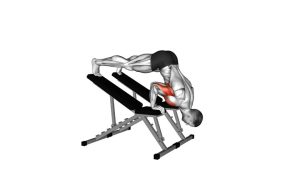
- Keep the body tight: Maintain tension through the core and legs so the torso does not fold or arch excessively.
- Reach the bottom position: Bring the head close to the floor or lightly to a pad while keeping the neck neutral.
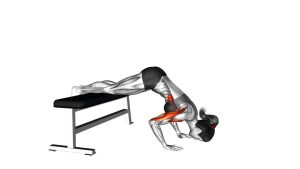
- Press upward: Drive hard through the palms, extend the elbows, and push the body back to full lockout.
- Finish tall: Re-establish a stacked top position with active shoulders before starting the next rep.
Pro Tips & Common Mistakes
- Push the floor away: Think about driving tall through the shoulders at the top instead of just locking the elbows.
- Control the negative: A slower descent builds strength and helps protect the neck and shoulders.
- Do not banana-arch: Excessive lower-back extension usually means you lost core tension.
- Keep the head path natural: Let the head move slightly forward as you descend so the elbows can bend efficiently.
- Do not crash the bottom: Light contact is fine, but do not dump your weight onto the head or neck.
- Use progressions wisely: Parallettes, pads, pike presses, and negatives can help build the pattern safely.
- Watch wrist tolerance: Warm up the wrists before inverted pressing, especially if you are new to handstand work.
FAQ
What muscles does the wall-supported handstand push-up work?
The main target is the anterior deltoid. The exercise also heavily trains the triceps, while the upper chest, upper traps, serratus anterior, and core help stabilize the movement.
Is this exercise better for strength or muscle building?
It can be excellent for both. Lower reps with longer rest work well for strength, while moderate reps with controlled tempo can support hypertrophy.
What if I cannot do a full handstand push-up yet?
Start with wall walks, pike push-ups, box pike presses, negatives, or reduced-range handstand push-ups using an abmat or stacked pads.
Should my head touch the floor?
It can lightly touch the floor or a pad if your mobility and strength allow it. Many athletes use a pad to protect the head and standardize depth.
Is the wall-supported handstand push-up safe for beginners?
Not usually as a first overhead bodyweight press. Beginners should first build shoulder strength, wrist tolerance, and inversion control with simpler progressions.
Recommended Equipment
- Push-Up Bars / Parallettes — help create a neutral wrist position and can make pressing more comfortable
- Handstand Push-Up Pad — useful for protecting the head and controlling range of motion
- Gym Wall Mats — adds protection to the wall area when practicing kicks, holds, and inverted drills
- Resistance Band Set — great for warm-ups, shoulder activation, and accessory pressing work
- Wrist Wraps — can provide extra wrist support for athletes who feel strained in the handstand position
Tip: Use equipment to improve control and comfort, not to mask poor alignment. Better setup usually leads to cleaner reps.