Band 45-Degree Biceps Curl: Form, Sets, Tips & FAQ
Learn the Band 45-Degree Biceps Curl to build biceps strength with constant resistance band tension. Includes setup, execution, sets by goal, common mistakes, FAQs, and recommended equipment.
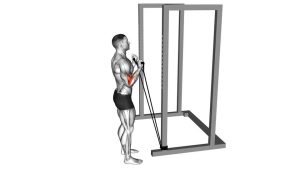
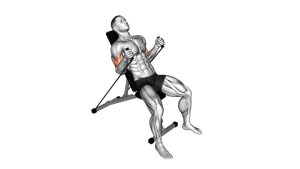
Band 45-Degree Biceps Curl
This movement is excellent for training the biceps at home, during warm-ups, or as a high-tension finisher after heavier arm work. The 45-degree arm angle places the upper arm slightly behind the body, which can increase the stretch on the biceps—especially the long head—while still allowing a clean curl pattern. The key is to keep the torso still and let the elbow joint do the work.
Quick Overview
| Body Part | Arms |
|---|---|
| Primary Muscle | Biceps brachii |
| Secondary Muscle | Brachialis, brachioradialis, forearms, anterior shoulder stabilizers |
| Equipment | Resistance band with handles or loop band |
| Difficulty | Beginner to intermediate |
Sets & Reps (By Goal)
- Muscle growth: 3–4 sets × 10–15 reps, using a slow 2–3 second lowering phase.
- Biceps endurance: 2–4 sets × 15–25 reps with lighter band tension and constant control.
- Strength emphasis: 3–5 sets × 6–10 reps with a thicker band, while keeping strict form.
- Warm-up activation: 1–2 sets × 12–15 easy reps before heavier pulling or arm training.
- Finisher: 2–3 sets × 20–30 controlled reps, stopping before form breaks down.
Progression rule: First improve control and range of motion, then increase band thickness, step farther from the anchor, or slow the lowering phase.
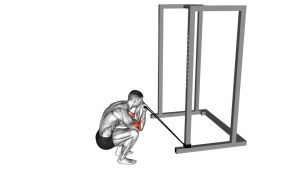
Setup / Starting Position
- Anchor the band low: Secure the band under your feet or to a low anchor behind you.
- Stand tall: Keep your chest lifted, ribs controlled, core lightly braced, and feet stable.
- Place arms slightly behind the torso: Let your upper arms sit at roughly a 45-degree angle behind your body.
- Use a supinated grip: Palms face forward or slightly upward, depending on the handle position.
- Set the elbows: Keep elbows close to your sides and slightly behind the torso without flaring out.
- Create light starting tension: Step forward or adjust the band until there is tension before the curl begins.
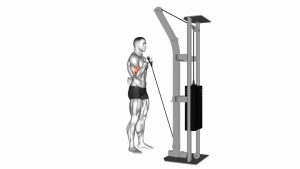
Execution (Step-by-Step)
- Start with control: Stand tall with arms extended, elbows soft, and the band already slightly stretched.
- Curl upward: Bend your elbows and bring your hands toward your shoulders without moving the upper arms forward.
- Keep the wrists neutral: Avoid bending the wrists back or letting the handles pull your hands out of alignment.
- Squeeze at the top: Pause briefly when the biceps are fully contracted.
- Lower slowly: Resist the band as your hands return to the starting position.
- Maintain tension: Do not fully relax at the bottom; keep the band slightly loaded before the next rep.
Pro Tips & Common Mistakes
- Do not swing: Keep your torso still and avoid leaning back to finish the curl.
- Control the eccentric: The lowering phase should be smooth, not pulled down quickly by the band.
- Keep shoulders relaxed: Do not shrug at the top of the curl.
- Avoid elbow drifting: Keep the elbows slightly behind the torso throughout the rep.
- Use the right band: If you cannot pause at the top, the band is too heavy.
- Keep tension even: Do not let the band go slack at the bottom.
- Train both arms evenly: Make sure each side curls through the same range and tempo.
FAQ
What muscles does the Band 45-Degree Biceps Curl work?
It primarily targets the biceps brachii, with assistance from the brachialis, brachioradialis, forearms, and shoulder stabilizers.
Why are the arms positioned behind the body?
Starting with the arms slightly behind the torso places the biceps in a more stretched position. This can make the curl feel more intense and helps emphasize control through the full range of motion.
Is this better than a regular resistance band curl?
It is not automatically better, but it provides a different stimulus. A regular band curl is great for general biceps work, while the 45-degree version adds more stretch and requires stricter elbow control.
Should I use a heavy resistance band?
Use a band that allows clean reps without swinging, shrugging, or losing wrist position. If form breaks, choose a lighter band.
Can beginners do this exercise?
Yes. Beginners can perform it with a light band and shorter range of motion. Focus on slow reps and strict control before increasing resistance.
Recommended Equipment
- Resistance Bands with Handles — ideal for comfortable gripping and smooth biceps curls.
- Loop Resistance Bands Set — useful for under-foot band curls and portable arm workouts.
- Resistance Band Door Anchor — helps create a low anchor point for better 45-degree curl setup.
- Exercise Mat — provides stable footing and comfort during home band training.
- Adjustable Resistance Bands Set — allows progressive overload by changing band resistance levels.
Choose equipment based on your strength level and training space. The best band is one that gives tension without forcing compensation.