Hip Raise Bridge: Proper Form, Glute Benefits, Sets, Tips & FAQ
Learn how to do the Hip Raise Bridge with proper form. Build stronger glutes, improve hip extension, protect your lower back, and follow sets, tips, mistakes, FAQs, and equipment suggestions.
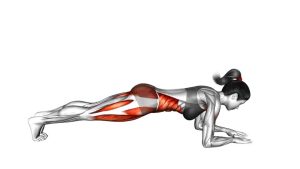
Hip Raise Bridge
The Hip Raise Bridge is an excellent choice for beginners, home workouts, warm-ups, glute activation, and lower-body strength routines. Because it uses only bodyweight, it allows you to focus on clean technique before adding more advanced variations. In addition, it can help people learn how to extend the hips without overusing the lower back. This makes it useful for athletes, lifters, desk workers, and anyone who wants stronger glutes with minimal equipment.
During the exercise, the feet stay planted on the floor while the hips lift upward. As the hips rise, the glutes contract to bring the body into a bridge position. Then, the hips lower with control until the body returns to the starting position. Since the movement is short and precise, every rep should feel smooth rather than rushed.
Quick Overview
| Body Part | Glutes |
|---|---|
| Primary Muscle | Gluteus Maximus |
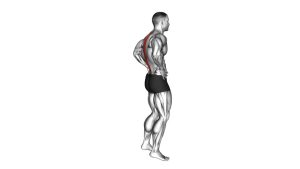
| Secondary Muscle | Hamstrings, core stabilizers, lower back stabilizers, hip stabilizers |
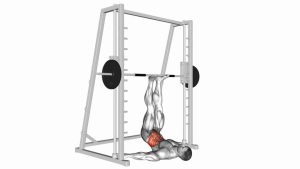
| Equipment | Bodyweight only; optional exercise mat, resistance band, or hip thrust pad |
| Difficulty | Beginner-friendly |
Sets & Reps (By Goal)
- Glute activation: 2–3 sets of 12–15 reps with a 1–2 second squeeze at the top.
- Beginner strength: 3 sets of 10–12 reps with slow, controlled lowering.
- Muscle endurance: 3–4 sets of 15–25 reps with consistent tempo and short rest.
- Warm-up before squats or deadlifts: 1–2 sets of 12–20 reps at easy-to-moderate effort.
- Glute control and technique: 2–3 sets of 8–10 reps with a 3-second hold at the top.
Progression rule: First, improve your control and top-position squeeze. Then, add more reps, longer holds, a mini band above the knees, or a single-leg variation. However, do not progress if your lower back starts taking over the movement.
Setup / Starting Position
- Lie on your back: Start flat on the floor with your knees bent and your feet planted. Your head, shoulders, and upper back should stay relaxed against the ground.
- Place your feet correctly: Keep your feet about hip-width apart. Then, position them close enough that your knees stay bent, but not so close that your heels crowd your hips.
- Set your arms: Rest your arms beside your body with your palms facing down. This gives you light support without turning the movement into an upper-body press.
- Brace gently: Pull your ribs slightly down and tighten your core lightly. As a result, your pelvis will stay more stable when the hips lift.
- Prepare the glutes: Before lifting, think about pushing the floor away through your heels and mid-foot. This cue helps shift the work into the glutes instead of the lower back.
A good starting position should feel stable, simple, and easy to repeat. If your hamstrings cramp, move your feet slightly farther away or reduce the top squeeze until your glutes control the movement better.
Execution (Step-by-Step)
- Start from a stable base: Keep both feet planted, arms relaxed, and eyes facing upward. Then, lightly brace your core before the hips leave the floor.
- Drive through the heels and mid-foot: Press into the floor and begin lifting your hips. At the same time, keep your knees tracking in line with your toes.
- Lift with the glutes: Raise your hips until your body forms a straight line from your shoulders to your knees. However, avoid pushing so high that your lower back arches.
- Squeeze at the top: Pause briefly and contract your glutes. This top position is the most important part of the exercise because it trains full hip extension.
- Control the descent: Lower your hips slowly back toward the floor. Instead of dropping, keep tension through the glutes until the hips gently return to the starting position.
- Reset before the next rep: Breathe, check your foot position, and repeat with the same clean path. Each repetition should look nearly identical.
Pro Tips & Common Mistakes
Pro Tips
- Use a small pause at the top: A 1–3 second hold improves glute activation and prevents you from rushing through the strongest part of the movement.
- Keep the ribs controlled: When your ribs flare upward, your lower back may arch. Therefore, keep the core gently braced throughout the rep.
- Push through the full foot: Although the heels should feel strong, keep the mid-foot connected to the floor as well. This improves balance and knee control.
- Use a mini band for extra feedback: If your knees collapse inward, a light resistance band above the knees can remind you to keep the knees tracking outward.
- Move slowly on the way down: The lowering phase builds control. In addition, it helps you avoid bouncing off the floor between reps.
Common Mistakes
- Overarching the lower back: Lifting too high can turn the bridge into a lower-back extension. Instead, stop when the hips are fully extended and the glutes are squeezed.
- Letting the knees cave inward: Keep the knees aligned with the toes. Otherwise, the hips may lose tension and the movement may feel unstable.
- Placing the feet too far away: If the feet are too far from the hips, the hamstrings may dominate. Therefore, adjust your foot position until the glutes are the main target.
- Using momentum: Fast reps reduce control. Instead, lift smoothly, pause briefly, and lower with purpose.
- Relaxing completely between reps: While the hips can touch down, avoid losing all tension. A controlled reset keeps the exercise more effective.
FAQ
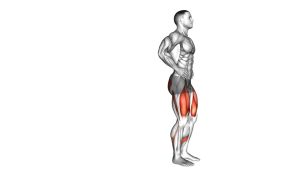
What muscles does the Hip Raise Bridge work?
The Hip Raise Bridge mainly works the gluteus maximus. In addition, the hamstrings, core muscles, lower back stabilizers, and hip stabilizers help control the movement.
Is the Hip Raise Bridge good for beginners?
Yes. It is one of the best beginner-friendly glute exercises because it requires no equipment and has a simple movement pattern. However, beginners should focus on control before adding resistance.
Where should I feel the Hip Raise Bridge?
You should feel the strongest contraction in your glutes. You may also feel light work in the hamstrings. However, if your lower back feels like the main working area, reduce your range and brace your core more.
How high should I lift my hips?
Lift until your body forms a straight line from shoulders to knees. After that point, lifting higher often causes lower-back arching instead of better glute activation.
Can I do Hip Raise Bridges every day?
You can perform light Hip Raise Bridges often, especially for glute activation or warm-ups. Nevertheless, if you use high volume, long holds, or added resistance, allow recovery like any other strength exercise.
How can I make the Hip Raise Bridge harder?
You can add a longer top hold, use a resistance band above the knees, place weight across the hips, or progress to a single-leg bridge. Even so, only progress when your form stays clean.
Recommended Equipment
- Exercise Mat — useful for comfort, grip, and better floor support during bridge reps.
- Mini Resistance Bands — helpful for glute activation and knee-alignment feedback.
- Hip Thrust Pad — useful when progressing to weighted hip bridges or barbell hip thrusts.
- Adjustable Dumbbell Set — allows gradual loading across the hips for harder bridge variations.
- Glute Training Accessories — useful for pairing bridges with kickbacks, hip abductions, and lower-body work.
Tip: Start with bodyweight first. Then, once your glute contraction is consistent, use bands or light weights to increase difficulty without sacrificing form.