Hanging Leg Hip Raise: Form, Core Benefits, Sets, Tips & FAQ
Learn the Hanging Leg Hip Raise for stronger abs, hip control, and core stability. Includes form cues, sets, mistakes, FAQs, and gear.
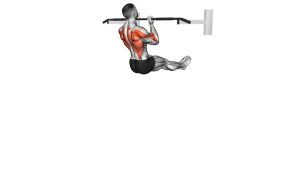
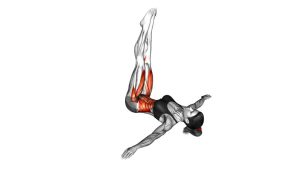
Hanging Leg Hip Raise
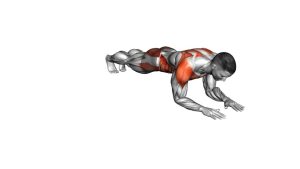
This exercise is best for lifters who already have solid grip strength, shoulder stability, and basic hanging core control. During each rep, the abs must brace the torso, control the legs, and finish the motion with a strong posterior pelvic tilt. As a result, the Hanging Leg Hip Raise trains the rectus abdominis, lower-ab emphasis, hip flexors, and deep stabilizers at the same time.
Although the movement looks simple, clean form matters more than height. A strict rep should start from a stable hang, continue through a smooth leg lift, and finish with the hips curling toward the ribs. Then, the body should lower under control without dropping, kicking, or using momentum.
Quick Overview
| Body Part | Abs |
|---|---|
| Primary Muscle | Rectus abdominis, with strong lower-ab emphasis during the hip raise |
| Secondary Muscle | Hip flexors, obliques, transverse abdominis, lats, forearms, and shoulder stabilizers |
| Equipment | Pull-up bar, captain’s chair, or hanging straps |
| Difficulty | Advanced; use bent knees for an easier progression |
Sets & Reps (By Goal)
- Core strength: 3–4 sets × 6–10 controlled reps, resting 75–120 seconds between sets.
- Muscle building: 3–5 sets × 8–12 reps, using a slow lowering phase and a strong top squeeze.
- Skill and control: 2–4 sets × 4–8 strict reps, pausing briefly at the top of each rep.
- Beginner progression: 2–3 sets × 6–10 bent-knee reps before moving to straight-leg reps.
- Finisher: 2–3 sets near technical fatigue, stopping before swing or grip breakdown appears.
Progression rule: Add reps only when every rep stays strict. After that, increase the top pause, slow the eccentric phase, or move from bent knees to straighter legs.
Setup / Starting Position
- Choose a stable bar: Use a pull-up bar that allows your legs to hang freely without touching the floor.
- Grip the bar firmly: Hold the bar slightly wider than shoulder width with an overhand grip.
- Set the shoulders: Pull the shoulders slightly down and away from the ears to avoid hanging passively.
- Brace the core: Keep the ribs down and avoid flaring the chest before the first rep begins.
- Control the legs: Start with the legs together, knees either straight or slightly bent, depending on your strength level.
- Reduce swing first: Wait until your body is still before starting the movement.
Tip: If the straight-leg version pulls too much on your lower back or hip flexors, begin with the hanging knee hip raise. That version keeps the same core pattern while reducing leverage.
Execution (Step-by-Step)
- Start from a quiet hang: Keep your arms long, shoulders stable, and body still before lifting.
- Brace before moving: Exhale slightly, tighten your abs, and keep the ribs from flaring upward.
- Raise the legs: Lift your legs forward in a smooth arc until they approach hip height or slightly above.
- Curl the pelvis: At the top, tuck your hips upward toward your ribs instead of only lifting the feet higher.
- Squeeze the abs: Pause briefly when the pelvis lifts and the lower abs are fully contracted.
- Lower slowly: Control the legs back down while resisting the urge to swing backward.
- Reset each rep: Let the body become still again before starting the next repetition.
Pro Tips & Common Mistakes
Pro Tips
- Think “hips to ribs”: This cue helps shift the focus from hip flexors to abdominal contraction.
- Use a slower descent: A controlled lowering phase builds strength and reduces swinging.
- Keep the shoulders packed: Stable shoulders make the torso easier to control.
- Exhale near the top: Breathing out helps the ribs drop and improves the pelvic tuck.
- Pause between reps: A short reset removes momentum and makes the exercise more effective.
Common Mistakes
- Swinging the body: Momentum reduces abdominal tension and turns the movement into a kip.
- Only lifting the legs: Without the hip curl, the exercise becomes less focused on the abs.
- Arching the lower back: Rib flare and lumbar extension reduce core control.
- Bending the arms too much: Pulling with the arms can hide weak core mechanics.
- Lowering too fast: Dropping the legs often causes swing and reduces eccentric strength.
- Training past form failure: Stop when reps become jerky, rushed, or unstable.
FAQ
What muscles does the Hanging Leg Hip Raise work?
The Hanging Leg Hip Raise mainly works the rectus abdominis, especially during the pelvic curl at the top. In addition, the hip flexors lift the legs, while the obliques, deep core, lats, forearms, and shoulders help stabilize the body.
Is the Hanging Leg Hip Raise better than the hanging leg raise?
It can be more effective for abdominal contraction because the hips lift at the top. A regular hanging leg raise focuses more on raising the legs, while the hip raise adds spinal flexion and posterior pelvic tilt.
Should my legs stay perfectly straight?
Straight legs make the exercise harder, but they are not required for good results. If bending the knees helps you control the pelvis and avoid swinging, use the bent-knee version first.
Why do I feel this more in my hip flexors than my abs?
Hip flexor involvement is normal because they lift the legs. However, you can increase abdominal focus by exhaling, tucking the pelvis at the top, and thinking about curling the hips toward the ribs.
How do I stop swinging during Hanging Leg Hip Raises?
Start each rep from a still hang, lower slowly, and pause before the next rep. Also, reduce the range or bend your knees until you can control the movement without momentum.
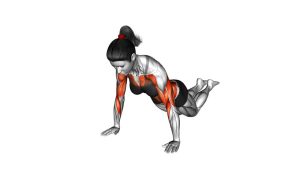
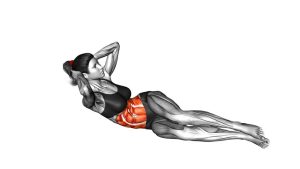
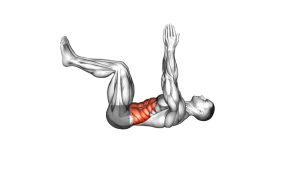
Is this exercise good for beginners?
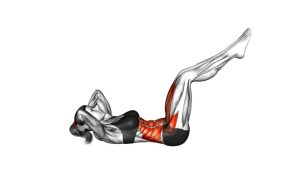
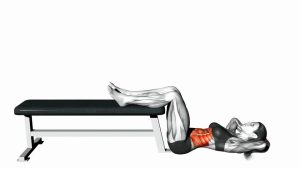
The full version is usually advanced. Beginners should start with lying reverse crunches, captain’s chair knee raises, or hanging knee raises before trying the straight-leg hip raise.
Can I do Hanging Leg Hip Raises every day?
Daily practice is not necessary for most people. Two to four sessions per week works well, especially if you train the movement with strict form and enough recovery.
Recommended Equipment
- Doorway Pull-Up Bar — useful for home hanging core exercises and pull-up progressions.
- Power Tower / Captain’s Chair Station — provides a stable setup for hanging raises, knee raises, dips, and bodyweight training.
- Hanging Ab Straps — reduce grip demand and help you focus more on the core movement.
- Pull-Up Grips / Gymnastics Grips — improve hand comfort during high-volume hanging work.
- Liquid Chalk — supports grip security when hands get sweaty during hanging core sets.
Tip: Choose equipment that improves control rather than difficulty. If a tool causes shoulder discomfort, grip pain, or extra swinging, adjust your setup before adding more volume.