Sit-Up Exercise: Proper Form, Core Benefits, Sets, Tips & FAQ
Learn how to do the Sit-Up with proper form to strengthen your abs, improve core control, and avoid common mistakes. Includes sets, tips, FAQs, and gear.
Sit-Up
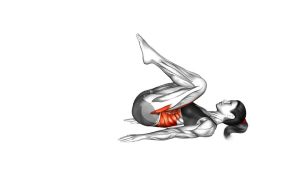
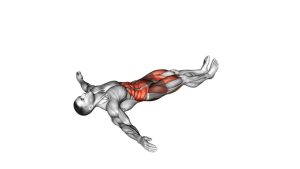
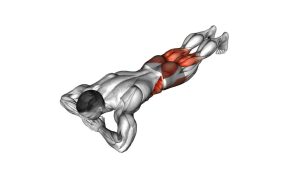
The sit-up works best when the movement starts from the abs instead of the neck, arms, or lower back. A clean rep begins with the body lying on the floor, knees bent, and feet stable. From there, the athlete curls the head, shoulders, and upper back upward before continuing into a full torso lift. At the top, the core stays engaged without collapsing forward. During the lowering phase, the spine returns to the floor with control rather than dropping quickly.
This exercise is useful for general core training, home workouts, bodyweight conditioning, and beginner abdominal strength programs. However, it should be performed with attention to tempo and posture. If the hip flexors take over too early, or if the lower back feels compressed, reduce the range of motion and use a slower pace.
Quick Overview
| Body Part | Abs |
|---|---|
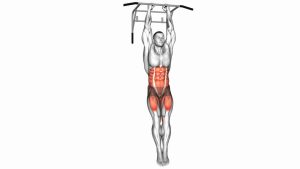
| Primary Muscle | Rectus abdominis |
| Secondary Muscle | Hip flexors, obliques, transverse abdominis, deep core stabilizers |
| Equipment | Bodyweight only; optional exercise mat or sit-up foot anchor |
| Difficulty | Beginner to intermediate, depending on tempo, range, and control |
Sets & Reps (By Goal)
- Beginner core strength: 2–3 sets × 8–12 reps with a slow, controlled tempo.
- Muscular endurance: 3–4 sets × 15–25 reps with steady breathing and clean form.
- Core control and technique: 2–4 sets × 6–10 reps using a 3-second lowering phase.
- Bodyweight conditioning: 3–5 rounds × 12–20 reps paired with planks, leg raises, or mountain climbers.
- Warm-up activation: 1–2 light sets × 8–10 reps before a full core workout.
Progression rule: Add reps first, then slow the lowering phase, then increase total sets. Do not progress by using faster momentum or pulling harder with the arms.
Setup / Starting Position
- Lie on your back: Start on a mat or comfortable floor surface with your spine relaxed.
- Bend your knees: Place both feet flat on the floor about hip-width apart.
- Set your foot position: Keep the feet stable. You may lightly anchor them if needed, but avoid pulling aggressively through the legs.
- Choose your arm position: Cross your arms over your chest, reach them forward, or place fingertips lightly near the sides of your head.
- Relax the neck: Keep the chin slightly tucked and avoid pulling the head forward.
- Brace gently: Tighten the abs as if preparing for a controlled curl from the floor.
For cleaner form, start with the arms crossed over the chest. This makes it easier to avoid neck pulling and keeps the focus on abdominal control.
Execution (Step-by-Step)
- Prepare the core: Take a small breath in, then gently brace your abs before moving. Keep your feet planted and your knees steady.
- Start with a curl: Lift your head and shoulders first. Think about peeling your upper back away from the floor one section at a time.
- Continue rising: Let the torso move upward in a smooth arc. Avoid throwing the arms, jerking the neck, or bouncing through the lower back.
- Reach the top position: Bring your chest closer toward your thighs while keeping the abs engaged. Do not collapse forward or relax completely at the top.
- Lower with control: Reverse the motion slowly. Let the lower back, mid-back, shoulders, and head return to the floor in a controlled sequence.
- Reset briefly: Pause for a moment at the bottom, keep tension in the core, and begin the next rep without bouncing.
Pro Tips & Common Mistakes
- Lead with the abs, not the head: The neck should follow the torso. Avoid pulling the chin toward the chest with your hands.
- Control the lowering phase: The descent builds strength. Do not drop quickly after reaching the top position.
- Keep the feet quiet: If your feet lift or slide, shorten the range or use a light foot anchor only for stability.
- Avoid momentum: Swinging the arms may help you sit up, but it reduces abdominal tension.
- Do not over-arch at the bottom: Keep the ribs controlled and avoid excessive lower-back extension before each rep.
- Breathe with the movement: Exhale as you rise. Inhale lightly as you lower back down.
- Use the right range: If full sit-ups irritate your lower back, switch to crunches, dead bugs, or partial sit-ups.
- Pair with anti-extension work: Planks, hollow holds, and dead bugs balance the spinal flexion pattern of sit-ups.
FAQ
What muscles do sit-ups work?
Sit-ups mainly train the rectus abdominis, which is the front abdominal muscle. They also involve the hip flexors, obliques, and deep core stabilizers, especially as the torso rises higher from the floor.
Are sit-ups good for beginners?
Yes, sit-ups can be beginner-friendly when performed with slow control and proper setup. Beginners should start with fewer reps and avoid pulling on the neck. If the full range feels too difficult, partial sit-ups or crunches are easier alternatives.
Should I anchor my feet during sit-ups?
Anchoring the feet can make the exercise more stable, but it may also increase hip flexor involvement. Use a light anchor only if it helps your control. Do not pull aggressively against the anchor to force yourself upward.
Why do I feel sit-ups in my hip flexors?
Hip flexor involvement is normal during full sit-ups because the movement includes trunk and hip flexion. However, if the hips dominate the entire exercise, slow the tempo, brace the abs before each rep, and avoid using momentum.
Are sit-ups bad for the lower back?
Sit-ups are not automatically bad, but they may bother some people if performed with poor control, excessive speed, or too much hip flexor tension. If you feel lower-back discomfort, reduce the range, slow down, or choose a more back-friendly core exercise.
How many sit-ups should I do?
Most people can start with 2–3 sets of 8–15 clean reps. Quality matters more than high numbers. Stop the set when you lose control, pull on the neck, or begin using momentum.
Recommended Equipment
- Exercise Mat — provides cushioning for the spine, hips, and head during floor-based core work.
- Sit-Up Foot Anchor — helps stabilize the feet when practicing controlled full sit-ups.
- Ab Mat — supports the lower back and can help guide a smoother abdominal curl.
- Medicine Ball — useful for advanced sit-up variations after bodyweight form is mastered.
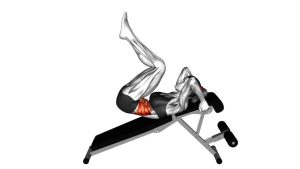
- Adjustable Decline Bench — allows harder decline sit-up variations for experienced trainees.
Tip: Start with a simple mat before adding equipment. The best sit-up progress comes from cleaner control, better breathing, and stronger eccentric lowering.