Alternate Lying Floor Leg Raise: Abs Form, Sets, Tips & FAQ
Learn the Alternate Lying Floor Leg Raise for stronger lower abs, hip control, and core stability with step-by-step form, sets, tips, FAQs, and gear.
Alternate Lying Floor Leg Raise
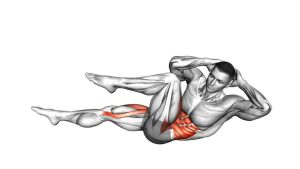
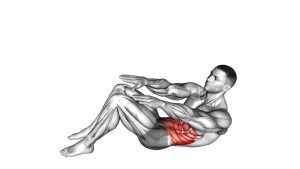
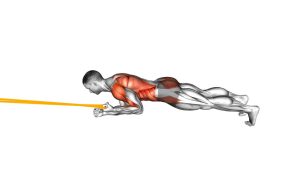
This exercise works best when the movement stays strict, steady, and controlled. Although the name may suggest an alternating pattern, the visible version shows both legs moving together. Therefore, this guide focuses on the demonstrated floor leg raise with a small hip lift at the top. The arms stay beside the body for support, while the abdominals help prevent the lower back from arching.
Because the legs create a long lever, the exercise can become challenging quickly. For that reason, beginners should use a smaller range of motion at first. As control improves, the legs can lower closer to the floor without losing abdominal tension. However, the lower back should remain controlled throughout the full repetition.
Quick Overview
| Body Part | Abs |
|---|---|
| Primary Muscle | Rectus abdominis, especially the lower abdominal region |
| Secondary Muscle | Hip flexors, deep core stabilizers, quadriceps, and pelvic stabilizers |
| Equipment | No equipment required; exercise mat optional |
| Difficulty | Beginner to Intermediate, depending on range of motion and tempo |
Sets & Reps (By Goal)
- Core control: 2–3 sets × 8–10 slow reps with a controlled lower phase.
- Lower-abs endurance: 3–4 sets × 10–15 reps with steady breathing and no leg drop.
- Strength focus: 3–5 sets × 6–10 reps using a slower 3–4 second descent.
- Beginner practice: 2 sets × 6–8 reps with a shorter lowering range.
- Finisher option: 2–3 sets × 12–20 reps only if form stays clean.
Progression rule: First improve control, then increase reps. After that, lower the legs closer to the floor or slow the descent. Do not progress by swinging the legs or forcing the hip lift.
Setup / Starting Position
- Lie on your back: Start flat on the floor with your head, upper back, hips, and arms supported.
- Place your arms beside you: Keep the arms extended along the sides with the palms pressing lightly into the floor.
- Extend your legs: Keep both legs straight and together, with the toes pointing upward or slightly forward.
- Create core tension: Brace the abdomen gently before the legs move. This helps keep the pelvis stable.
- Start from a low hover: If possible, hold the legs slightly above the floor. If that is too difficult, begin with the legs higher.
- Keep the neck relaxed: Let the head stay down. Avoid lifting the head or straining the jaw.
Setup tip: If your lower back arches immediately, bend the knees slightly or reduce how low the legs travel.
Execution (Step-by-Step)
- Brace before moving: Tighten the core lightly and keep your ribs controlled against the floor.
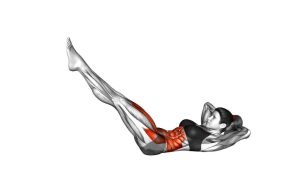
- Raise the legs together: Lift both straight legs upward in a smooth arc from the hips.
- Keep the movement steady: Avoid kicking or using momentum. Instead, let the abs and hip flexors control the lift.
- Reach the vertical position: Bring the legs close to 90 degrees while keeping them straight and together.
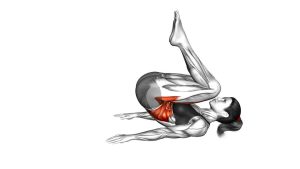
- Lift the hips slightly: At the top, curl the pelvis upward just enough to raise the hips from the floor.
- Pause briefly: Hold the top position for a moment without throwing the legs backward.
- Lower with control: Slowly return the hips to the floor first, then lower the legs toward the starting hover.
- Stop before your back arches: End the lowering phase at the point where you can still control your spine.
- Repeat cleanly: Begin the next rep only after the legs are stable and the core is reset.
Pro Tips & Common Mistakes
Pro Tips
- Use the arms for light support: Press the palms into the floor gently, but do not rely on the arms to throw the hips upward.
- Lower slower than you lift: A slow descent increases abdominal control and reduces momentum.
- Think “pelvis curls,” not “legs swing”: The hip lift should come from abdominal contraction, not from kicking the legs upward.
- Keep the legs together: This helps maintain symmetry and keeps the movement clean.
- Breathe with control: Exhale during the lift or hip curl, then inhale lightly during the lowering phase.
- Use a smaller range when needed: A shorter, cleaner rep is better than a long rep with back strain.
Common Mistakes
- Dropping the legs too fast: This reduces core tension and may pull the lower back into extension.
- Arching the lower back: If the back lifts during the lowering phase, the range is too large.
- Using momentum for the hip lift: Swinging the legs backward makes the movement less effective for the abs.
- Bending and straightening randomly: Keep the knee position consistent so the tension stays predictable.
- Lifting the head and neck: Keep the upper body relaxed unless you intentionally choose a harder variation.
- Rushing the top position: Pause briefly at the top so the hip lift stays controlled.
Muscle Focus & Training Benefits
The rectus abdominis works strongly during the leg raise and hip lift. The lower portion of the abdominal wall becomes especially challenged because the legs act like a long lever. Additionally, the hip flexors help lift the thighs, while the deep core muscles help stabilize the pelvis.
This exercise is useful for home workouts because it requires no machine, bench, or weight. Moreover, it teaches the body to control the pelvis while the legs move. That skill can support better performance in hanging leg raises, reverse crunches, hollow holds, and many athletic core drills.
FAQ
Is the Alternate Lying Floor Leg Raise good for lower abs?
Yes. It strongly challenges the lower abdominal region because the legs move as a long lever. However, the exercise works best when the hips lift slightly under control and the lower back does not arch.
Should my legs touch the floor between reps?
Not necessarily. A low hover keeps tension on the abs. However, beginners can lightly reset between reps if they cannot control the lower back yet.
Why does my lower back hurt during leg raises?
Lower-back discomfort often happens when the legs lower too far or too fast. Reduce the range, bend the knees slightly, or stop the descent before your back arches.
Is this exercise beginner-friendly?
It can be beginner-friendly when the range of motion is controlled. Beginners should start with fewer reps, a higher leg position, or a slight knee bend.
What is the difference between this and a reverse crunch?
A reverse crunch focuses more on curling the pelvis and lifting the hips. This movement includes a straight-leg raise first, then adds a small hip lift at the top.
How slow should I perform each rep?
A good tempo is about 2 seconds up, a brief pause at the top, and 3–4 seconds down. Slower reps usually improve control and reduce swinging.
Recommended Equipment (Optional)
- Exercise Mat — adds comfort and support for floor-based core training.
- Thick Yoga Mat — useful if your lower back or hips feel uncomfortable on hard floors.
- Adjustable Ankle Weights — optional progression for advanced users with excellent control.
- Core Sliders — helpful for related core variations and controlled abdominal training.
- Ab Workout Bench — useful for progressing to decline leg raises and harder core variations.
Equipment note: This exercise does not require equipment. Add resistance only when you can lower the legs slowly without back arching or hip discomfort.