V-Up Double Crunch: Form, Benefits, Sets, Tips & FAQ
Learn the V-Up Double Crunch for stronger abs and hip flexors. Get proper form, sets by goal, common mistakes, FAQs, and gear tips.
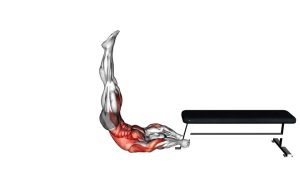
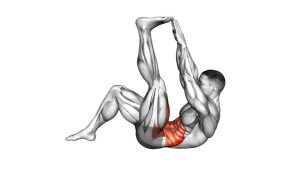
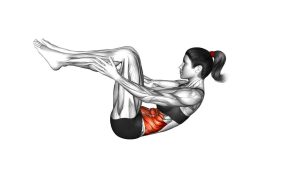
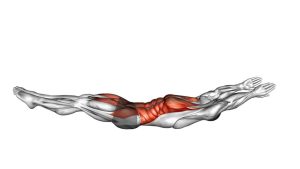
V-Up Double Crunch
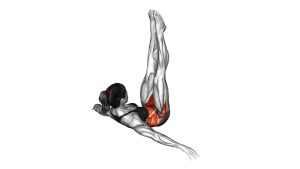
This exercise works best when the body folds upward with control instead of momentum. Begin fully extended on the floor, then lift the legs and upper body together until your body forms a strong V-like shape. Although the movement looks simple, it requires timing, abdominal strength, hip flexor control, and a stable lower back position. Therefore, focus on quality reps before adding speed or volume.
Quick Overview
| Body Part | Core |
|---|---|
| Primary Muscle | Rectus abdominis |
| Secondary Muscle | Hip flexors, transverse abdominis, obliques, quadriceps |
| Equipment | No equipment required; exercise mat optional |
| Difficulty | Intermediate to advanced, depending on leg control and range of motion |
Sets & Reps (By Goal)
- Core strength: 3–4 sets × 8–12 controlled reps, resting 60–90 seconds between sets.
- Muscle endurance: 2–4 sets × 12–18 reps with a steady tempo and clean breathing.
- Beginner progression: 2–3 sets × 6–10 reps using bent knees or a smaller range of motion.
- Advanced control: 3–5 sets × 8–15 reps with a slow 2–3 second lowering phase.
- Core finisher: 1–2 rounds × 20–30 seconds, stopping before form breaks down.
Progression rule: First improve control, then add reps. After that, increase difficulty by slowing the descent, extending the legs more fully, or pausing briefly at the top position.
Setup / Starting Position
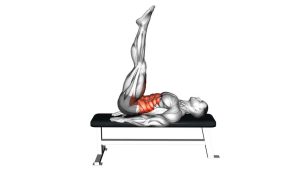
- Lie on your back: Start on the floor or on an exercise mat with your legs extended straight.
- Reach overhead: Extend both arms behind your head while keeping them close to the floor.
- Set your core: Brace your abs lightly and avoid letting the lower back over-arch before the first rep.
- Keep legs together: Align both legs and point the toes naturally without forcing the ankles.
- Prepare to fold: Keep the movement connected so the torso and legs rise at nearly the same time.
Tip: If the full straight-leg version feels too demanding, slightly bend the knees. This adjustment reduces leverage while still training the same core pattern.
Execution (Step-by-Step)
- Start fully extended: Keep your arms overhead and your legs straight on the floor.
- Brace before lifting: Tighten your abs gently so the lower back stays controlled as the movement begins.
- Lift both ends together: Raise your legs and upper body at the same time.
- Reach toward your feet: Bring your arms forward as your torso lifts, aiming toward the legs without yanking the neck.
- Form the V shape: At the top, keep the legs elevated and the upper back off the floor.
- Pause briefly: Hold the peak contraction for a moment while keeping the abs tight.
- Lower with control: Return your arms and legs toward the floor slowly instead of dropping down.
- Repeat smoothly: Begin the next rep only when your body is stable and your breathing is controlled.
Pro Tips & Common Mistakes
- Move both sides together: Lift the upper body and legs as one connected motion rather than two separate actions.
- Control the lowering phase: The descent builds strength, so avoid collapsing back to the floor.
- Keep the neck neutral: Look toward the legs without pulling the head aggressively forward.
- Avoid lower-back arching: If the back arches during the leg lift, bend the knees or shorten the rep.
- Do not chase toe touch: Reaching forward is useful, but clean abdominal control matters more than touching the feet.
- Exhale as you crunch: Breathing out during the lift helps the abs contract and reduces unnecessary tension.
- Use an exercise mat: A mat can make the floor contact more comfortable, especially during higher-volume sets.
- Scale before you fail: Switch to bent-knee double crunches when straight-leg reps become sloppy.
FAQ
What muscles does the V-Up Double Crunch work?
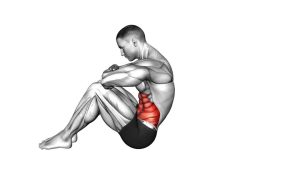
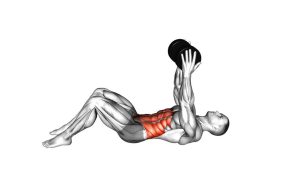
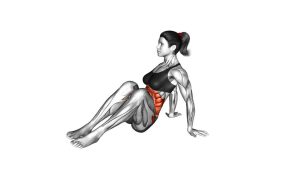
The V-Up Double Crunch mainly targets the rectus abdominis. In addition, the hip flexors assist during the leg raise, while the transverse abdominis and obliques help stabilize the trunk.
Is the V-Up Double Crunch good for lower abs?
Yes, it can strongly challenge the lower portion of the abdominal wall because the legs lift from the floor. However, the abs work as one connected muscle group, so you should think about bracing the entire core rather than isolating only the lower abs.
Why does my lower back hurt during this exercise?
Lower-back discomfort often happens when the legs lower too far, the core loses tension, or the hip flexors dominate the movement. Therefore, reduce the range, bend your knees, and lower more slowly. If pain continues, choose an easier core exercise.
Can beginners do the V-Up Double Crunch?
Beginners can practice a modified version. For example, keep the knees bent, perform a smaller crunch, or use a basic double crunch first. Once control improves, progress gradually toward straighter legs and a larger range of motion.
How fast should I perform each rep?
Use a controlled tempo. Lift smoothly, pause briefly at the top, then lower for about 2–3 seconds. This pace keeps tension on the abs and reduces momentum.
Should my feet touch the floor between reps?
You may lightly touch the floor if you need a reset. However, for more tension, stop just above the floor and begin the next rep without relaxing completely.
Recommended Equipment
- Exercise Mat — adds comfort and grip during floor-based core training.
- Thick Yoga Mat — useful if your spine or hips need extra cushioning during crunch movements.
- Adjustable Ankle Weights — optional advanced tool for increasing leg-raise difficulty after mastering bodyweight reps.
- Ab Mat — supports comfortable abdominal training and can help with floor-based core progressions.
- Core Sliders — useful for related core progressions such as body saws, mountain climbers, and plank tucks.
Tip: Equipment is optional for this exercise. Start with bodyweight control first, then add tools only when your reps stay smooth and pain-free.