Band Reverse Crunch: Form, Sets, Tips & FAQ
Learn the Band Reverse Crunch for stronger abs, better pelvic control, and core stability with step-by-step form, sets, tips, FAQs, and gear.
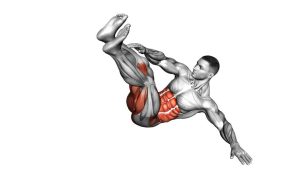
Band Reverse Crunch
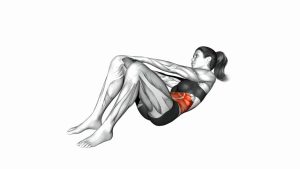
This exercise works best when the movement stays slow, compact, and controlled. First, the legs move from an extended position into a knee tuck. Then, the pelvis curls slightly off the floor at the top of the rep. Because the band adds resistance during the hardest part, your abs must work harder to control the upward curl and the return to the starting position.
Quick Overview
| Body Part | Core |
|---|---|
| Primary Muscle | Rectus abdominis, especially the lower abdominal region |
| Secondary Muscle | Hip flexors, deep core stabilizers, and obliques for control |
| Equipment | Resistance band and a secure low anchor point |
| Difficulty | Beginner to Intermediate |
Sets & Reps (By Goal)
- Core control: 2–3 sets × 8–10 reps with a slow 2–3 second lowering phase.
- Ab strength: 3–4 sets × 10–15 reps with moderate band tension.
- Beginner practice: 2 sets × 6–8 reps using a light band and shorter range of motion.
- Workout finisher: 2–3 sets × 12–20 controlled reps with clean form.
Progression rule: Add reps first. After that, increase band tension only if you can still curl the pelvis without swinging, arching the lower back, or rushing the descent.
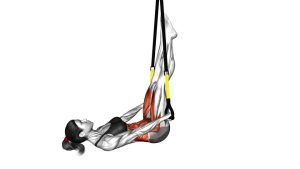
Setup / Starting Position
- Anchor the band low: Secure the resistance band behind you so it pulls from the direction of your feet.
- Attach the band to your feet: Place the band around both feet and make sure it sits securely before starting.
- Lie on your back: Keep your torso flat on the floor with your arms straight alongside your body.
- Set your legs: Extend your legs forward with light band tension already present.
- Brace gently: Press your arms into the floor for stability while keeping your ribs controlled.
Tip: The band should challenge the movement without pulling your body out of position. Therefore, start with light resistance before increasing difficulty.
Execution (Step-by-Step)
- Start long: Lie flat with your legs extended forward and your feet connected to the band.
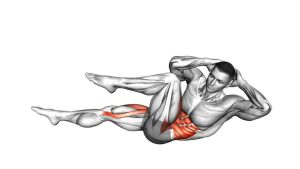
- Bend the knees: Pull your knees toward your torso while keeping the motion smooth.
- Curl the pelvis: As your knees come closer, lift your hips slightly off the floor by contracting your abs.
- Pause briefly: Hold the top position for a moment without jerking or kicking the legs.
- Lower with control: Slowly return the hips to the floor and extend the legs back out.
- Reset tension: Finish each rep with control before starting the next one.
Pro Tips & Common Mistakes
- Think “curl,” not “kick”: The abs should curl the pelvis upward instead of the legs swinging toward the chest.
- Use your arms for stability only: Press lightly into the floor, but do not push hard to lift the hips.
- Control the lowering phase: The band may pull your legs forward, so resist it slowly.
- Avoid excessive lower-back arching: Keep your ribs down and return to the start without losing core tension.
- Do not use too much band tension: Heavy resistance often causes swinging, hip flexor dominance, or poor pelvic control.
- Keep the reps consistent: Each repetition should follow the same path from extension to tuck to pelvic curl.
FAQ
What muscles does the Band Reverse Crunch work?
The Band Reverse Crunch mainly targets the rectus abdominis, especially the lower portion during the pelvic curl. Additionally, the hip flexors and deep core muscles help control the leg movement and stabilize the pelvis.
Is the Band Reverse Crunch good for lower abs?
Yes. Although the abs work as one muscle group, this exercise strongly emphasizes the lower-abdominal region because the pelvis curls upward against band tension.
Should my hips lift off the floor?
Yes, but only slightly. The small hip lift is the key reverse crunch action. However, it should come from abdominal contraction, not from kicking the legs or using momentum.
Why does the band make this exercise harder?
The band creates resistance as your legs move and your hips curl. Therefore, your abs must work harder near the top and must also control the return as the legs extend.
Can beginners do the Band Reverse Crunch?
Beginners can perform it with a light band and a shorter range of motion. However, if the band causes swinging or lower-back strain, practice a regular reverse crunch first.
Recommended Equipment
- Resistance Bands with Door Anchor — ideal for setting up band-resisted core exercises at home
- Loop Resistance Bands — useful for lighter band reverse crunch variations and core activation drills
- Thick Exercise Mat — provides comfort for the spine, hips, and arms during floor-based ab training
- Resistance Band Ankle Straps — helps secure band placement for lower-body and core resistance exercises
- Heavy-Duty Resistance Band Anchor — creates a safer, more stable anchor point for band-based training
Tip: Choose a band that lets you control every rep. If the band pulls your legs too quickly or changes your form, reduce resistance immediately.