Band Reverse Crunch: Form, Sets, Core Tips & FAQ
Learn the Band Reverse Crunch to strengthen lower abs with band resistance. Includes setup, steps, sets, mistakes, FAQs, and equipment.
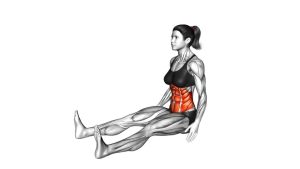
Band Reverse Crunch
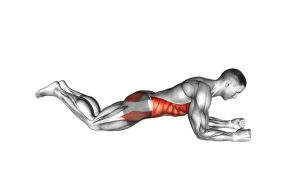
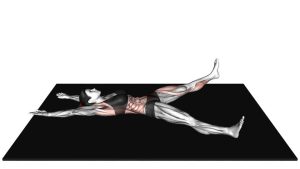
This exercise works best when the body stays quiet and the movement comes from the pelvis. First, the legs remain lifted with the knees bent. Then, the abs pull the pelvis off the floor in a short curl. Finally, the hips lower with control while the band tension decreases. As a result, the Band Reverse Crunch trains the lower core without needing heavy weights or large spinal motion.
Quick Overview
| Body Part | Core |
|---|---|
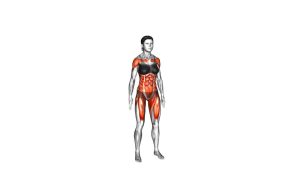
| Primary Muscle | Rectus abdominis, especially the lower-abdominal region |
| Secondary Muscle | Hip flexors, deep core stabilizers, and obliques for pelvic control |
| Equipment | Resistance band and exercise mat |
| Difficulty | Beginner to intermediate, depending on band tension and control |
Sets & Reps (By Goal)
- Core control: 2–3 sets × 8–10 reps with a slow curl and controlled return.
- Ab strength: 3–4 sets × 10–15 reps with steady band tension.
- Beginner technique: 2 sets × 6–8 reps with a light band and shorter range.
- Core finisher: 2–3 sets × 12–20 reps, only if form stays strict.
Progression rule: Add reps first, then increase band resistance. However, do not progress if your hips swing, your lower back arches, or your legs drop too far between reps.
Setup / Starting Position
- Lie on your back: Position yourself on a mat with your arms flat beside your body.
- Secure the band: Place the resistance band around the feet and anchor it behind the head or to a stable point.
- Lift the legs: Bend the knees and raise the legs so the feet stay off the floor.
- Brace the core: Lightly press the lower back toward the floor before the first rep.
- Set the arms: Keep the palms down for support, but avoid pushing hard with the hands.
The band should have light tension at the bottom. If it is completely slack, the resistance will not stay consistent.
Execution (Step-by-Step)
- Start with control: Keep the knees bent, feet elevated, and core braced.
- Pull the knees inward: Move the knees toward the chest while keeping the motion smooth.
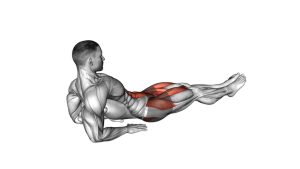
- Curl the pelvis: Lift the hips slightly off the floor by rolling the pelvis upward.
- Pause at the top: Squeeze the abs briefly without swinging the legs.
- Lower slowly: Return the hips to the floor with control as the knees move slightly away from the chest.
- Repeat without dropping: Keep the legs elevated and maintain light band tension before the next rep.
Pro Tips & Common Mistakes
- Think “pelvis curl,” not “leg swing”: The hips should lift because the abs curl the pelvis, not because the legs kick.
- Keep the band controlled: Do not let the band snap the legs back during the lowering phase.
- Use a light-to-moderate band: Too much tension can turn the exercise into a hip-flexor pull.
- Avoid excessive range: A small hip lift is enough when the abs stay engaged.
- Keep the upper body relaxed: The shoulders, neck, and jaw should not tense up.
- Control the bottom position: Do not let the legs drop low if that causes the lower back to arch.
- Breathe steadily: Exhale as the hips curl up, then inhale as you lower with control.
FAQ
What muscles does the Band Reverse Crunch work?
The Band Reverse Crunch mainly targets the rectus abdominis, with extra emphasis on lower-ab control. In addition, the hip flexors and deep core stabilizers assist as the knees move and the pelvis curls.
Is the Band Reverse Crunch good for lower abs?
Yes. Although the abs work as one muscle group, this exercise strongly challenges the lower portion of the movement pattern because the pelvis curls upward from the floor.
Why use a resistance band for reverse crunches?
The band adds tension as the knees move toward the chest. Therefore, it can make the exercise more challenging while still keeping the movement joint-friendly and floor-based.
Should my hips lift off the floor?
Yes, but only slightly. The goal is a controlled pelvic curl, not a large kick or roll. If your hips lift because of momentum, slow down and reduce the range.
What if I feel this mostly in my hip flexors?
Reduce the band tension, keep the knees bent, and focus on curling the pelvis instead of pulling with the thighs. Also, avoid lowering the legs too far between reps.
Recommended Equipment
- Resistance Loop Bands — useful for adding smooth band tension to reverse crunch variations
- Thick Exercise Mat — supports the spine and hips during floor-based core work
- Resistance Band Door Anchor — helps create a stable anchor point for banded floor exercises
- Resistance Band Ankle Straps — optional attachment for more secure lower-body band positioning
- Mini Resistance Bands Set — convenient for home core training, warm-ups, and accessory exercises
Choose a band that allows clean control. If the resistance makes your legs swing or your lower back arch, use a lighter option.