Side Plank Raise and Crunch: Form, Sets, Benefits & Core Tips
Learn the Side Plank Raise and Crunch to train obliques, core stability, and hip control with proper form, sets, tips, FAQs, and gear.
Side Plank Raise and Crunch
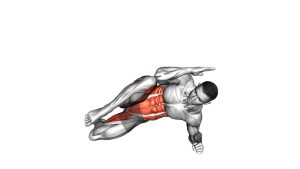
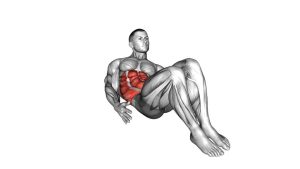
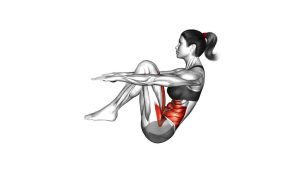
This exercise works best when every repetition is controlled. Start in a strong side plank position, lift the hips away from the floor, then crunch the top elbow and top knee toward each other. Your body should not swing, rotate, or drop between reps. Think of the movement as a precise core contraction, not a fast knee drive.
Quick Overview
| Body Part | Core |
|---|---|
| Primary Muscle | Obliques |
| Secondary Muscle | Rectus abdominis, transverse abdominis, glutes, hip flexors, shoulder stabilizers |
| Equipment | No equipment required; optional exercise mat |
| Difficulty | Intermediate |
Sets & Reps (By Goal)
- Core control: 2–3 sets × 6–8 reps per side with slow, clean movement.
- Oblique strength: 3–4 sets × 8–12 reps per side with a strong squeeze at the top.
- Core endurance: 2–3 sets × 12–15 reps per side using a steady, controlled tempo.
- Bodyweight circuit: 30–40 seconds per side, resting 30–60 seconds between rounds.
Progression rule: First improve balance and range of motion. Then add more reps, longer holds, or a slower tempo. Do not progress if your hips drop or your shoulder collapses.
Setup / Starting Position
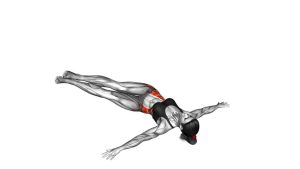
- Lie on your side: Place your lower forearm on the floor with the elbow under the shoulder.
- Stack your body: Keep your head, ribs, hips, knees, and ankles in one long line.
- Set your feet: Stack the feet for more challenge or stagger them slightly for better balance.
- Lift into side plank: Press through the forearm and lift the hips away from the floor.
- Place the top hand: Put the top hand lightly behind your head without pulling the neck.
- Brace the core: Tighten the abs and glutes so the torso does not rotate forward or backward.
Keep the support shoulder strong and away from the ear. Your elbow should stay directly under the shoulder to reduce unnecessary joint stress.
Execution (Step-by-Step)
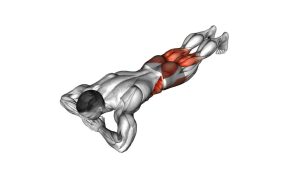
- Start in a strong side plank: Lift the hips and create a straight line from head to feet.
- Raise the hips slightly: Push the lower side of your waist upward to increase oblique tension.
- Begin the crunch: Bring your top elbow downward while lifting your top knee upward.
- Close the gap: Move the elbow and knee toward each other without yanking the head forward.
- Squeeze the obliques: Pause briefly when the elbow and knee are close together.
- Return with control: Extend the top leg and open the torso back to the side plank position.
- Reset your line: Keep the hips lifted before starting the next repetition.
Pro Tips & Common Mistakes
- Keep the elbow under the shoulder: This improves support and protects the shoulder joint.
- Do not pull on the neck: The hand behind the head is only a guide, not a lever.
- Avoid hip dropping: Keep the lower waist active throughout the full rep.
- Control the knee drive: Lift the top knee with the core, not with momentum.
- Do not rotate too much: The movement is a side crunch, not a full twisting crunch.
- Breathe during the rep: Exhale as elbow and knee come together, inhale as you return.
- Use a mat if needed: A soft surface can reduce elbow and forearm discomfort.
- Master the basic side plank first: If you cannot hold a stable side plank, this variation will be too advanced.
FAQ
What muscles does the Side Plank Raise and Crunch work?
The main target is the obliques. It also trains the rectus abdominis, transverse abdominis, glutes, hip flexors, and shoulder stabilizers because the body must stay lifted and controlled during the crunch.
Is the Side Plank Raise and Crunch good for abs?
Yes. It is especially effective for the side abs and deep core because it combines an isometric plank hold with a dynamic elbow-to-knee crunch.
Is this exercise beginner-friendly?
It is better for intermediate users. Beginners should first practice a basic side plank, side plank from knees, or side plank hip lift before adding the crunch.
Why do my hips drop during the movement?
Hip dropping usually means the obliques, glutes, or shoulder stabilizers are losing tension. Reduce the reps, slow the tempo, or perform the exercise from the knees until your control improves.
Should my elbow and knee touch every rep?
They do not have to touch. The goal is a strong controlled contraction. Focus on bringing them close together while keeping the side plank stable.
Can I do this exercise every day?
You can use it frequently if volume is low and your form stays clean, but most people do best with 2–4 sessions per week as part of a balanced core routine.
Recommended Equipment
- Exercise Mat — adds comfort for the elbow, forearm, hips, and knees during floor-based core work.
- Thick Yoga Mat — useful if you need extra cushioning for side plank variations.
- Core Sliders — helpful for advanced core progressions and controlled bodyweight training.
- Resistance Bands Set — useful for adding warm-up work for glutes, hips, and shoulder stability.
- Ab Wheel — a strong companion tool for building anti-extension core strength.
Choose equipment that supports better control, not harder movement. For this exercise, a comfortable mat is the most useful option because clean side plank positioning matters more than added resistance.