Lying Side Reverse Crunch: Form, Core Benefits, Sets & Tips
Learn the Lying Side Reverse Crunch to train your obliques and lower abs with controlled side-lying form, step-by-step cues, sets, mistakes, FAQs, and gear.
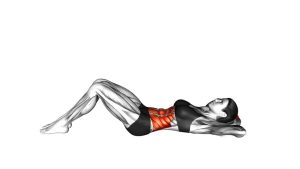
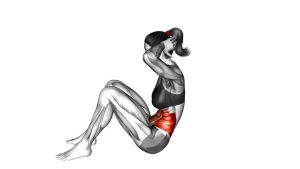
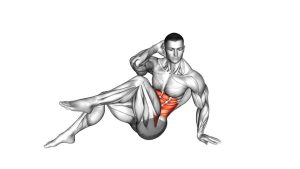
Lying Side Reverse Crunch
This exercise works best when the movement stays small, smooth, and controlled. Because the body is lying on one side, the goal is not to swing the legs or twist aggressively. Instead, keep the legs stacked, brace the midsection, and pull the knees and torso toward each other with steady abdominal tension.
Additionally, the return phase matters just as much as the crunch phase. Lower the legs and torso with control so the core stays active through the full repetition. If your hips roll backward, your shoulders collapse, or your legs kick upward with momentum, reduce the range and slow the tempo.
Quick Overview
| Body Part | Core |
|---|---|
| Primary Muscle | Obliques |
| Secondary Muscle | Rectus abdominis, lower abs, deep core stabilizers, hip flexors |
| Equipment | None; optional exercise mat for comfort |
| Difficulty | Beginner to intermediate, depending on control and range of motion |
Sets & Reps (By Goal)
- Core control: 2–3 sets × 8–10 reps per side with slow, clean movement
- Oblique endurance: 3–4 sets × 12–15 reps per side with steady breathing
- Beginner practice: 2 sets × 6–8 reps per side using a shorter range of motion
- Bodyweight ab workout: 3 sets × 10–12 reps per side after planks or basic crunches
Progression rule: First improve control, then add reps. After that, increase the top pause to 1–2 seconds before making the range larger.
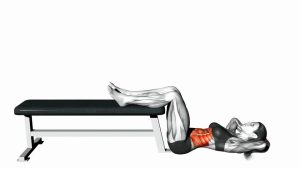
Setup / Starting Position
- Lie on one side: Stack your hips and shoulders so your body faces sideways.
- Bend the knees slightly: Keep the legs together and relaxed instead of locked straight.
- Support your upper body: Place the lower arm on the floor for balance and comfort.
- Brace gently: Tighten the midsection before the first rep without holding your breath.
- Keep the body compact: Stay balanced on your side before pulling the knees inward.
Tip: Use a mat if your hip or shoulder feels uncomfortable on the floor. Better comfort usually improves control and reduces unwanted rocking.
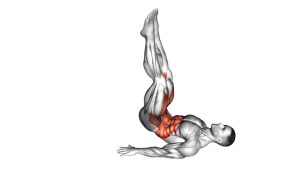
Execution (Step-by-Step)
- Start from the side-lying position: Keep the knees stacked, the torso stable, and the core lightly engaged.
- Draw the knees toward the torso: Curl the lower body inward as the knees move closer to the chest area.
- Curl the upper body slightly: Bring the torso subtly toward the legs without yanking the neck or rolling onto your back.
- Squeeze at the top: Pause briefly when the knees and torso are closest together.
- Return with control: Lower the legs and torso back to the starting position without dropping or swinging.
- Reset before the next rep: Re-stack the body and repeat with the same smooth path.
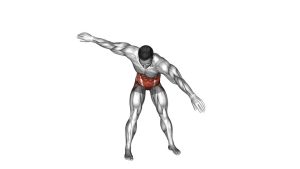
Pro Tips & Common Mistakes
- Keep the movement compact: A smaller controlled crunch is more effective than a large, loose swing.
- Avoid rolling backward: Keep your chest and hips mostly side-facing throughout the rep.
- Do not pull with the neck: Let the abs create the curl while the head follows naturally.
- Control the lowering phase: Lowering slowly keeps tension on the obliques and lower abs.
- Keep the knees together: Separating the legs often reduces control and changes the path.
- Breathe through each rep: Exhale as you crunch inward, then inhale as you return.
- Train both sides evenly: Complete the same number of reps on the left and right side.
FAQ
What muscles does the Lying Side Reverse Crunch work?
The exercise mainly targets the obliques. Additionally, the rectus abdominis, lower abs, deep core stabilizers, and hip flexors assist during the knee-tuck and curling motion.
Is the Lying Side Reverse Crunch good for beginners?
Yes, it can be beginner-friendly when performed with a small range of motion. However, beginners should move slowly, avoid swinging, and focus on clean control before adding more reps.
Should I feel this more in my abs or hips?
You should feel the exercise mostly through the side of the waist and front of the core. Some hip flexor involvement is normal, but if the hips dominate, shorten the range and curl more deliberately.
Why do I roll backward during the exercise?
Rolling usually happens when the rep is too fast or the range is too large. Therefore, reduce the motion, brace before lifting, and keep the shoulders and hips stacked as much as possible.
How many reps should I do per side?
Start with 8–10 controlled reps per side. Once your form stays stable, progress toward 12–15 reps per side or add a short pause at the top of each crunch.
Recommended Equipment (Optional)
- Exercise Mat — adds comfort for the hip, shoulder, and side body during floor-based core work
- Thick Yoga Mat — useful if you need extra cushioning while lying on your side
- Ab Workout Mat — supports repeated core sessions and helps keep floor exercises more comfortable
- Mini Resistance Bands — optional for progressing nearby core and hip stability exercises
- Non-Slip Workout Towel — helps manage sweat and keeps your setup cleaner during floor workouts
Tip: Equipment is optional for this exercise. However, a comfortable mat can help you stay focused on core control instead of pressure on the floor-side hip or shoulder.