Wall Sit March: Proper Form, Muscles Worked, Sets, Tips & FAQ
Learn how to do the Wall Sit March with proper form. Build quad endurance, hip control, core stability, and lower-body strength safely.
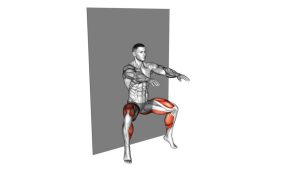
Wall Sit March
This exercise is excellent for building quad endurance, improving lower-body control, and teaching the body to stay stable while one leg moves. Unlike a regular wall sit, the marching action makes the supporting leg work harder and forces the core to resist rotation. It is useful for athletes, beginners, home workouts, knee-control drills, and anyone who wants a simple but effective bodyweight leg exercise.
Quick Overview
| Body Part | Legs |
|---|---|
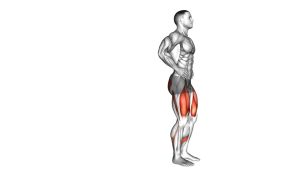
| Primary Muscle | Quadriceps |
| Secondary Muscle | Glutes, hip flexors, calves, core stabilizers |
| Equipment | Wall only; optional exercise mat or timer |
| Difficulty | Beginner to Intermediate |
Sets & Reps (By Goal)
- Beginner control: 2–3 sets × 10–16 total marches with 45–60 sec rest
- Quad endurance: 3–4 sets × 20–30 total marches with 45–75 sec rest
- Strength endurance: 3–5 sets × 30–45 seconds with controlled alternating marches
- Warm-up activation: 1–2 sets × 10–12 slow total marches
- Finisher: 2–3 rounds × 40–60 seconds, keeping clean form throughout
Progression rule: First improve control and time under tension. Then increase march reps, hold duration, or squat depth. Do not progress if your hips shift or your knees collapse inward.
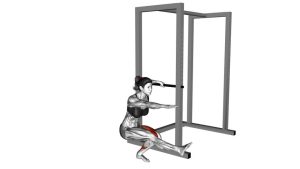
Setup / Starting Position
- Stand against a wall: Place your back flat against the wall with your feet slightly forward.
- Slide down into a wall sit: Bend your knees until your thighs are close to parallel with the floor.
- Set your feet: Keep feet about hip-width to shoulder-width apart and flat on the floor.
- Stack your joints: Keep knees roughly above ankles, not pushed far past the toes.
- Brace your core: Keep ribs controlled, pelvis stable, and lower back lightly supported by the wall.
- Position your arms: Extend arms forward or keep hands relaxed by your sides for balance.
Tip: Start higher than a full 90-degree wall sit if your knees or quads fatigue too quickly. A slightly higher position helps you learn the marching pattern with better control.
Execution (Step-by-Step)
- Hold the wall sit: Keep your back against the wall and maintain a steady squat position.
- Shift minimally: Keep your hips level before lifting one foot from the floor.
- Lift one foot: Raise one knee slightly like a small march while the opposite leg supports your body.
- Pause briefly: Hold the lifted foot for a moment without twisting, leaning, or standing up.
- Lower with control: Place the foot back down softly and regain equal pressure through both feet.
- Repeat on the other side: Alternate legs while keeping the same wall sit depth.
- Maintain rhythm: Move slowly and smoothly. The exercise should feel controlled, not rushed.
Pro Tips & Common Mistakes
- Keep the back connected to the wall: Do not lean forward or let the torso drift away.
- Use a small march: Lifting the knee too high often causes hip shifting or loss of balance.
- Control the supporting knee: Do not let the knee cave inward when the opposite foot lifts.
- Do not bounce: Stay in a fixed wall sit position instead of rising and dropping with each march.
- Keep both hips level: Avoid dropping the hip on the lifted-leg side.
- Breathe steadily: Do not hold your breath during the isometric hold.
- Use the wall for posture: The wall should help you stay upright, not support sloppy movement.
- Stop before form fails: Fatigue is normal, but knee collapse, shaking loss of control, or pain means the set is over.
FAQ
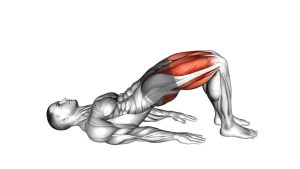
What muscles does the Wall Sit March work?
The Wall Sit March mainly works the quadriceps. It also trains the glutes, hip flexors, calves, and core stabilizers because your body must stay still while one leg lifts.
Is the Wall Sit March harder than a regular wall sit?
Yes. A regular wall sit is a static hold, while the Wall Sit March adds alternating single-leg support. Each march briefly increases the load on one leg and challenges balance, hip control, and core stability.
How low should I sit during the exercise?
Aim for thighs near parallel if you can keep good form. Beginners can stay higher to reduce knee stress and improve control before progressing to a deeper wall sit.
Should I feel this in my knees?
You may feel your quadriceps working around the knees, but you should not feel sharp knee pain. If your knees hurt, reduce the depth, check knee alignment, shorten the set, or return to a basic wall sit.
Can I use Wall Sit March for home workouts?
Yes. It is a strong bodyweight home exercise because it needs only a wall and very little space. It works well in leg circuits, warm-ups, finishers, and low-equipment strength routines.
How do I make the Wall Sit March harder?
Increase the hold time, slow the march tempo, lower the squat depth, add more total marches, or hold a light medicine ball. Progress only when your hips stay level and your knees stay aligned.
Recommended Equipment
- Exercise Mat — useful for comfort, warm-ups, and lower-body floor work before or after wall sits
- Interval Timer — helps track wall sit holds, march intervals, and rest periods accurately
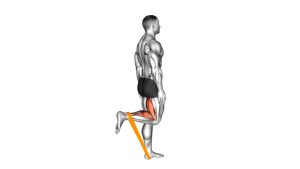
- Mini Resistance Bands — useful for glute activation and knee-alignment drills before leg training
- Medicine Ball — optional tool for advanced wall sit variations and core stability challenges
- Foam Roller — helpful for quad, glute, and hip recovery after lower-body endurance work
Tip: Equipment is optional. The Wall Sit March can be done effectively with only a wall, but simple tools can help with timing, comfort, warm-up quality, and progression.