Sled Hack Squat: Proper Form, Muscles Worked, Sets, Tips & FAQ
Learn the Sled Hack Squat for building stronger quads with controlled machine support. Includes form cues, sets, mistakes, FAQs, and equipment.
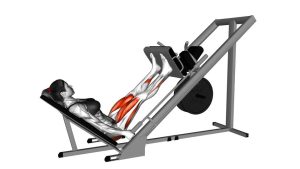
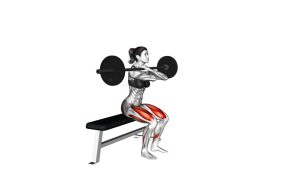
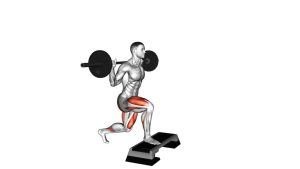
Sled Hack Squat
The Sled Hack Squat is most effective when performed with a controlled tempo, stable foot pressure, and consistent range of motion. It is especially useful for lifters who want to build the front thighs while keeping the torso supported. Compared with a free-weight squat, the hack squat places less demand on balance and spinal stabilization, but it can create strong loading through the knees and quadriceps. For that reason, clean setup and controlled depth are more important than simply adding heavy weight.
Quick Overview
| Body Part | Legs |
|---|---|
| Primary Muscle | Quadriceps |
| Secondary Muscle | Glutes, hamstrings, calves, hip stabilizers |
| Equipment | Sled hack squat machine |
| Difficulty | Beginner to intermediate, depending on load and depth |
Sets & Reps (By Goal)
- Muscle growth: 3–5 sets × 8–12 reps with controlled depth and steady tension.
- Strength focus: 4–6 sets × 4–8 reps using heavier loads while keeping full control.
- Beginner technique: 2–3 sets × 10–15 reps with light to moderate resistance.
- Quad pump / finisher: 2–4 sets × 12–20 reps with shorter rest and smooth tempo.
- Control and mobility practice: 2–3 sets × 6–10 reps using a slower lowering phase.
Progression rule: Increase load only when every rep reaches consistent depth, the knees track in line with the toes, and the lower back stays firmly supported against the pad.
Setup / Starting Position
- Step onto the platform: Place your back firmly against the pad and position your shoulders under the shoulder pads.
- Set your feet: Use a shoulder-width stance with the feet flat on the platform. A slightly higher foot position can reduce knee stress, while a lower position increases quad demand.
- Align the knees: Point the toes slightly outward if comfortable and make sure your knees can track in the same direction.
- Brace lightly: Keep the ribs down, core active, and lower back in contact with the pad.
- Grip the handles: Hold the side handles for stability without pulling your body out of position.
- Unlock the sled safely: Extend your legs slightly, release the safety handles, and prepare to lower under control.
Setup tip: Before adding heavy weight, test your stance with a few light reps. Your best stance allows the heels to stay down, the knees to track cleanly, and the hips to move without pinching.
Execution (Step-by-Step)
- Start tall on the sled: Keep your back against the pad, chest open, and knees slightly soft at the top.
- Begin the descent: Bend the knees and hips together as the sled travels down along the rails.
- Control the lowering phase: Lower slowly without letting the knees collapse inward or the heels lift from the platform.
- Reach your working depth: Descend until your thighs reach a strong, controlled squat depth without losing back contact.
- Pause briefly: Avoid bouncing at the bottom. Keep tension through the quads and feet.
- Drive upward: Push through the mid-foot and heel while extending the knees and hips together.
- Finish with control: Return near the top without aggressively locking the knees. Maintain tension before the next rep.
Pro Tips & Common Mistakes
- Keep your heels planted: Lifting the heels shifts pressure forward and can make the knees feel irritated.
- Do not bounce at the bottom: A hard rebound reduces control and can increase joint stress.
- Avoid locking out aggressively: Stop just short of a hard lockout to keep tension on the quads.
- Track knees with toes: Let the knees move in the same direction as your toes instead of collapsing inward.
- Use a controlled tempo: Lower for 2–3 seconds, pause briefly, then drive up with steady force.
- Do not overload too soon: Heavy weight with poor depth reduces the exercise’s value and raises injury risk.
- Adjust foot height based on comfort: Lower foot placement increases quad focus, while higher placement may feel better for some knees.
- Keep the back on the pad: Do not let the hips tuck excessively or the lower back peel away at the bottom.
FAQ
What muscles does the Sled Hack Squat work?
The Sled Hack Squat primarily targets the quadriceps. The glutes, hamstrings, calves, and hip stabilizers assist during the movement, especially as you descend deeper and drive the sled upward.
Is the Sled Hack Squat good for building quads?
Yes. The supported machine path allows you to focus strongly on knee extension, which makes the exercise highly effective for quad hypertrophy when performed with controlled depth and proper foot pressure.
Where should I place my feet on the hack squat platform?
A shoulder-width stance near the middle of the platform works well for most people. A lower stance usually increases quad emphasis, while a higher stance may involve more glutes and feel easier on the knees.
Should I lock my knees at the top?
Avoid aggressive lockout. Finish each rep with the legs nearly extended, but keep the knees slightly soft so tension stays on the muscles and the joints are not forced into a hard end position.
Is the Sled Hack Squat better than the leg press?
Neither is automatically better. The hack squat usually feels more squat-like and quad-focused, while the leg press may allow different foot positions and heavier loading. Both can be useful in a complete leg program.
Can beginners do the Sled Hack Squat?
Yes, beginners can use it if they start light, learn the safety handles, control the descent, and avoid forcing deep range before their knees, hips, and ankles are ready.
Recommended Equipment
- Weightlifting Knee Sleeves — helps provide warmth, light compression, and knee support during heavy leg training
- Flat-Sole Training Shoes — improves platform contact and helps maintain stable foot pressure
- Weightlifting Belt — useful for heavier sets when you need extra bracing support
- Gym Towel — keeps the back pad clean and improves comfort during machine work
- Training Log Book — helps track load, reps, depth consistency, and weekly progression
Tip: Equipment can support better training, but the main priorities are still proper stance, controlled depth, smooth tempo, and smart load progression.