Split Sprinter Low Lunge: Proper Form, Benefits & Tips
Learn the Split Sprinter Low Lunge with proper form, step-by-step instructions, muscles worked, sets and reps, common mistakes, and expert training tips.
Split Sprinter Low Lunge
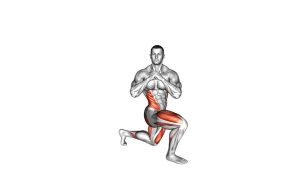
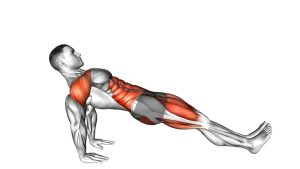
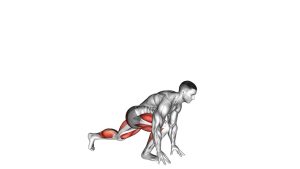
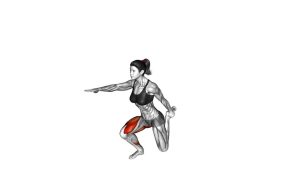
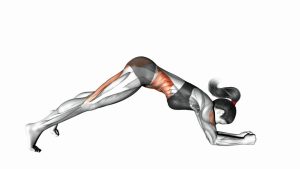
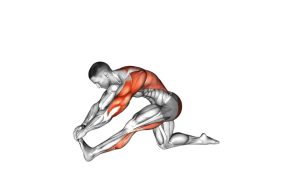
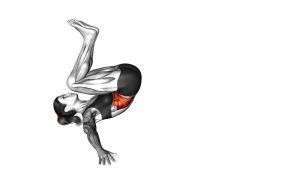
The Split Sprinter Low Lunge works best when each repetition follows a controlled movement pattern. Begin in a deep sprinter stance with one foot forward, the opposite leg extended backward, and both hands reaching toward the floor. Next, push through the forward leg while bringing the rear leg into a compact athletic stance. Finally, reverse the movement by stepping backward and lowering into the original sprinter position. Although the exercise resembles a running-start movement, it does not require an explosive jump. Instead, focus on smooth transitions and consistent balance.
Quick Overview
| Body Part | Legs |
|---|---|
| Primary Muscle | Quadriceps (rectus femoris, vastus lateralis, vastus medialis, vastus intermedius) and gluteus maximus |
| Secondary Muscle | Hamstrings, gluteus medius, hip adductors, gastrocnemius, soleus, and core stabilizers |
| Equipment | None required (optional: exercise mat, training shoes, yoga blocks, resistance bands) |
| Difficulty | Intermediate (requires dynamic balance, coordinated leg movement, and sufficient hip and ankle mobility) |
Sets & Reps (By Goal)
Recommended Training Volume
Training volume should reflect your experience, movement quality, and intended workout outcome. Because the Split Sprinter Low Lunge requires coordination and balance, begin with controlled repetitions before increasing speed or volume. The following recommendations are practical starting ranges rather than mandatory targets.
- Strength and muscular control: 3–4 sets × 6–10 reps per side. Use a deliberate upward drive and controlled descent, resting 60–90 seconds between sets.
- Muscle hypertrophy: 3–4 sets × 10–15 reps per side. Maintain consistent tension through the quadriceps and glutes, resting 45–75 seconds.
- Muscular endurance: 2–4 sets × 15–20 reps per side. Maintain a comfortable rhythm and rest approximately 30–60 seconds between sets.
- Mobility and movement preparation: 2–3 sets × 6–10 controlled reps per side. Emphasize comfortable hip movement, ankle mobility, and smooth transitions.
- Rehabilitation-style movement practice: 1–3 sets × 5–8 slow reps per side. Use a reduced range and external support when appropriate, following professional guidance if recovering from an injury.
Progression and Intensity
Initially, prioritize consistent foot placement and a stable front knee. Once the movement feels comfortable, increase repetitions gradually or reduce unnecessary pauses. Additionally, you may increase the lunge depth if your mobility and joint comfort allow it. However, avoid adding speed until you can control both the upward and downward phases. For balanced training, perform an appropriate number of repetitions with each leg forward.
Progression rule: Master controlled bodyweight repetitions first. Increase total volume gradually, and maintain consistent technique before progressing to faster or more demanding variations.
Setup / Starting Position
Establish the Sprinter Stance
Proper positioning helps create a stable foundation for the entire movement. Therefore, take time to establish your stance before beginning the upward transition.
- Choose a stable surface: Stand on a flat, nonslip floor with enough space to extend one leg backward.
- Step into a split stance: Position one foot forward and extend the opposite leg behind your body.
- Bend the front knee: Lower your hips until the forward thigh approaches a comfortable deep-lunge position.
- Position the rear leg: Keep the rear leg extended backward with the knee approaching the floor without forcing contact.
- Lean the torso forward: Incline your upper body naturally over the front thigh while maintaining a controlled spinal position.
- Reach toward the floor: Position both hands near the front foot. Use your fingertips for light balance assistance if necessary.
- Brace the abdomen: Engage the core gently while keeping the shoulders relaxed and neck aligned.
Check Your Starting Alignment
Before moving, confirm that your front foot remains stable and your knee tracks in the same general direction as your toes. Meanwhile, keep the rear hip comfortable rather than forcing an extreme stretch. Your bodyweight should feel controlled through the lower body instead of resting heavily on your hands. If the floor feels too far away, use yoga blocks or maintain your hands above the ground.
Setup tip: A slightly shorter split stance may improve balance when learning the movement. However, maintain enough space between the feet to lower comfortably without crowding the knees.
Execution (Step-by-Step)
Phase 1: Initiate the Upward Drive
The movement begins from the low sprinter stance shown in the exercise demonstration. Rather than immediately jumping upward, initiate the transition through controlled extension of the forward leg.
- Set your starting position: Establish the deep split stance with the torso inclined forward and the hands reaching toward the floor.
- Press through the front foot: Drive into the floor while extending the front knee and hip.
- Lift the torso: Allow your upper body to rise naturally as the hips move upward.
- Bring the rear leg forward: Move the back foot toward the front leg while maintaining balance.
Phase 2: Reach the Compact Athletic Position
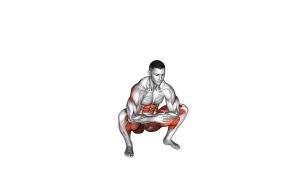
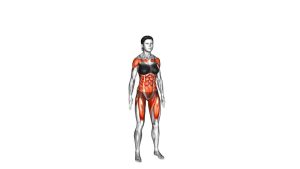
As the rear leg travels forward, the body transitions into a higher athletic stance. Importantly, the knees remain slightly bent rather than locking into a fully upright position. This compact position provides a controlled transition before returning to the low lunge.
- Bring the feet closer together: Move into a compact stance while keeping the lower body active.
- Maintain a slight crouch: Keep the knees softly flexed and the hips positioned for the return movement.
- Control your balance: Avoid excessive side-to-side movement or unnecessary upper-body swinging.
Phase 3: Return to the Low Sprinter Lunge
After reaching the compact position, reverse the movement by sending the rear leg backward. At the same time, lower the hips and allow the torso to incline forward. Consequently, the body returns to the original low sprinter stance.
- Step the rear leg backward: Extend the leg behind your body while maintaining control through the front foot.
- Lower the hips: Bend the forward knee and descend into a comfortable deep-lunge position.
- Reach toward the floor: Bring the hands down near the forward foot without collapsing the torso.
- Complete the repetition: Return to the starting sprinter stance and prepare for the next upward drive.
Breathing and Movement Rhythm
Exhale naturally during the upward drive and inhale as you return to the low position. Additionally, maintain gentle abdominal tension to support a stable trunk. Although faster repetitions may increase cardiovascular demand, controlled movement should remain the priority. If balance becomes inconsistent, slow down and reset your stance between repetitions.
Pro Tips & Common Mistakes
Pro Tips for Better Performance
Effective repetitions depend on coordinated hip movement, stable foot placement, and controlled transitions. Therefore, focus on movement quality before increasing training intensity.
- Drive through the front foot: Maintain stable contact with the floor while extending the knee and hip.
- Keep the front knee aligned: Allow the knee to travel naturally in the direction of the toes.
- Maintain a controlled torso: A forward lean is appropriate, but avoid excessive spinal rounding.
- Use a comfortable lunge depth: Lower only as far as your mobility and joint comfort permit.
- Move the rear leg smoothly: Avoid dragging the foot or swinging it forward without control.
- Keep the shoulders relaxed: Allow the arms to follow the movement without unnecessary tension.
- Train both lead-leg positions: Complete an appropriate number of repetitions on each side.
- Progress gradually: Increase repetitions or movement speed only after mastering the basic pattern.
Common Mistakes to Avoid
Several technique errors can reduce stability and make the exercise unnecessarily difficult. Fortunately, most can be corrected by reducing speed and adjusting the stance.
- Allowing the front knee to collapse inward: This can compromise lower-body alignment. Instead, keep the knee tracking comfortably with the foot.
- Rushing the upward transition: Excessive speed can reduce balance. Therefore, extend the front leg smoothly before bringing the rear foot forward.
- Dropping into the bottom position: An uncontrolled descent may increase joint stress. Lower gradually and maintain muscular control.
- Forcing excessive lunge depth: Deep positioning is not necessary when mobility is limited. Instead, use a comfortable range.
- Rounding the lower back excessively: Avoid collapsing through the trunk. Maintain a stable spine while allowing a natural forward hip hinge.
- Placing too much weight on the hands: The hands should mainly assist positioning. Keep the legs responsible for the primary upward drive.
- Turning the movement into a jump: A powerful leap is not required. Focus instead on controlled leg extension and accurate foot repositioning.
FAQ
Exercise Technique and Muscle Activation
What muscles does the Split Sprinter Low Lunge work?
The exercise primarily targets the quadriceps and gluteus maximus. Additionally, the hamstrings, calves, hip stabilizers, and abdominal muscles contribute to movement control. Because the exercise includes dynamic repositioning, it also challenges lower-body coordination and balance.
Is the Split Sprinter Low Lunge a strength or mobility exercise?
It can support both muscular conditioning and dynamic mobility. The upward drive challenges the legs, while the low lunge requires coordinated hip, knee, and ankle movement. However, bodyweight resistance may be insufficient for advanced maximal-strength development without additional progression.
Should I jump during the upward phase?
No jump is required for the demonstrated Split Sprinter Low Lunge. Instead, drive upward through the front leg and bring the rear foot forward into a compact athletic position. A jumping variation would introduce additional impact and should be treated as a separate progression.
Training Frequency and Progression
How many repetitions should beginners perform?
Beginners can start with 1–2 sets of 5–8 controlled repetitions per side using a shorter stance. Additionally, a slower stepping variation can help develop confidence and balance. Once technique improves, gradually increase the number of repetitions or sets.
Should I alternate legs after every repetition?
Alternating legs is optional rather than a requirement of the demonstrated movement. You can complete a set with one leg forward before switching sides. Alternatively, alternate lead legs between repetitions if you can maintain consistent foot placement and balance.
Can I include this exercise in a warm-up?
Yes. Controlled repetitions can help prepare the lower body for dynamic training. For example, perform 1–2 light sets before squats, lunges, or athletic drills. However, avoid exhausting the legs before demanding strength or power exercises.
Safety, Modifications, and Exercise Benefits
Is the Split Sprinter Low Lunge suitable for knee discomfort?
Suitability depends on the cause and severity of the discomfort. A shorter stance and reduced lunge depth may make the exercise more manageable. Nevertheless, persistent or sharp knee pain requires professional assessment rather than continued forced repetitions.
What if I cannot reach the floor?
Reaching the floor is not essential. Instead, reduce the depth or place yoga blocks beside the front foot. As mobility improves, you may gradually lower the hands while maintaining comfortable spinal and hip positioning.
Does this exercise improve athletic performance?
The movement can help develop coordination, unilateral leg control, and dynamic balance. Additionally, it provides practice transitioning between low and higher athletic positions. However, improved performance depends on the complete training program, progressive overload, and sport-specific practice.
How often can I perform Split Sprinter Low Lunges?
Light mobility-focused repetitions may fit into several training sessions each week. For more demanding muscular conditioning, start with approximately 2–3 weekly sessions. Furthermore, adjust frequency according to soreness, training intensity, and overall lower-body recovery.
Recommended Equipment (Optional)
The Split Sprinter Low Lunge requires no equipment, making it suitable for home workouts, gym sessions, and bodyweight training routines. Nevertheless, a few optional accessories can improve comfort, stability, and exercise progression. The following Amazon product categories are relevant to this movement.
- Non-Slip Exercise Mat — provides a stable training surface and additional cushioning when practicing deep lunge positions.
- High-Density Yoga Blocks — offer elevated hand support when reaching the floor is difficult, helping maintain comfortable positioning.
- Stable Cross-Training Shoes — provide traction and a secure base for controlled lunges and dynamic lower-body transitions.
- Mini Resistance Loop Bands — useful for complementary glute activation, lateral walks, and hip-stability exercises.
- Foam Roller for Lower-Body Recovery — may help temporarily reduce perceived muscle tightness and support comfortable movement during warm-up or recovery routines.
How to Choose Useful Training Accessories
Start with equipment that addresses a specific training need. For example, yoga blocks can make the low position more accessible, while stable footwear may improve confidence during transitions. Additionally, resistance bands can complement your lower-body routine through separate hip-strengthening drills. However, none of these products is necessary to perform the exercise correctly.
Equipment tip: Prioritize a stable surface and comfortable movement before purchasing accessories. Amazon links lead to product searches, so compare specifications, suitability, and customer feedback before choosing an item.