Lunge with Jump: Proper Form, Muscles Worked, Sets & Tips
Learn the Lunge with Jump with precise reverse-lunge form, explosive knee drive, safer landings, sets by goal, common mistakes, and beginner-friendly tips.
Lunge with Jump
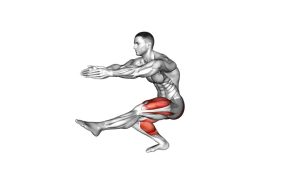
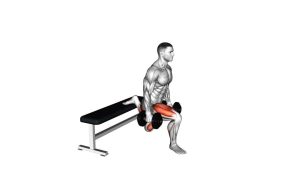
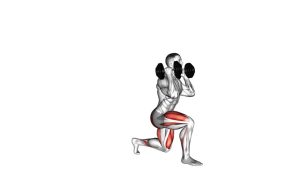
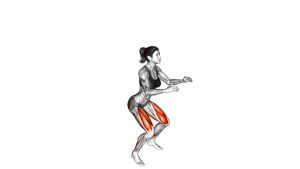
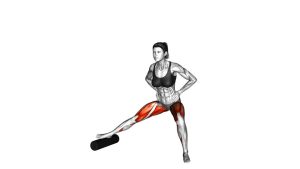
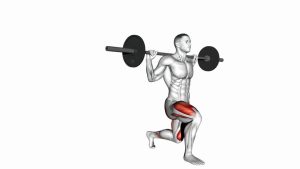
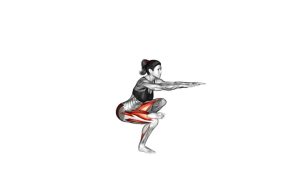
The Lunge with Jump builds on a traditional reverse lunge by adding an explosive upward movement. First, the athlete steps backward and lowers into a split stance. Next, the front leg produces force while the rear leg drives forward. As a result, the body rises into a brief hop before returning to a balanced standing position.
Although the movement looks simple, accurate timing matters. The front leg provides most of the propulsion, while the core and hip stabilizers control the torso and pelvis. Additionally, coordinated arm movement can improve balance and help generate upward momentum. Therefore, prioritize a clean lunge, controlled knee drive, and quiet landing before increasing speed.
Quick Overview
| Body Part | Legs |
|---|---|
| Primary Muscle | Quadriceps (rectus femoris, vastus lateralis, vastus medialis, vastus intermedius) and gluteus maximus |
| Secondary Muscle | Hamstrings, gastrocnemius, soleus, gluteus medius, hip adductors, and core stabilizers |
| Equipment | None required; bodyweight exercise. Supportive training shoes are optional. |
| Difficulty | Intermediate — requires controlled lunges, single-leg balance, and basic landing ability |
Sets & Reps (By Goal)
Recommended Training Volume
Training volume should match your experience and intended goal. Because this movement involves jumping, begin with fewer high-quality repetitions instead of chasing fatigue. Additionally, allow enough recovery to maintain consistent landing mechanics.
- Explosive power: Perform 3–5 sets of 3–5 reps per leg. Use maximum controlled speed during the upward drive, then rest 90–150 seconds between sets.
- Lower-body strength and control: Complete 3–4 sets of 5–8 reps per leg. Lower with control, drive upward strongly, and rest 60–90 seconds between sets.
- Muscular endurance: Perform 2–3 sets of 8–10 reps per leg. Maintain a comfortable jumping height and take 60–90 seconds of recovery.
- Balance and coordination: Complete 2–3 sets of 5–6 reps per leg. After each landing, briefly stabilize your body before beginning another repetition.
- Beginner preparation: Practice 2–3 sets of 6–10 reverse lunges per leg without jumping. Next, introduce a standing knee drive before progressing to a small hop.
Progression and Recovery
Start with manageable repetitions and a low jumping height. Once your balance improves, increase the quality and speed of the upward drive. However, do not increase volume and jumping intensity simultaneously.
Progression rule: Master the reverse lunge first, then add a controlled knee drive and a small hop. Progress toward greater explosiveness only when knee alignment, balance, and landing control remain consistent. For demanding sessions, allow sufficient recovery between lower-body plyometric workouts.
Setup / Starting Position
Establish a Stable Starting Stance
- Choose a suitable surface: Stand on a firm, level, non-slip training area. Remove nearby obstacles and allow enough space for the backward step and upward movement.
- Position your feet: Begin standing upright with your feet approximately hip-width apart. Meanwhile, distribute your body weight evenly and keep your knees relaxed.
- Align your upper body: Lift your chest naturally while maintaining a neutral spine. Keep your head aligned with your torso and look straight ahead.
- Engage your core: Gently brace your abdominal muscles without holding your breath. Consequently, your torso will be better prepared to resist unwanted rotation during the lunge.
- Prepare your arms: Relax your shoulders and bend your elbows slightly. As the exercise develops, allow your arms to move naturally in a running-style pattern.
- Choose the stepping leg: Select one leg to move backward while keeping the opposite foot firmly planted. Initially, use a moderate backward step rather than an excessively long stride.
- Check your balance: Keep your hips facing forward and your weight centered over the supporting leg. Before adding speed, confirm that you can perform a controlled reverse lunge.
Setup tip: A slightly wider split stance can improve side-to-side stability compared with placing both feet on one narrow line. Therefore, prioritize natural foot spacing before attempting explosive repetitions.
Execution (Step-by-Step)
Reverse Lunge and Explosive Knee Drive
- Begin standing tall: Start with both feet beneath your hips, your chest lifted, and your core engaged. Keep your gaze forward and your shoulders relaxed.
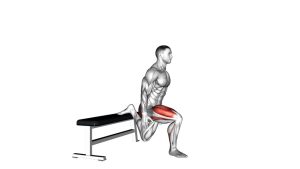
- Step backward: Move one leg behind your body into a split stance. Meanwhile, keep the front foot planted and allow the rear heel to rise naturally.
- Lower into the lunge: Bend both knees while lowering your hips toward the floor. Aim for a comfortable depth with the front knee tracking in the direction of the toes. Avoid crashing the rear knee onto the ground.
- Maintain body alignment: Keep your torso mostly upright and your hips facing forward. Additionally, brace your core to limit excessive side bending or trunk rotation.
- Prepare the upward drive: Press through the front foot and begin extending the front hip and knee. Simultaneously, move your arms naturally to assist coordination and upward momentum.
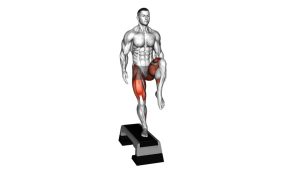
- Drive the rear knee forward: Bring the trailing leg forward and upward as your body rises from the lunge. Consequently, the former rear knee moves toward hip height while the supporting leg produces explosive force.
- Perform a small jump: Extend the supporting ankle, knee, and hip to create a brief upward hop. Keep your torso controlled rather than leaning backward or twisting. Jumping height should remain secondary to balance and technique.
- Land with control: Return the supporting foot softly to the ground, allowing the knee and hip to bend naturally. Avoid landing with a locked knee or allowing the knee to collapse inward.
- Return to standing: Lower the lifted leg and bring your feet back underneath your body. Afterward, regain a balanced upright stance before starting the next repetition.
- Repeat on the opposite side: Perform the movement with the other leg when you are stable. Alternatively, complete your planned repetitions on one side before switching.
Landing and Movement Control
The entire movement should follow a smooth sequence: reverse lunge, upward drive, knee lift, small hop, and controlled return. Although the upward phase is explosive, the landing should remain quiet and balanced. Therefore, reduce jumping height whenever your knee alignment or posture becomes inconsistent.
Pro Tips & Common Mistakes
Improve Power and Technique
- Master the basic reverse lunge: Learn to lower and rise smoothly before jumping. As a result, you can develop a stronger foundation for explosive movement.
- Push through the supporting foot: Generate force through a stable front foot. Then extend the ankle, knee, and hip together during the upward drive.
- Keep the front knee aligned: Allow the knee to travel naturally in the same direction as your toes. However, avoid uncontrolled inward collapse during takeoff or landing.
- Coordinate the arm movement: Use a natural running-style arm action to support rhythm and balance. Meanwhile, avoid swinging the arms wildly or twisting your torso.
- Control your lunge depth: Lower only as far as you can maintain a stable pelvis and comfortable knee position. Excessive depth is unnecessary if it compromises the upward drive.
- Keep the torso stable: Avoid leaning excessively forward or backward. Instead, maintain a controlled trunk position while allowing a small, natural forward inclination.
- Use a soft landing: Absorb impact through your ankle, knee, and hip. Consequently, the landing becomes more controlled than a stiff, straight-legged touchdown.
- Avoid excessive jumping height: Focus on controlled explosiveness instead of jumping as high as possible. Moreover, a smaller hop often makes it easier to maintain consistent technique.
- Do not rush repetitions: Reset your stance after each landing. If balance deteriorates, pause briefly rather than forcing the next repetition.
- Breathe naturally: Inhale during the lowering phase and exhale during the upward drive. Additionally, avoid prolonged breath-holding during repeated jumps.
Common Mistakes to Avoid
Common errors include unstable foot placement, excessive forward leaning, collapsing knees, and uncontrolled landings. Furthermore, some athletes push too aggressively from the rear foot instead of driving through the supporting leg.
If your technique deteriorates, reduce the jump height and slow the movement. Once your balance returns, gradually restore a more explosive upward drive. Ultimately, consistent movement quality matters more than completing extra repetitions.
FAQ
Technique and Muscles Worked
What muscles does the Lunge with Jump work?
The Lunge with Jump primarily trains the quadriceps and gluteus maximus. These muscles help extend the knee and hip during the explosive upward drive. Additionally, the calves contribute to propulsion, while the hamstrings, hip stabilizers, and abdominal muscles support balance. As a result, the movement challenges several lower-body muscle groups simultaneously.
Is the Lunge with Jump the same as an alternating jumping lunge?
No. In this demonstrated variation, the athlete steps backward into a reverse lunge, drives the rear knee forward, performs a small hop, and returns to standing. In contrast, an alternating jumping lunge involves switching leg positions while airborne and landing in the opposite split stance. Therefore, the two exercises have different movement sequences and coordination demands.
Should I feel the exercise more in my quadriceps or glutes?
Both muscle groups should contribute to the upward movement. The quadriceps help extend the supporting knee, while the gluteus maximus extends the hip. However, muscle emphasis varies with individual anatomy, lunge depth, and technique. Rather than forcing one muscle to dominate, maintain balanced movement and stable alignment.
Why do I lose balance during the jumping phase?
Balance problems may result from excessive jumping height, unstable foot placement, poor trunk control, or rushing the knee drive. Additionally, fatigue can make landing mechanics less consistent. To improve control, reduce the hop and pause between repetitions. Then gradually increase speed as stability improves.
Training Frequency, Progression and Safety
Is the Lunge with Jump suitable for beginners?
The jumping variation is generally better suited to people who already perform lunges confidently. Nevertheless, beginners can prepare by practicing regular reverse lunges and standing knee drives. Afterward, a small, controlled hop may be introduced. If landing mechanics remain unstable, continue using the non-jumping variation.
How often should I perform the Lunge with Jump?
For many healthy, appropriately conditioned adults, one or two weekly sessions can provide a starting point for plyometric practice. However, the ideal frequency depends on training experience, recovery, and total lower-body workload. Allow sufficient recovery between demanding sessions. Furthermore, reduce volume if soreness or fatigue affects your landing technique.
Can the Lunge with Jump improve explosive power?
Yes. The movement combines rapid lower-body force production with a coordinated knee drive. Consequently, it can contribute to developing explosive leg power when programmed appropriately. However, improvements depend on consistent technique, progressive training, and adequate recovery. For power-focused sessions, prioritize short sets of fast, controlled repetitions.
Should I alternate legs after every repetition?
Either approach can work. You may complete several controlled repetitions on one leg before switching sides. Alternatively, return to standing and change legs after each repetition. Importantly, keep the change of legs separate from the airborne phase in this variation. This approach matches the demonstrated movement without requiring a midair lunge switch.
Can I perform this exercise if I have knee pain?
Jumping movements may aggravate certain knee or ankle conditions because they require impact absorption and dynamic joint control. Therefore, avoid pushing through sharp or worsening pain. A regular reverse lunge or other lower-impact movement may be more appropriate. If you have an injury or persistent symptoms, seek guidance from a qualified healthcare professional.
Recommended Equipment
The Lunge with Jump requires no additional equipment. However, the following optional products can support preparation, conditioning, technique practice, and recovery. Choose equipment according to your training needs.
- Non-Slip Cross-Training Shoes — provide traction and support for lunges, explosive knee drives, and controlled landings
- Resistance Loop Bands Set — useful for glute activation, hip stability drills, and lower-body warm-up exercises
- Non-Slip Exercise Mat — suitable for floor-based warm-ups, stretching, and mobility work before or after training; perform the jumps on a firm, stable surface
- Fitness Interval Timer — helps organize work periods, recovery intervals, and structured lower-body conditioning sessions
- High-Density Foam Roller — useful for optional quadriceps, glute, and calf self-massage after demanding workouts
Equipment tip: Supportive shoes and a firm, non-slip training surface are more important than additional resistance. First, develop consistent lunge mechanics and controlled landings. Then consider optional training accessories that complement your overall workout routine.