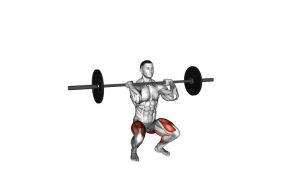
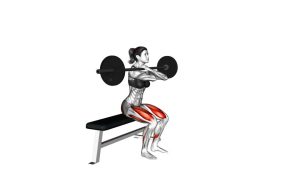
Barbell Clean-Grip Front Squat: Proper Form & Muscles
Learn the Barbell Clean-Grip Front Squat with step-by-step form, front-rack setup, muscles worked, sets and reps, common mistakes, expert tips, and FAQs.
Barbell Clean-Grip Front Squat
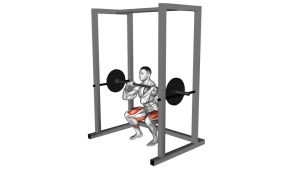
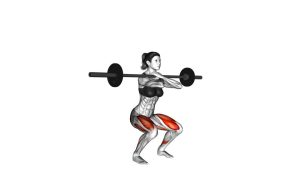
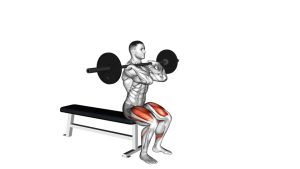
The Barbell Clean-Grip Front Squat is particularly effective for developing lower-body strength, quadriceps size, and controlled squat mechanics. Because the load sits in front of the torso, the exercise encourages a relatively upright trunk position. Additionally, the front-rack arrangement increases the demands placed on the abdominal muscles and upper-back stabilizers.
However, successful execution requires more than simply bending the knees. The lifter must coordinate hip flexion, knee flexion, ankle mobility, and trunk stability. Therefore, beginners should first establish a comfortable front-rack position and consistent squat depth before increasing resistance.
Quick Overview
| Body Part | Legs |
|---|---|
| Primary Muscle | Quadriceps (Rectus femoris, Vastus lateralis, Vastus medialis, and Vastus intermedius) |
| Secondary Muscle | Gluteus maximus, adductor magnus, spinal erectors, abdominal muscles, obliques, and upper-back stabilizers |
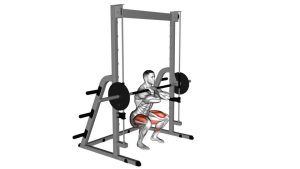
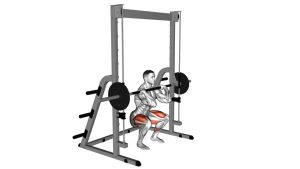
| Equipment | Barbell, weight plates, and power rack with safety bars |
| Difficulty | Intermediate — requires front-rack mobility, coordinated squat mechanics, and trunk stability |
Sets & Reps (By Goal)
Choose Your Training Goal
Training volume should reflect your experience, available mobility, and current strength. Additionally, prioritize consistent technique before increasing the barbell load.
- Strength development: Perform 3–5 sets × 3–5 reps using challenging but controlled resistance. Rest 2–4 minutes between sets to maintain performance.
- Muscle hypertrophy: Complete 3–4 sets × 6–10 reps with a full, comfortable range of motion. Rest approximately 90–150 seconds between sets.
- Muscular endurance: Perform 2–3 sets × 12–15 reps using lighter resistance. However, stop before fatigue compromises the front-rack position.
- Technique and stability: Complete 3–4 sets × 5–8 controlled reps with a light barbell. Additionally, pause briefly near the bottom while maintaining balance.
- Mobility and movement practice: Perform 2–3 sets × 5–8 slow reps using an empty barbell. Focus on ankle movement, knee tracking, and comfortable squat depth.
Progression and Recovery
Progression rule: First, improve squat consistency, front-rack mobility, and trunk control. Then gradually increase repetitions or resistance without changing your technique. Furthermore, allow sufficient recovery between demanding leg sessions. If your elbows drop, heels lift, or lower back loses position, reduce the load before progressing.
Setup / Starting Position
Prepare the Barbell and Front-Rack Grip
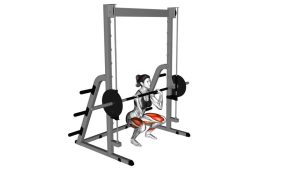
- Set the rack height: Position the barbell slightly below shoulder height inside a power rack. Additionally, adjust the safety bars to catch a failed repetition.
- Approach the barbell: Step close enough to place the bar across the front of both shoulders. The bar should rest on the shoulder muscles rather than being supported entirely by the hands.
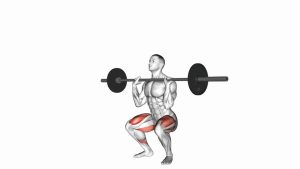
- Establish the clean grip: Position your hands just outside shoulder width with the palms facing upward. Then lift your elbows forward and upward into a secure front-rack position.
- Adjust hand contact: Allow the bar to rest on your fingertips when necessary for comfortable wrist mobility. However, maintain sufficient contact and control to keep the bar secure.
- Unrack carefully: Brace your torso, extend your knees, and lift the bar clear of the supports. Next, take one or two controlled steps backward.
Establish Your Squat Stance and Posture
- Position the feet: Stand approximately shoulder-width apart with the toes slightly outward. Adjust the stance naturally to accommodate your hips and ankles.
- Distribute your weight: Maintain stable pressure through the heel, big-toe base, and little-toe base. Consequently, your balance should remain centered over the feet.
- Brace the abdominal muscles: Inhale and create firm trunk tension without excessively arching the lower back. Meanwhile, keep your rib cage aligned over the pelvis.
- Lift the elbows: Keep the elbows pointing forward and sufficiently high to support the bar. Additionally, maintain an open chest and a stable upper back.
- Set your gaze: Look straight ahead or slightly downward with the neck comfortably neutral. Finally, prepare to lower the body without shifting onto the toes.
Tip: If the clean-grip position causes wrist discomfort, reduce the load and work on comfortable front-rack mobility. Never force a painful grip.
Execution (Step-by-Step)
Phase One: Controlled Squat Descent
- Begin from a stable standing position: Stand tall with the barbell supported across your front shoulders. Before descending, establish abdominal tension and balanced foot pressure.
- Initiate the squat: Bend your knees and hips together while lowering the pelvis. Meanwhile, allow the knees to travel forward naturally in the direction of the toes.
- Maintain an upright torso: Keep your chest lifted and elbows pointing forward throughout the descent. Consequently, the barbell should remain securely supported by the shoulders.
- Control knee alignment: Guide both knees in line with their respective feet. Additionally, avoid allowing either knee to collapse excessively inward.
- Descend to a comfortable depth: Continue lowering until your mobility allows a stable squat position. Ideally, reach approximately parallel or deeper when control and joint comfort permit. However, never sacrifice spinal position or heel contact simply to squat lower.
Phase Two: Bottom Position and Upward Drive
- Stabilize the bottom position: Maintain abdominal tension with the heels planted and elbows elevated. Avoid bouncing aggressively or relaxing completely under the barbell.
- Begin the ascent: Push firmly through your feet while extending the knees and hips together. At the same time, drive the torso upward without dropping the chest.
- Maintain the front rack: Keep the elbows high enough to prevent the bar from rolling forward. Furthermore, resist excessive forward leaning as you pass the most difficult portion.
- Complete hip and knee extension: Continue standing until the knees and hips reach a natural, upright position. However, avoid forcefully snapping the knees backward or leaning excessively behind the hips.
- Reset before repeating: Reestablish balanced foot pressure and controlled breathing. Finally, begin the next repetition only when your front-rack position feels secure.
Breathing tip: Inhale and brace before descending. Maintain appropriate trunk tension through the difficult portion of the lift. Then exhale as you finish standing and reset your breathing before the next repetition.
Pro Tips & Common Mistakes
Professional Tips for Better Front Squat Technique
- Keep the elbows elevated: Maintain a strong front-rack position to prevent the barbell from rolling forward. Additionally, think about keeping your upper arms directed forward throughout the repetition.
- Prioritize an upright torso: A relatively vertical trunk helps maintain balance with the bar positioned in front. However, some natural forward inclination is acceptable depending on individual proportions.
- Maintain full-foot pressure: Keep the entire foot firmly connected to the floor. Consequently, the force produced by the legs remains more stable during the ascent.
- Use controlled repetition speed: Lower for approximately two to three seconds before driving upward smoothly. Furthermore, avoid deliberately bouncing out of the bottom position.
- Improve ankle mobility gradually: Limited dorsiflexion can restrict comfortable squat depth or encourage heel lifting. Therefore, practice controlled ankle mobility work and adjust your stance when necessary.
- Build front-rack mobility: Improve comfortable movement through the wrists, shoulders, and upper back. As a result, the elbows can remain elevated without excessive wrist strain.
Common Mistakes and How to Correct Them
- Allowing the elbows to collapse: Dropping the elbows can shift the bar forward and increase the risk of losing control. Instead, reduce the load and maintain a secure shoulder-supported rack.
- Leaning excessively forward: A pronounced forward lean can disrupt the intended bar path. Therefore, strengthen your trunk and upper back while practicing lighter repetitions.
- Raising the heels: Heel lifting often indicates a balance problem, restricted ankle mobility, or unsuitable positioning. Consequently, adjust your stance, depth, or footwear before adding weight.
- Allowing the knees to collapse inward: Excessive inward knee movement can compromise control under load. Instead, maintain stable foot pressure and guide each knee toward its toes.
- Squatting deeper than mobility allows: Forced depth may cause unwanted pelvic or spinal movement. Therefore, select a range that preserves comfortable alignment and controlled movement.
- Loading the barbell too heavily: Excessive resistance can cause wrist discomfort, elbow dropping, and poor squat mechanics. As a result, technical consistency should determine when additional weight is appropriate.
- Holding the bar entirely with the hands: Supporting the load primarily through the wrists can create unnecessary discomfort. Instead, position the bar securely across the front shoulders.
- Rising with the hips first: Allowing the hips to shoot upward can turn the lift into an exaggerated forward lean. Therefore, coordinate hip and knee extension while maintaining your chest position.
FAQ
Muscles Worked and Exercise Technique
What muscles does the Barbell Clean-Grip Front Squat work?
The exercise primarily targets the quadriceps, which extend the knees during the upward phase. Additionally, the gluteus maximus and adductor magnus contribute to hip extension.
Meanwhile, the abdominal muscles, spinal erectors, and upper-back stabilizers help maintain torso alignment. Consequently, the movement provides both substantial lower-body training and demanding trunk stabilization.
What is the difference between a clean-grip front squat and a back squat?
The main difference is the position of the barbell. During the clean-grip front squat, the bar rests across the front shoulders. In contrast, a back squat positions the bar across the upper back.
Consequently, front squats generally encourage a more upright torso and create significant demands on front-rack mobility and upper-back stability. However, both exercises can effectively develop leg strength and muscle mass.
Should the knees travel past the toes during a front squat?
Yes, the knees may naturally move beyond the toes during a front squat. This movement is not automatically incorrect or dangerous. In fact, forward knee travel often helps maintain an upright torso.
However, knee movement should remain controlled and comfortable. Additionally, keep the heels planted and maintain consistent knee alignment throughout the repetition.
How deep should I squat with a clean-grip front rack?
Aim for the deepest position you can control without pain or significant loss of spinal alignment. Many trained lifters can descend below parallel. However, individual mobility and body proportions influence comfortable depth.
Therefore, prioritize heel contact, stable knees, elevated elbows, and consistent torso positioning rather than forcing maximum depth.
Mobility, Safety, and Training Progression
Why do my wrists hurt during the clean-grip front squat?
Wrist discomfort may occur when the barbell is supported excessively by the hands or when front-rack mobility is limited. Additionally, low elbows can increase stress around the wrists.
To improve comfort, position the bar securely on the front shoulders and use only the finger contact needed for control. However, never force a painful wrist position. Seek professional guidance if discomfort persists.
Is the Barbell Clean-Grip Front Squat suitable for beginners?
The movement can be introduced to beginners who already demonstrate comfortable squat mechanics and adequate front-rack control. However, learning the technique without heavy resistance is essential.
Initially, practice bodyweight squats or light front-rack positioning. Next, progress to an empty barbell under appropriate supervision. Finally, increase resistance only after demonstrating consistent technique.
Can front squats help build bigger quadriceps?
Yes, front squats can effectively stimulate quadriceps growth when performed with appropriate resistance, volume, and controlled movement. Additionally, the forward bar position creates substantial knee-extension demands.
For hypertrophy, consider performing 3–4 sets of 6–10 repetitions. However, combine progressive resistance with sufficient recovery, nutrition, and consistent training for the best results.
Should I use weightlifting shoes for front squats?
Weightlifting shoes can provide a firm base and an elevated heel. Consequently, they may help some lifters maintain an upright torso and achieve a comfortable squat depth.
However, specialized footwear is not mandatory. If your current shoes offer stable support and your ankle mobility permits controlled squatting, you may not need additional equipment.
How often should I include front squats in my training?
Many lifters can perform front squats once or twice weekly, depending on total leg-training volume and recovery ability. Additionally, training experience influences how frequently demanding barbell sessions should be scheduled.
For example, beginners may start with one focused session each week. More experienced lifters can distribute their front squat volume across multiple sessions when recovery and technique remain consistent.
What should I do if my elbows drop during the squat?
Dropping elbows often indicates front-rack mobility limitations, upper-back fatigue, or excessive resistance. As a result, the bar may begin shifting forward during the movement.
First, reduce the resistance and establish a secure front-rack position. Then practice controlled repetitions while maintaining upper-back tension. Additionally, improve comfortable wrist, shoulder, and thoracic mobility.
Recommended Equipment
- Olympic Barbell — provides the main resistance for clean-grip front squats. Choose a barbell with suitable dimensions, knurling, and load capacity for your training.
- Olympic Bumper Weight Plates — allow progressive loading while providing compatible resistance for an Olympic barbell. Additionally, bumper plates are useful for a variety of barbell exercises.
- Power Rack with Safety Bars — provides adjustable barbell supports and safety catches. Consequently, it is an important equipment choice for safer loaded front squat training.
- Weightlifting Shoes with Raised Heel — offer a firm platform and may improve comfortable squat positioning for lifters with limited ankle mobility. However, they do not replace proper technique.
- Weightlifting Wrist Wraps — provide optional wrist support during front-rack training. Nevertheless, comfortable bar placement and appropriate wrist mobility remain essential.
Equipment tip: Prioritize a reliable barbell, compatible weight plates, and a sturdy power rack with correctly adjusted safety bars. Additionally, choose footwear that provides stable contact with the floor. Wrist wraps can offer support, but they should never be used to force a painful grip.