Cable Kneeling Shoulder Internal Rotation: Form, Sets, Tips & FAQ
Learn how to do the Cable Kneeling Shoulder Internal Rotation with proper form. Discover muscles worked, setup tips, sets and reps by goal, common mistakes, FAQs, and recommended equipment.
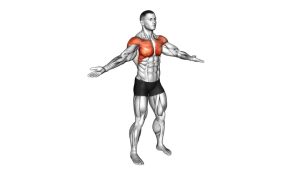
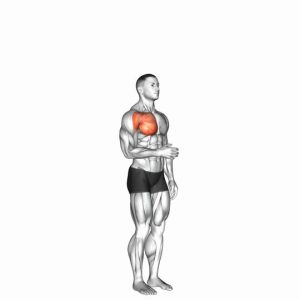
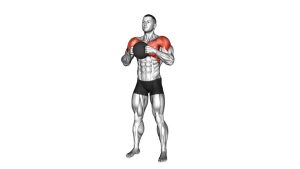
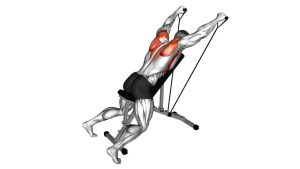
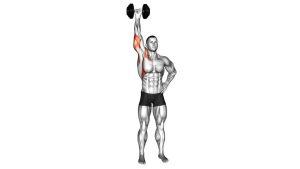
Cable Kneeling Shoulder Internal Rotation
This movement is best used for shoulder health, rotator cuff strengthening, warm-ups, and controlled accessory work. Because the range of motion is short and the target muscles are relatively small, lighter weight and strict execution matter far more than load. When done correctly, you should feel focused tension deep in the front of the shoulder without twisting the body, shrugging the traps, or turning the exercise into a row.
Quick Overview
| Body Part | Shoulders |
|---|---|
| Primary Muscle | Subscapularis |
| Secondary Muscle | Anterior deltoid, pectoralis major (light assistance), rotator cuff stabilizers |
| Equipment | Cable machine, single handle attachment, optional kneeling pad |
| Difficulty | Beginner to Intermediate |
Sets & Reps (By Goal)
- Shoulder warm-up / activation: 2–3 sets × 12–15 reps per side with light weight and full control
- Rotator cuff strengthening: 3–4 sets × 10–15 reps per side with a brief pause at peak contraction
- Joint stability / prehab: 2–3 sets × 12–20 reps per side using slow tempo and clean technique
- Rehab-style control work: 2–3 sets × 8–12 reps per side with very light resistance and pain-free range only
Progression rule: Increase reps or improve control before increasing the load. If your elbow drifts, your torso twists, or the motion becomes jerky, the weight is too heavy.
Setup / Starting Position
- Set the cable height: Position the pulley around elbow height so the line of pull matches the shoulder joint naturally.
- Kneel beside the machine: Take a stable tall-kneeling or half-kneeling position depending on what feels strongest and most balanced.
- Grab the handle with the working arm: Bend your elbow to roughly 90 degrees and keep it tucked close to your side.
- Align your posture: Keep your chest up, ribs down, core braced, and shoulders level. Avoid leaning toward or away from the cable.
- Start with the forearm slightly away from the body: The shoulder should begin in a comfortable externally rotated position, not overstretched.
Tip: Place a small towel between your elbow and ribcage if you want feedback to keep the upper arm from drifting away from the body.
Execution (Step-by-Step)
- Brace and stay tall: Lock in your kneeling stance, keep the torso still, and maintain a neutral neck position.
- Rotate the forearm inward: Pull the handle across your body by internally rotating the shoulder, keeping the elbow close to your side throughout.
- Move only through the shoulder: Do not swing the wrist, lift the elbow, or turn the movement into a press or row.
- Squeeze at the end range: When the forearm nears the torso, pause briefly and feel the shoulder muscles contract without forcing extra range.
- Return under control: Slowly allow the cable to pull your forearm back outward until you reach the starting position again.
- Repeat evenly: Keep every rep smooth, controlled, and nearly identical from start to finish.
Pro Tips & Common Mistakes
- Keep the elbow anchored: The elbow should stay close to the torso so the shoulder does the work instead of larger muscles taking over.
- Use lighter weight than you think: This is a control exercise, not a max-strength movement.
- Pause briefly at peak contraction: A short squeeze improves shoulder awareness and reinforces good mechanics.
- Do not rotate the torso: Twisting to move the cable reduces rotator cuff involvement and turns the exercise into a compensation pattern.
- Avoid shrugging: Keep the upper traps relaxed so the shoulder stays centered and stable.
- Control the eccentric: The lowering phase is crucial for joint stability and healthy shoulder mechanics.
- Train both sides evenly: Even if one shoulder feels weaker, match the quality of the movement on each side.
FAQ
What muscle does the Cable Kneeling Shoulder Internal Rotation work the most?
The main muscle is the subscapularis, which is the primary internal rotator of the shoulder. It also involves smaller stabilizers that help keep the shoulder joint secure during movement.
Is this exercise for muscle growth or shoulder health?
It can support both, but it is most valuable for shoulder health, joint stability, and rotator cuff strength. It is usually treated as a prehab, rehab, or accessory movement rather than a primary mass builder.
How heavy should I go on this exercise?
Go light enough that you can keep the elbow tucked, the torso still, and the motion perfectly controlled. If you feel yourself jerking the cable or twisting the body, the load is too heavy.
Should I do this before or after my workout?
It works well before upper-body training as part of a shoulder activation warm-up, or after training as light accessory work. For rehab-focused use, it can also be done on its own with light resistance.
Can beginners use the Cable Kneeling Shoulder Internal Rotation?
Yes. Beginners can benefit a lot from it as long as they use light weight, controlled reps, and a pain-free range of motion. It is an excellent exercise for learning better shoulder control.
Recommended Equipment
- Single D-Handle Cable Attachment — ideal for one-arm cable shoulder and rotator cuff exercises
- Exercise Kneeling Pad — adds comfort and stability when performing the movement from a kneeling position
- Resistance Bands Set — useful for extra rotator cuff work, warm-ups, and shoulder mobility drills
- Shoulder Rehab Pulley System — helpful for gentle mobility and shoulder recovery routines
- Peanut Massage Ball / Mobility Ball — useful for soft tissue work around the upper back and shoulder area
Tip: Choose tools that support better positioning and smoother shoulder mechanics. For this exercise, precision and consistency matter much more than adding more resistance.