Elbow Lift to Prayer Push: Form, Muscles Worked, Sets, Tips & FAQ
Learn the Elbow Lift to Prayer Push for shoulder activation, mobility, and control. Includes proper form, muscles worked, sets by goal, common mistakes, FAQs, and recommended equipment.
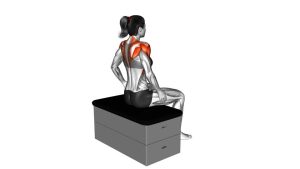
Elbow Lift to Prayer Push
This exercise works best when performed with control, light tension, and a comfortable range of motion. You should feel the shoulders working as the elbows lift and the hands press upward, while the upper body stays tall and stable. The movement should feel clean and coordinated rather than forced.
Quick Overview
| Body Part | Shoulders |
|---|---|
| Primary Muscle | Anterior deltoids and lateral deltoids |
| Secondary Muscle | Upper chest, serratus anterior, upper trapezius, rotator cuff stabilizers |
| Equipment | None |
| Difficulty | Beginner |
Sets & Reps (By Goal)
- Warm-up / activation: 2–3 sets × 8–12 reps with slow, controlled tempo
- Mobility practice: 2–4 sets × 10–15 reps using a smooth full range you can control
- Shoulder endurance / movement quality: 2–3 sets × 12–20 reps with light effort
- Rehab-style control: 2–3 sets × 6–10 reps with a brief 1–2 second pause overhead
Progression rule: Improve smoothness, range, and posture first. Then add reps or pause time before increasing complexity.
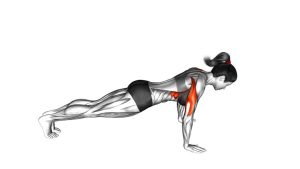
Setup / Starting Position
- Stand tall: Keep your feet about hip-width apart with the ribs stacked over the hips.
- Lift the elbows: Bring your elbows up around shoulder height with the upper arms out to the sides.
- Hands in front: Position the hands near the face or upper chest so they can move into a prayer position.
- Relax the neck: Keep the shoulders down away from the ears and avoid shrugging before the movement starts.
- Brace lightly: Tighten the core just enough to avoid leaning back during the overhead push.
Execution (Step-by-Step)
- Start with elbows lifted: Hold the elbows high and wide while keeping the chest tall.
- Bring the hands together: Draw the forearms inward until the palms meet in front of the chest or face.
- Press upward: From the prayer position, extend the arms overhead in a smooth vertical press.
- Reach without arching: Finish with the arms overhead while keeping the ribs down and spine neutral.
- Pause briefly: Hold the top for a moment to reinforce control and shoulder positioning.
- Return slowly: Lower the hands back down with control and reset to the starting elbow-lift position.
Pro Tips & Common Mistakes
- Keep the motion smooth: Avoid rushing the press or dropping the arms on the way down.
- Do not arch the lower back: Keep the core lightly engaged so the overhead reach stays clean.
- Elbows should stay active: Let them guide the movement rather than letting the arms collapse inward.
- Do not shrug excessively: Keep tension in the shoulders without jamming them into the ears.
- Use pain-free range: Press only as high as you can while maintaining good alignment.
- Focus on quality over height: A smaller, clean overhead press is better than forcing range.
FAQ
What muscles does the Elbow Lift to Prayer Push work?
It mainly targets the front and side deltoids, while the upper chest, serratus anterior, and rotator cuff stabilizers assist with control and overhead movement.
Is this a mobility exercise or a strengthening exercise?
It is primarily a mobility and activation drill, but it can also improve shoulder endurance and movement quality when performed with control.
Can beginners use this exercise?
Yes. It is beginner-friendly because it uses bodyweight only and can be performed with a reduced range of motion if needed.
What if I feel pinching in my shoulder overhead?
Reduce the range of motion, slow the movement down, and keep your ribs from flaring. If the pinching continues, stop and reassess shoulder mobility or seek professional guidance.
Where should I feel this exercise most?
You should mostly feel it in the shoulders, especially the front and side delts, with some support from the upper chest and upper back stabilizers.
Recommended Equipment (Optional)
- Resistance Bands Set — useful for shoulder warm-ups, pull-aparts, presses, and light stability work
- Shoulder Pulley for Physical Therapy — helps with gentle range-of-motion practice and shoulder mobility drills
- Posture Corrector Brace — can be used as a temporary posture-awareness tool during daily activities
- Massage Ball for Shoulder Muscles — useful for soft-tissue work around the upper back, rear shoulder, and chest
- Mobility Stick / Stretching Bar — helpful for shoulder pass-throughs, mobility prep, and overhead positioning drills
Tip: These tools are optional. This exercise can be effective on its own, but supportive mobility and activation tools can make warm-ups and shoulder prep more productive.