Band Lying Reverse-Grip Pressdown: Form, Sets, Tips & FAQ
Learn the Band Lying Reverse-Grip Pressdown to isolate the triceps with controlled band tension. Includes setup, step-by-step form, sets, mistakes, FAQs, and equipment.
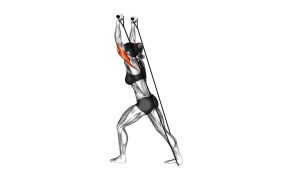
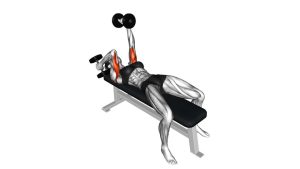
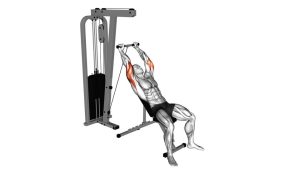
Band Lying Reverse-Grip Pressdown (Skull Crusher)
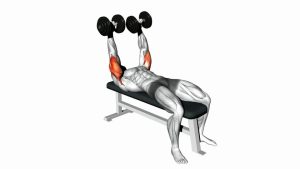
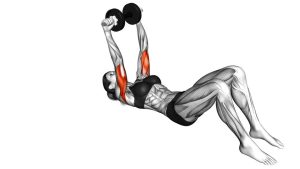
This exercise begins with the body lying on the floor, knees bent, and the resistance band anchored behind the head. From there, the elbows stay mostly fixed while the hands press away from the face until the arms approach full extension. The band becomes harder as it stretches, which makes the lockout position especially useful for building triceps tension and control.
A clean rep should feel smooth, controlled, and focused around the back of the upper arms. The shoulders should stay quiet, the elbows should avoid drifting outward, and the wrists should remain firm instead of collapsing backward. Treat the movement as a precise elbow-extension drill rather than a fast pressing motion.
Quick Overview
| Body Part | Triceps |
|---|---|
| Primary Muscle | Triceps brachii |
| Secondary Muscle | Forearms, wrist stabilizers, shoulder stabilizers |
| Equipment | Resistance band and secure anchor point |
| Difficulty | Beginner to Intermediate |
Sets & Reps (By Goal)
- Muscle activation: 2–3 sets × 12–15 reps with light band tension and slow control.
- Triceps hypertrophy: 3–4 sets × 10–15 reps with a 1–2 second squeeze at lockout.
- Strength endurance: 3–5 sets × 15–25 reps using smooth reps and short rest periods.
- Finisher: 1–3 sets × 20–30 reps after heavier pressing or arm training.
- Technique practice: 2 sets × 8–12 reps with a slow eccentric and strict elbow position.
Progression rule: Add reps first, then increase band tension. Better triceps growth comes from clean lockout control, not from using a band so heavy that your elbows flare or shoulders take over.
Setup / Starting Position
- Anchor the band: Secure the band behind your head to a rack, post, door anchor, or another stable point.
- Lie on your back: Position yourself on the floor with knees bent and feet flat for stability.
- Grip the band: Hold the band with a reverse grip, keeping palms angled toward your face or slightly upward.
- Set the elbows: Bend your elbows and bring your hands near the forehead or upper chest area.
- Stabilize your body: Keep ribs down, shoulders relaxed, and upper arms steady before starting the rep.
- Create light tension: Slide far enough from the anchor so the band is not completely slack at the bottom.
Your upper arms do not need to be perfectly vertical. A slight angle is acceptable as long as the main movement comes from bending and extending the elbows.
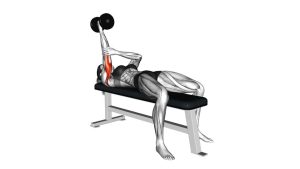
Execution (Step-by-Step)
- Brace lightly: Keep your torso still, feet grounded, and shoulders relaxed against the floor.
- Start with bent elbows: Let the hands sit near the face or upper chest while maintaining band tension.
- Extend the elbows: Press the hands away from your face until the arms are nearly straight.
- Squeeze the triceps: Pause briefly at the top and feel the back of the upper arms contract.
- Control the return: Bend the elbows slowly and bring the hands back toward the starting position.
- Repeat with precision: Keep the elbows from drifting wide and avoid letting the band pull your hands back quickly.
Pro Tips & Common Mistakes
Pro Tips
- Keep the elbows narrow: Tucked elbows help maintain triceps focus and reduce shoulder compensation.
- Use a controlled lockout: Straighten the arms without violently snapping the elbows.
- Maintain wrist position: Keep wrists firm so the reverse grip does not collapse under band tension.
- Move slowly on the way back: The eccentric phase builds control and keeps tension on the triceps.
- Adjust distance from the anchor: Move farther away for more resistance or closer for easier reps.
Common Mistakes
- Letting elbows flare: Wide elbows reduce isolation and can make the movement feel awkward.
- Swinging the upper arms: Excess shoulder movement turns the drill into a different exercise.
- Using too much band tension: Heavy resistance often causes poor control and wrist bending.
- Rushing the return: Letting the band snap back removes tension and increases injury risk.
- Losing anchor security: An unstable band setup can be dangerous, especially when lying under tension.
FAQ
What muscles does the Band Lying Reverse-Grip Pressdown work?
It primarily trains the triceps brachii, especially through elbow extension. The forearms and wrist stabilizers also assist because the reverse grip requires extra control.
Is this the same as a band skull crusher?
It is very similar. The movement pattern matches a skull crusher because the elbows bend and extend while lying down, but the band creates a different resistance curve compared with dumbbells or an EZ bar.
Should I fully lock out my elbows?
You can approach full extension, but avoid snapping the elbows aggressively. Aim for a strong triceps squeeze while keeping the joints controlled.
Why use a reverse grip?
The reverse grip can make the movement feel smoother for some lifters and encourages careful wrist positioning. It also adds variety to triceps training without changing the basic elbow-extension pattern.
Can beginners do this exercise?
Yes, beginners can perform it with a light band and a secure anchor. Start with slower reps and moderate tension before increasing resistance.
Where should I feel the exercise?
You should feel the back of the upper arms working. If you mostly feel shoulders, wrists, or elbows, reduce the resistance and check your elbow path.
Can this replace cable pressdowns?
It can be a strong home-training alternative. Cable pressdowns offer more consistent machine resistance, while bands provide increasing resistance as they stretch.
Recommended Equipment
- Resistance Bands Set — essential for performing the exercise with adjustable tension levels.
- Door Anchor for Resistance Bands — useful for creating a secure anchor point behind the head.
- Thick Exercise Mat — improves comfort while lying on the floor during triceps extensions.
- Resistance Band Handles — can improve grip comfort and wrist control during reverse-grip pressing.
- Triceps Rope Attachment — useful for triceps variations if you want to pair band work with cable-style movements.
Choose band tension that lets you complete every rep with stable elbows, firm wrists, and a smooth return. A lighter band with strict control is usually better than a heavy band with poor mechanics.