Dead Bug : Core Stability Form, Sets, Tips & FAQ
Learn Dead Bug for core stability, abs control, and safer trunk bracing. Includes setup, steps, sets, mistakes, FAQs, and equipment.
Dead Bug
This movement is excellent for building core stability, especially when you want an ab exercise that teaches control without aggressive spinal flexion. Because the body stays supported on the floor, it is often easier to focus on bracing, pelvic position, and limb coordination. However, the exercise becomes less effective if the lower back lifts, the ribs flare, or the legs move faster than the core can control.
Quick Overview
| Body Part | Core |
|---|---|
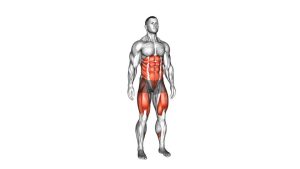
| Primary Muscle | Rectus abdominis and deep core stabilizers |
| Secondary Muscle | Hip flexors, quadriceps, obliques, and shoulder stabilizers |
| Equipment | No equipment required; optional exercise mat |
| Difficulty | Beginner to intermediate, depending on range of motion and tempo |
Sets & Reps (By Goal)
- Core activation: 2–3 sets × 6–8 reps per side with slow control.
- Beginner strength: 3 sets × 8–10 reps per side with a short pause between reps.
- Core endurance: 3–4 sets × 10–12 reps per side while maintaining steady breathing.
- Warm-up / movement prep: 1–2 sets × 6–8 reps per side before lower-body or full-body training.
Progression rule: First increase control and range of motion. After that, increase reps slowly. Do not progress if your lower back starts to arch.
Setup / Starting Position
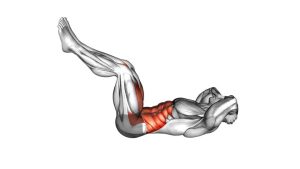
- Lie on your back: Position yourself flat on the floor with your head, upper back, and pelvis supported.
- Raise the legs: Bring both knees above the hips with the knees bent, similar to a tabletop position.
- Set the arms: Reach the arms upward or overhead depending on the phase of the movement shown in the exercise.
- Brace the core: Gently tighten the abs as if preparing for a light tap to the stomach.
- Control the ribs: Keep the ribs down so the lower back does not lift away from the floor.
Tip: If you cannot keep the lower back controlled, reduce the arm or leg range before adding more repetitions.
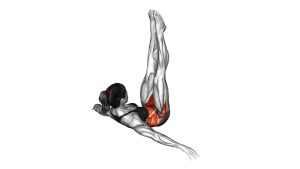
Execution (Step-by-Step)
- Start in the loaded position: Lie on your back with the legs lifted and bent while the arms are positioned overhead or above the chest.
- Brace before moving: Create light abdominal tension before the limbs begin to move.
- Move with control: Slowly lower or reposition the arm while keeping the legs elevated and stable.
- Keep the spine steady: Maintain contact between the lower back and the floor without forcing the spine flat aggressively.
- Return smoothly: Bring the moving limb back to the starting position without swinging or rushing.
- Repeat with coordination: Continue the pattern slowly, keeping the torso quiet while the limbs move.
Pro Tips & Common Mistakes
- Move slowly: A slower tempo makes the exercise more effective because the core must stabilize longer.
- Do not rush the limbs: Fast reps often hide poor control and reduce abdominal tension.
- Keep the ribs down: Rib flare usually means the lower back is starting to compensate.
- Avoid excessive leg lowering: Lower only as far as you can while keeping the pelvis stable.
- Breathe through the movement: Exhale during the hardest part to help maintain abdominal pressure.
- Relax the neck: Keep the head supported and avoid pulling the chin aggressively toward the chest.
- Use a smaller range if needed: Shorter, cleaner reps are better than large reps with back arching.
FAQ
What muscles does Dead Bug work?
Dead Bug Version 2 mainly works the abs and deep core stabilizers. Additionally, the hip flexors, quadriceps, obliques, and shoulder stabilizers assist as the limbs move while the torso stays controlled.
Is Dead Bug good for beginners?
Yes. It can be beginner-friendly because the floor supports the body. However, beginners should use a smaller range of motion until they can keep the lower back stable.
Should my lower back stay on the floor?
Your lower back should stay controlled and close to the floor. If it arches strongly as the limbs move, reduce the range or pause between reps.
How slow should I perform the exercise?
Use a slow, steady tempo. For example, move for 2–3 seconds, pause briefly, then return with control. This helps the abs stay engaged throughout the repetition.
Why do I feel this mostly in my hip flexors?
Some hip flexor activity is normal because the legs are elevated. However, if the hip flexors dominate, brace harder, shorten the leg range, and focus on keeping the ribs down.
Recommended Equipment (Optional)
- Exercise Mat — adds comfort and support for floor-based core training.
- Thick Yoga Mat — useful if your lower back or hips need extra cushioning.
- Pilates Mini Ball — can help with core feedback and controlled dead bug variations.
- Resistance Bands Set — helpful for progressing core stability drills when ready.
- Adjustable Ankle Weights — optional advanced progression only after perfect bodyweight control.
Tip: Equipment is optional. Master the bodyweight version first because this exercise depends more on control than resistance.