Air Bike Exercise: Proper Form, Core Benefits, Sets, Tips & FAQ
Learn the Air Bike exercise for stronger abs and obliques. Includes proper form, sets by goal, common mistakes, FAQs, and recommended equipment.
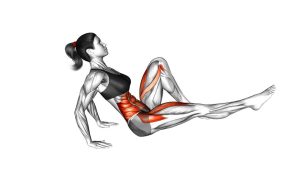
Air Bike
This exercise is highly effective when the rhythm stays smooth and the core remains active from the first rep to the last. Unlike a basic crunch, the Air Bike challenges your trunk to rotate while your legs cycle in the air. That combination makes it useful for building abdominal endurance, improving oblique activation, and developing better control through the pelvis. The goal is not to move as fast as possible. Instead, each rep should feel deliberate, balanced, and connected.
Quick Overview
| Body Part | Core |
|---|---|
| Primary Muscle | Rectus abdominis |
| Secondary Muscle | Obliques, hip flexors, transverse abdominis, quadriceps |
| Equipment | Bodyweight only; optional exercise mat |
| Difficulty | Intermediate because it requires coordination, core endurance, and lower-back control |
Sets & Reps (By Goal)
- Beginner control: 2–3 sets × 8–12 reps per side, slow tempo, 45–60 seconds rest.
- Core endurance: 3–4 sets × 15–25 reps per side, steady rhythm, 45–75 seconds rest.
- Ab definition focus: 3–5 sets × 20–30 total reps, controlled squeeze on each rotation.
- Finisher workout: 2–4 rounds × 30–45 seconds, moderate speed, 30–45 seconds rest.
- Low-impact core practice: 2 sets × 6–10 reps per side with the extended leg higher from the floor.
Progression rule: First improve control, then increase reps or duration. Lowering the extended leg closer to the floor makes the exercise harder, but only use that progression if your lower back remains stable.
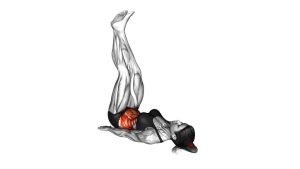
Setup / Starting Position
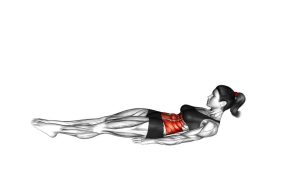
- Lie on your back: Use a flat surface or exercise mat. Keep your spine long and your ribs gently down.
- Place your hands behind your head: Let the fingertips support the head lightly. Avoid locking the fingers or pulling the neck forward.
- Lift your shoulders slightly: Curl the upper back just enough to engage the abs before the legs begin moving.
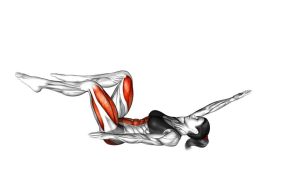
- Bring one knee in: Draw one knee toward the chest while the opposite leg extends forward and hovers above the floor.
- Brace your core: Press the lower back gently toward the floor and keep the pelvis from rocking side to side.
A good starting position should feel active but not forced. If the neck becomes tense before the first rep, lower the head briefly, reset your hands, and restart with a lighter upper-body lift.
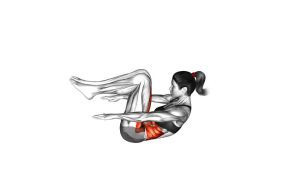
Execution (Step-by-Step)
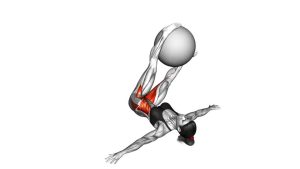
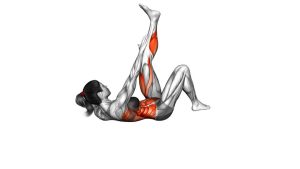
- Start with one knee close: Bring your right knee toward your torso while your left leg stays extended and hovering.
- Rotate across the body: Turn your upper torso slightly toward the bent knee. Think about moving the rib cage, not just the elbow.
- Switch sides smoothly: Extend the bent leg as the opposite knee drives in. Keep both legs controlled during the transition.
- Repeat the cycling pattern: Alternate left and right while keeping the shoulders lifted and the abs engaged.
- Control the tempo: Use a steady pace. Fast reps are only useful when your form stays clean.
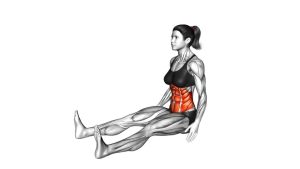
- Finish with control: After the last rep, bring both knees in, lower your shoulders, then relax your legs to the floor.
Pro Tips & Common Mistakes
- Rotate from the torso: Do not simply touch elbow to knee. The obliques work better when the rib cage turns with control.
- Keep elbows wide: Narrow elbows often lead to neck pulling and reduced core engagement.
- Control the lower back: If the back arches, shorten the range or keep the extended leg higher.
- Avoid rushing: Speed can hide poor form. A slower Air Bike usually builds better abdominal control.
- Breathe through the movement: Exhale as you rotate and drive the knee in. Inhale during the switch.
- Do not yank the head: Your hands are only support. The abs should lift the shoulders, not the arms.
- Keep tension continuous: Avoid resting between sides unless you are intentionally modifying the exercise.
FAQ
What muscles does the Air Bike work?
The Air Bike mainly works the rectus abdominis and obliques. It also uses the hip flexors, transverse abdominis, and quadriceps because the legs stay elevated and move continuously.
Is the Air Bike good for abs?
Yes. The Air Bike is a strong ab exercise because it combines trunk flexion, rotation, and leg movement. It is especially useful for training the abs and obliques together.
Why does my lower back hurt during Air Bikes?
Lower-back discomfort usually happens when the extended leg drops too low and the pelvis tilts forward. Keep the leg higher, move slower, and focus on keeping the lower back gently pressed toward the floor.
Should my elbow touch my knee?
Touching is not required. The main goal is controlled torso rotation. If you force the elbow toward the knee, you may pull on the neck instead of using the abs.
Is the Air Bike beginner-friendly?
It can be beginner-friendly when modified. Beginners should slow the tempo, reduce the range, keep the extended leg higher, and perform fewer reps per side.
How can I make Air Bikes harder?
To make the exercise harder, extend the leg lower, pause briefly during each rotation, increase total reps, or perform the movement for time. Only progress when your lower back stays stable.
Recommended Equipment
- Exercise Mat — provides cushioning for the spine, hips, and shoulders during floor-based core work.
- Thick Non-Slip Yoga Mat — helps keep your body stable while reducing pressure on the lower back.
- Core Sliders — useful for other ab exercises that pair well with Air Bikes, such as mountain climbers and plank variations.
- Mini Resistance Bands Set — adds variety to core and hip-strengthening routines.
- Workout Timer / Interval Timer — helpful for timed core circuits, finishers, and consistent rest periods.
Tip: Equipment is optional for the Air Bike, but a good mat can improve comfort and help you stay consistent with floor-based ab training.