Hanging Leg Tuck: Core Strength Form, Benefits, Sets & Tips
Learn the Hanging Leg Tuck for stronger abs, hip flexors, and core control. Includes proper form, sets, mistakes, FAQs, and equipment tips.
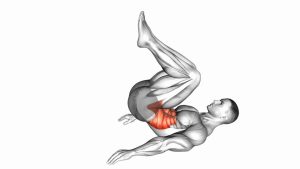
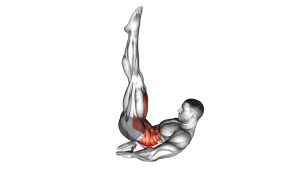
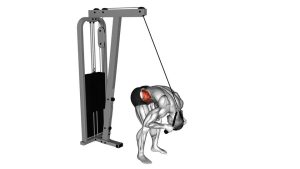
Hanging Leg Tuck
This exercise works best when you control both the lifting and lowering phases. Although the legs move, the main challenge comes from keeping the ribs controlled, the pelvis active, and the shoulders stable while hanging from the bar. Therefore, the Hanging Leg Tuck is useful for building stronger abs, better grip endurance, and improved body control for harder hanging core exercises.
Quick Overview
| Body Part | Core |
|---|---|
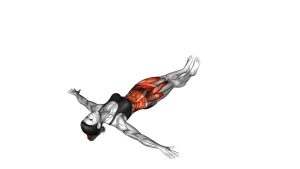
| Primary Muscle | Rectus abdominis and hip flexors |
| Secondary Muscle | Obliques, forearms, lats, shoulders, and upper-back stabilizers |
| Equipment | Pull-up bar or stable hanging bar |
| Difficulty | Intermediate because it requires grip strength, shoulder stability, and core control |
Sets & Reps (By Goal)
- Core strength: 3–4 sets × 6–10 controlled reps, resting 60–90 seconds between sets.
- Muscle endurance: 2–4 sets × 10–15 reps, using a smooth rhythm without swinging.
- Beginner progression: 2–3 sets × 5–8 reps, lifting only as high as you can control.
- Strict technique practice: 3 sets × 4–6 slow reps with a brief pause at the top.
- Advanced control: 3–5 sets × 8–12 reps with a 2-second top hold and slow descent.
Progression rule: First reduce swinging, then increase reps. After that, add a longer top hold, slower lowering phase, or progress toward hanging knee raises and hanging leg raises.
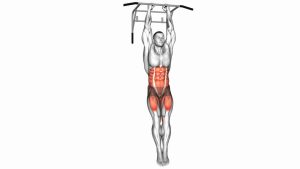
Setup / Starting Position
- Grip the bar securely: Hold the pull-up bar with both hands slightly wider than shoulder width.
- Start in a dead hang: Let the arms stay long while keeping the shoulders active and controlled.
- Keep the legs together: Begin with the legs hanging below the body and the feet slightly in front if needed.
- Brace the core: Pull the ribs down gently so the lower back does not over-arch.
- Control the body: Before lifting, reduce any swinging and find a steady hanging position.
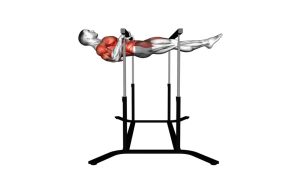
In the video, the movement begins from a straight hanging position with the arms extended overhead. Because of that, the exercise should start calmly rather than from a bouncing or swinging hang.
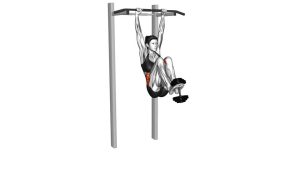
Execution (Step-by-Step)
- Begin from a stable hang: Keep your arms straight, shoulders controlled, and body quiet.
- Start the tuck: Bend your knees and begin lifting them forward by flexing at the hips.
- Pull the knees upward: Bring the knees toward the chest while keeping the movement smooth.
- Round slightly at the top: Let the pelvis tuck under as the knees come close to the torso.
- Pause briefly: Hold the compact top position without pulling with the arms.
- Lower with control: Extend the hips and legs gradually instead of dropping them quickly.
- Reset at the bottom: Return to a steady dead hang before starting the next repetition.
Pro Tips & Common Mistakes
- Do not rush the lowering phase: The descent builds control, so lower the knees slowly.
- Avoid excessive swinging: Momentum reduces core tension and makes the exercise less effective.
- Keep the arms straight: The visible movement should come from the hips and core, not from pulling yourself up.
- Use a compact tuck: Bring the knees toward the chest while keeping the movement tight and controlled.
- Brace before every rep: A light core brace helps prevent uncontrolled arching at the bottom.
- Control your shoulders: Stay active through the upper back instead of hanging passively into the joints.
- Do not chase height too early: If you cannot lift high without swinging, use a smaller tuck and build control first.
- Keep breathing: Exhale as the knees rise, then inhale as you lower back to the dead hang.
FAQ
What muscles does the Hanging Leg Tuck work?
The Hanging Leg Tuck mainly works the rectus abdominis and hip flexors. Additionally, your forearms, shoulders, lats, and upper back help stabilize the body while you hang.
Is the Hanging Leg Tuck good for lower abs?
Yes. The exercise strongly challenges the lower portion of the abdominal wall because the pelvis must tuck as the knees come toward the chest. However, the entire core works together during the movement.
Why do I swing during Hanging Leg Tucks?
Swinging usually happens when you lift too fast, drop the legs too quickly, or start the next rep before your body settles. To fix it, pause at the bottom and lower each rep more slowly.
Can beginners do this exercise?
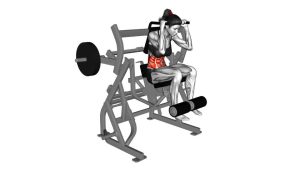
Beginners can use a smaller knee lift or perform captain’s chair knee raises first. However, a full hanging version requires enough grip strength and shoulder control to hold a stable dead hang.
How is this different from a Hanging Leg Raise?
The Hanging Leg Tuck uses bent knees, which makes it easier to control. In contrast, the Hanging Leg Raise uses straighter legs, creating a longer lever and a harder core challenge.
Recommended Equipment
- Doorway Pull-Up Bar — useful for practicing hanging core exercises at home.
- Wall-Mounted Pull-Up Bar — provides a more stable setup for strict hanging leg tucks.
- Fitness Grip Chalk — helps improve grip security during hanging exercises.
- Hanging Ab Straps — optional support for users who need less grip demand during core work.
- Resistance Bands Set — helpful for warm-ups, shoulder activation, and assisted hanging progressions.
Choose equipment that feels stable and secure. Since this exercise depends on hanging control, a strong bar and reliable grip setup matter more than adding extra difficulty too soon.