Lying Bent-Leg Tuck: Core Form, Sets, Tips & Beginner Ab Workout
Learn the lying bent-leg tuck for stronger abs and hip control. Follow step-by-step form, sets, mistakes, FAQs, and useful home workout gear.
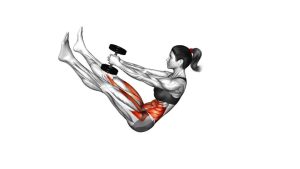
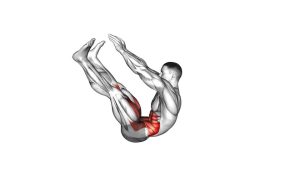
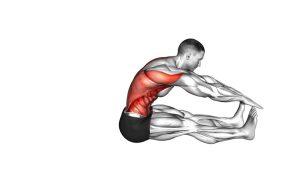
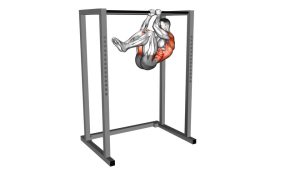
Lying Bent-Leg Tuck
This exercise works best when the movement stays smooth, small, and controlled. Instead of throwing the legs toward the chest, focus on drawing the knees inward with abdominal tension. Then, return the legs outward without letting the lower back arch aggressively. As a result, the core does more of the work and the hips move with better control.
Quick Overview
| Body Part | Core |
|---|---|
| Primary Muscle | Rectus abdominis |
| Secondary Muscle | Hip flexors, transverse abdominis, lower abdominal stabilizers |
| Equipment | None required; exercise mat optional |
| Difficulty | Beginner to intermediate, depending on range of motion and tempo |
Sets & Reps (By Goal)
- Beginner core control: 2–3 sets × 8–10 reps, using a slow and comfortable range.
- Ab endurance: 3–4 sets × 12–15 reps, keeping each rep smooth and consistent.
- Lower-ab focus: 3 sets × 10–12 reps, pausing briefly as the knees come inward.
- Warm-up activation: 1–2 sets × 8–12 reps before planks, crunches, or leg raises.
- Tempo control: 2–3 sets × 6–8 reps with a 2-second tuck and 3-second return.
Progression rule: First, make each repetition slower. Then, increase reps. After that, extend the legs farther away only if the lower back stays controlled.
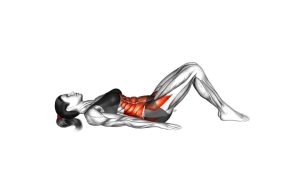
Setup / Starting Position
- Lie on your back: Start on the floor with your head, shoulders, and back supported.
- Place the arms down: Keep the arms beside the body for balance and light support.
- Set the legs: Begin with the legs extended or nearly extended close to the floor.
- Brace lightly: Tighten the midsection enough to control the pelvis without holding your breath.
- Keep the neck neutral: Let the head rest on the floor and avoid pulling the chin forward.
If your lower back arches during the start position, begin with the knees already slightly bent and keep the feet closer to the floor.
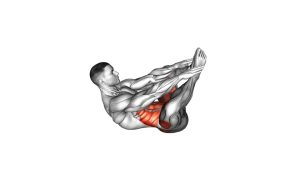
Execution (Step-by-Step)
- Prepare your brace: Gently tighten the abs before the legs move.
- Lift the legs: Bring the feet off the floor while bending the knees.
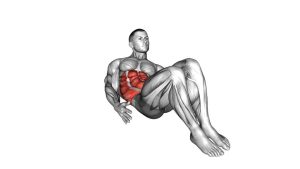
- Tuck the knees inward: Draw the knees toward the torso in a controlled motion.
- Pause briefly: Hold the tucked position for a moment without rocking the upper body.
- Extend with control: Move the knees away from the chest and lengthen the legs back outward.
- Stop before losing control: Keep the legs just above the floor if touching down causes you to relax too much.
- Repeat smoothly: Continue for the target reps while keeping the same tempo from start to finish.
Pro Tips & Common Mistakes
- Move slowly: A slower return makes the exercise more effective and reduces momentum.
- Keep the knees bent: This keeps the exercise easier to control than a straight-leg version.
- Avoid swinging: Do not kick the legs in and out quickly, because momentum reduces core tension.
- Control the lower back: If your back arches, shorten the leg extension and reset your brace.
- Relax the neck: Keep the head down and avoid lifting the shoulders unless using a planned crunch variation.
- Breathe steadily: Exhale as the knees tuck in, then inhale gently as the legs extend out.
- Use the arms lightly: The arms can help balance, but they should not press hard into the floor.
- Stop before fatigue breaks form: Clean reps matter more than high reps with poor control.
FAQ
What muscles does the lying bent-leg tuck work?
The lying bent-leg tuck mainly works the rectus abdominis and deep core stabilizers. Additionally, the hip flexors assist as the knees move toward the torso.
Is the lying bent-leg tuck good for beginners?
Yes. Since the knees stay bent, this exercise is usually easier than straight-leg raises. However, beginners should use a short range of motion until they can control the lower back.
Should my feet touch the floor between reps?
They can touch lightly, but they do not have to. For better core tension, keep the feet slightly above the floor if you can maintain control without arching the back.
Why do I feel this exercise in my hip flexors?
Some hip flexor involvement is normal because the hips flex during the tuck. Still, if the hips take over completely, slow down, reduce the range, and focus on bracing the abs first.
How can I make the lying bent-leg tuck harder?
You can slow the lowering phase, pause longer in the tuck, extend the legs farther from the body, or keep the feet hovering above the floor between reps.
What is the most common mistake?
The most common mistake is using momentum. When the legs swing quickly, the abs lose tension and the lower back may start to arch.
Recommended Equipment (Optional)
- Exercise Mat — adds comfort for the spine, hips, and shoulders during floor core exercises.
- Thick Yoga Mat — useful if you need extra cushioning for lying ab movements.
- Adjustable Ankle Weights — optional progression tool for advanced users who already control the movement well.
- Mini Resistance Bands — helpful for pairing with hip and core activation drills.
- Foam Roller — useful for warm-ups and recovery around the hips, glutes, and lower back.
Tip: Add equipment only after your bodyweight reps feel stable. Better control should come before extra resistance.