Roll Forearms Standing Against Wall: Form, Sets, Tips & FAQ
Learn how to do the Roll Forearms Standing Against Wall exercise to improve forearm control, wrist mobility, and shoulder stability with proper form, sets, mistakes, FAQs, and equipment.
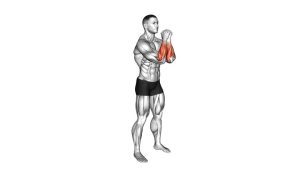
Roll Forearms Standing Against Wall
This exercise is especially useful as a warm-up before upper-body workouts, grip training, wrist work, calisthenics, pressing, pulling, or any activity that requires strong and controlled forearms. Because the wall provides feedback, it helps you notice if your wrists collapse, elbows drift, shoulders shrug, or posture breaks during the movement.
Quick Overview
| Body Part | Forearms |
|---|---|
| Primary Muscle | Forearm extensors and wrist stabilizers |
| Secondary Muscle | Forearm flexors, elbow stabilizers, serratus anterior, rotator cuff, and upper-back stabilizers |
| Equipment | Wall only; optional towel or light resistance band for progression |
| Difficulty | Beginner-friendly; excellent for warm-ups, mobility, activation, and rehab-style control |
Sets & Reps (By Goal)
- Wrist and forearm warm-up: 2–3 sets × 8–12 slow reps before training.
- Mobility and movement control: 2–4 sets × 10–15 reps with a smooth 2–3 second tempo.
- Rehab-style activation: 2–3 sets × 6–10 reps with a short pause at the top and bottom.
- Desk break or posture reset: 1–2 sets × 6–10 easy reps during the day.
- Pre-grip training preparation: 2 sets × 10 controlled reps before curls, rows, carries, or pull-ups.
Progression rule: Start with slow, clean wall contact. Progress by increasing range, adding pauses, or using a light band only after the wrists, elbows, and shoulders stay controlled.
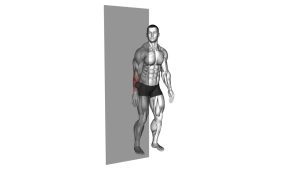
Setup / Starting Position
- Stand facing a wall: Place your body close enough that your forearms can rest comfortably against the wall.
- Set your feet: Stand with feet about hip-width apart and weight evenly balanced.
- Place the forearms on the wall: Keep both forearms in contact with the wall from near the elbow toward the wrist.
- Bend the elbows: Start with elbows bent around 90 degrees, slightly below or around shoulder height.
- Stack your posture: Keep ribs down, spine tall, neck neutral, and shoulders relaxed.
- Set the wrists: Keep wrists controlled without collapsing inward or bending aggressively backward.
- Brace lightly: Engage your core just enough to prevent leaning, arching, or twisting.
The wall should act like a guide. If you cannot keep your forearms on the wall without shrugging or arching, step slightly closer, reduce the range, and move slower.
Execution (Step-by-Step)
- Start in position: Forearms on the wall, elbows bent, shoulders relaxed, and eyes facing forward.
- Begin the roll: Slowly slide or roll your forearms upward along the wall while maintaining contact.
- Control the wrists: Keep the wrists active and aligned instead of letting them collapse or twist.
- Let the elbows open gradually: As your forearms move upward, your elbows should extend slightly without locking out.
- Keep the shoulders stable: Allow natural upward movement, but avoid shrugging hard toward the ears.
- Reach the top position: Pause briefly when you reach your comfortable range without losing wall contact.
- Reverse slowly: Slide the forearms back down the wall with the same control used on the way up.
- Return to the start: Finish with elbows bent again, forearms still connected to the wall, and posture unchanged.
- Repeat smoothly: Perform each rep with a slow, consistent rhythm instead of bouncing or rushing.
Pro Tips & Common Mistakes
- Keep full forearm contact: Do not let the elbows or wrists peel away from the wall too early.
- Move slowly: A controlled tempo trains the forearm stabilizers better than fast, loose reps.
- Avoid wrist collapse: Keep the wrists active and aligned instead of letting them bend excessively.
- Do not shrug: The shoulders can move naturally, but they should not dominate the exercise.
- Do not arch your back: Keep your ribs stacked over your hips to prevent compensation.
- Use a comfortable range: Stop before shoulder pinching, wrist strain, or elbow irritation appears.
- Control both directions: The lowering phase is just as important as the upward phase.
- Keep your head neutral: Avoid jutting the chin forward or looking down excessively.
- Focus on quality: This is not a strength-max exercise; it is a precision, activation, and mobility drill.
FAQ
What muscles does the Roll Forearms Standing Against Wall exercise work?
It mainly works the forearm extensors and wrist stabilizers. It also involves the forearm flexors, elbow stabilizers, serratus anterior, rotator cuff, and upper-back muscles that help control the shoulder blades during the wall movement.
Is this exercise for strength or mobility?
It is mostly a mobility, activation, and control exercise. It can support forearm strength indirectly by improving wrist alignment, forearm coordination, and joint control before heavier exercises like curls, rows, carries, pull-ups, or grip work.
Should my forearms stay on the wall the whole time?
Yes, that is the main goal. The wall gives feedback so you can keep the wrists, elbows, and shoulders moving together. If you lose contact, reduce your range of motion and move slower.
Why do my shoulders shrug during this exercise?
Shoulder shrugging usually means you are reaching too high, moving too fast, or lacking shoulder control in that range. Keep the range smaller, relax the neck, and focus on sliding the forearms smoothly rather than forcing the arms upward.
Can beginners do this exercise?
Yes. This is beginner-friendly because it uses no load and the wall provides guidance. Beginners should use a short range, slow tempo, and low effort until the movement feels smooth and comfortable.
When should I use this exercise?
Use it before upper-body training, wrist work, grip training, calisthenics, pressing, pulling, or as a quick desk-break mobility drill. It works well when you want to prepare the forearms, wrists, elbows, and shoulders for cleaner movement.
Recommended Equipment (Optional)
- Wrist Mobility Ball — useful for improving wrist control and warming up the forearms before wall drills.
- Forearm Massage Roller — helps release tight forearm tissue before mobility and grip training.
- Resistance Bands Set — useful for pairing this drill with wrist extension, band pull-aparts, and shoulder activation.
- Adjustable Grip Strengthener — helps build stronger hands and forearms after mobility work is complete.
- Small Exercise Towel — can be used between the forearms and wall for smoother sliding and comfort.
Tip: Equipment is optional. Start with the wall-only version first, then add tools only if they improve comfort, control, or consistency.