Ring Handstand to L-Sit: Advanced Rings Form, Strength Tips & Progressions
Learn the Ring Handstand to L-Sit with step-by-step form, core control cues, shoulder stability tips, sets, mistakes, FAQs, and ring equipment.
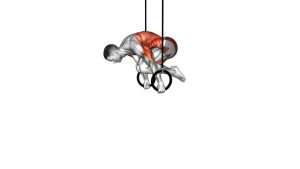
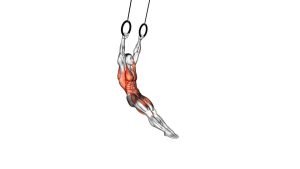
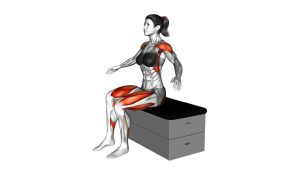
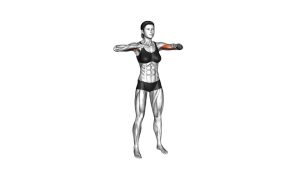
Ring Handstand to L-Sit
This movement is best trained by athletes who already have a strong ring support hold, strict L-sit, handstand control, and solid straight-arm stability. Because the rings move independently, every small shift in the shoulders, wrists, hips, and legs affects balance. A clean repetition should look smooth, controlled, and quiet, with no sudden collapse, elbow bend, or uncontrolled leg swing.
Quick Overview
| Body Part | Shoulders |
|---|---|
| Primary Muscle | Deltoids, serratus anterior, rotator cuff, and shoulder stabilizers |
| Secondary Muscle | Rectus abdominis, transverse abdominis, hip flexors, triceps, forearms, chest, and upper back |
| Equipment | Gymnastic rings, secure overhead anchor, optional crash mat |
| Difficulty | Advanced to elite; requires strong rings experience and high body control |
Sets & Reps (By Goal)
- Skill practice: 3–6 sets × 1–3 controlled reps with full rest between attempts.
- Transition control: 3–5 sets × 1 slow negative from handstand toward L-sit.
- L-sit strength: 3–5 sets × 8–20 second ring L-sit holds.
- Handstand stability: 3–5 sets × 5–15 second ring handstand holds or assisted holds.
- Progression work: 4–6 sets of tuck transitions before attempting straight-leg versions.
Progression rule: Master static holds first. Build a stable ring support, ring L-sit, tuck handstand transition, and slow negative before attempting the full straight-leg Ring Handstand to L-Sit.
Setup / Starting Position
- Set the rings securely: Attach the rings to a stable overhead anchor and check that both straps are even.
- Prepare the landing area: Place a crash mat or padded surface under you, especially when learning.
- Grip the rings firmly: Keep wrists strong, hands wrapped around the rings, and elbows locked.
- Enter the handstand: Move into a controlled ring handstand using a safe progression or assisted setup.
- Stack the body: Align wrists, shoulders, hips, knees, and ankles as much as possible before starting the transition.
- Set shoulder tension: Push tall through the rings and keep the shoulders active, elevated, and stable.
- Brace the core: Squeeze the glutes, tighten the midsection, and keep the legs together with toes pointed.
The cleaner your starting handstand, the easier it is to control the descent into the L-sit. Do not start the transition from a shaky or collapsing inverted position.
Execution (Step-by-Step)
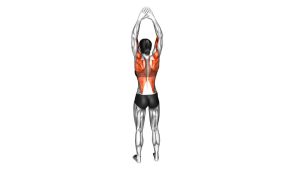
- Stabilize the ring handstand: Begin fully inverted with locked elbows, active shoulders, straight legs, and rings close to the body.
- Control the shoulder angle: Keep pressing through the rings as you prepare to shift your hips and legs forward.
- Start the hip break: Slowly flex at the hips while keeping the knees straight and the toes pointed.
- Lower the legs with control: Bring the legs down in front of your body without letting them swing or drop.
- Keep the arms straight: Maintain locked elbows throughout the transition. Avoid turning the movement into a dip.
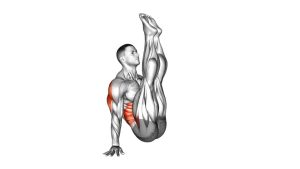
- Compress through the core: Pull the thighs toward the torso as the body changes from vertical to an L-shape.
- Stabilize the rings: Keep the rings close to the hips and resist outward drift or shaking.
- Finish in the L-sit: Hold the legs straight in front of you, keep the torso tall, and maintain strong shoulder depression.
- Pause with control: Hold the final position briefly before lowering safely or resetting for the next attempt.
Pro Tips & Common Mistakes
- Keep the elbows locked: Bent elbows reduce straight-arm strength demand and often lead to instability.
- Do not rush the descent: The transition should be controlled, not a fall from handstand into L-sit.
- Keep the rings close: Rings drifting outward make the shoulders work harder and increase the risk of losing control.
- Use a tight hollow position: Core tension helps prevent arching, swinging, or overbalancing.
- Point the toes: Straight legs and pointed toes improve body line and control.
- Master the tuck version first: Tuck transitions reduce leverage and help build the pattern safely.
- Train compression separately: Seated leg lifts, hanging leg raises, and ring L-sits improve the finishing position.
- Avoid shrug collapse: Keep the shoulders active in the handstand and controlled as you move into the L-sit.
- Use low rings when learning: Lower rings reduce fear and make safe exits easier.
- Rest fully between attempts: Fatigue quickly reduces precision on advanced ring skills.
FAQ
Is the Ring Handstand to L-Sit beginner friendly?
No. This is an advanced to elite rings exercise. Beginners should first build ring support holds, ring dips, ring L-sits, handstand strength, and basic shoulder stability before attempting this transition.
What muscles does the Ring Handstand to L-Sit work?
It mainly trains the shoulders, serratus anterior, rotator cuff, triceps, core, hip flexors, forearms, and upper back. The movement also requires full-body coordination and balance.
Why is this exercise so difficult on rings?
Rings move independently, which forces the shoulders, wrists, and core to stabilize constantly. The transition also changes leverage from an inverted handstand to a compressed L-sit, making control very demanding.
Should I train the tuck version first?
Yes. The tuck version is the best progression because it shortens the lever, reduces core demand, and helps you learn the transition without dropping the legs too fast.
How do I stop the rings from shaking?
Use stronger shoulder engagement, keep the rings close to the body, move slower, and reduce the difficulty. Shaking often means the progression is too advanced or fatigue is too high.
Can this exercise build shoulder strength?
Yes. It develops advanced shoulder stability, straight-arm control, and pressing strength. However, it should be trained as a skill-strength movement, not as a high-rep conditioning exercise.
Recommended Equipment
- Wooden Gymnastic Rings — essential for ring handstands, ring L-sits, support holds, and advanced calisthenics skills
- Heavy-Duty Ring Straps — helps secure the rings safely to a pull-up bar, beam, or overhead anchor
- Gymnastics Crash Mat — adds protection during handstand entries, failed transitions, and advanced skill practice
- Calisthenics Wrist Wraps — provides wrist support during ring handstands and straight-arm pressing work
- Liquid Chalk — improves grip security on rings and reduces slipping during high-tension holds
Tip: For this exercise, the most important equipment factors are ring security, strap quality, grip control, and safe landing protection.