Wall-Assisted Handstand Shoulder Press Between Benches: Form, Sets, Tips & FAQ
Learn the Wall-Assisted Handstand Shoulder Press Between Benches for shoulder strength, overhead pressing power, and advanced bodyweight control. Includes setup, execution, sets by goal, common mistakes, FAQs, and recommended equipment.
Wall-Assisted Handstand Shoulder Press Between Benches
This movement combines bodyweight overhead pressing strength with inversion control. The wall reduces the balance challenge enough for you to focus on pressing mechanics, while the raised hand position increases the range of motion and makes each rep more demanding on the shoulders. It works best for athletes who already have solid shoulder mobility, confidence upside down, and the strength to control both the lowering and pressing phases without collapsing.
Quick Overview
| Body Part | Front Shoulders |
|---|---|
| Primary Muscle | Anterior deltoids |
| Secondary Muscle | Triceps, upper chest, upper traps, serratus anterior, core stabilizers |
| Equipment | Bodyweight, two sturdy benches, wall |
| Difficulty | Advanced |
Sets & Reps (By Goal)
- Strength: 3-5 sets × 3-6 reps, 90-150 sec rest
- Muscle building: 3-4 sets × 6-10 reps, 75-120 sec rest
- Skill + control: 3-5 sets × 2-5 smooth reps, focus on tempo and depth
- Advanced bodyweight pressing progression: 2-4 sets × 4-8 reps after warm-up
Progression rule: First improve control, depth, and lockout consistency. Then add reps. Only increase difficulty when every rep stays stable, strict, and pain-free.
Setup / Starting Position
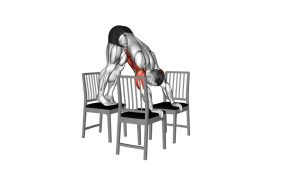
- Position the benches: Place two sturdy benches parallel to each other with enough space for your head to lower safely between them.
- Face the wall: Set the benches close enough to the wall so your heels can touch it when upside down.
- Place your hands firmly: Grip or press into the top surfaces of the benches with hands about shoulder-width apart.
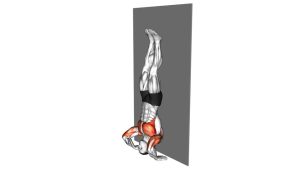
- Kick up into position: Bring the legs overhead and place the heels lightly against the wall for support.
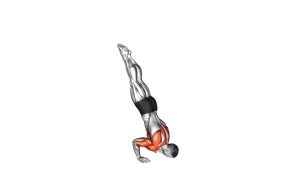
- Brace everything: Keep the core tight, glutes engaged, ribs down, and eyes focused slightly between the hands.
Tip: Before full reps, hold the top position for a few seconds to make sure the benches feel stable and your line is under control.
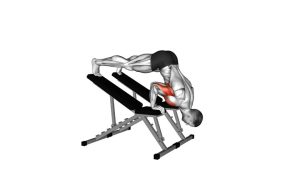
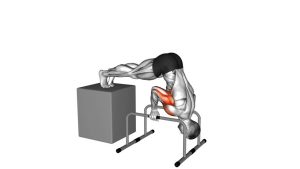
Execution (Step-by-Step)
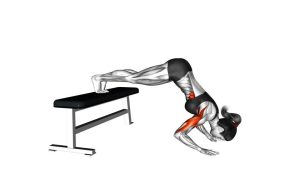
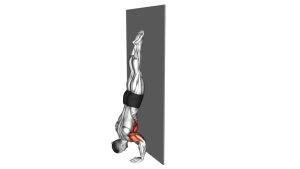
- Start at lockout: Begin in a supported handstand with arms straight, shoulders active, and heels lightly touching the wall.
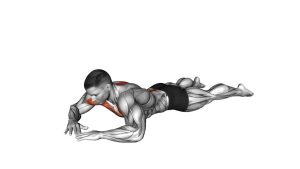
- Lower under control: Bend the elbows and let the head travel down between the benches. Keep the body tight and avoid collapsing through the midsection.
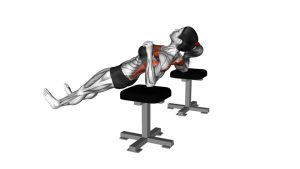
- Reach the bottom carefully: Descend until you achieve a deep but safe range of motion, ideally with the head dropping below hand level.
- Press upward powerfully: Drive through the palms, extend the elbows, and push the body back toward full lockout.
- Finish strong: Return to the top with shoulders elevated, elbows straight, and body stable before starting the next rep.
Pro Tips & Common Mistakes
- Use stable equipment only: Wobbly benches make this exercise unsafe.
- Keep the core tight: Avoid excessive lower-back arching during both the lowering and pressing phases.
- Control the eccentric: Do not drop quickly into the bottom position.
- Press through the full hand: Balanced pressure improves control and shoulder stability.
- Do not force extra depth: More range is useful only if you can maintain joint control.
- Keep the wall as light support: Leaning too heavily into it can throw off your pressing path.
- Warm up wrists and shoulders first: This movement places high demand on both.
FAQ
What muscles does the Wall-Assisted Handstand Shoulder Press Between Benches work?
It primarily targets the anterior deltoids. The triceps, upper chest, upper traps, and core stabilizers also help throughout the movement.
Why use benches instead of doing handstand push-ups on the floor?
The benches create a deeper range of motion because the head can travel below hand level. That usually makes the movement more demanding and can improve pressing strength and shoulder development.
Is this exercise beginner-friendly?
No. This is an advanced bodyweight shoulder exercise. Most people should first master pike push-ups, wall-supported handstand holds, and standard wall handstand push-up progressions.
How do I make it safer?
Use very stable benches, place them on a non-slip surface, warm up thoroughly, and only work through a range of motion you can control. Never rush the descent.
Can I use this for shoulder hypertrophy?
Yes, provided you already have the strength and control for it. The deeper range of motion can create a strong training stimulus for the shoulders and triceps when performed with good technique.
Recommended Equipment
- Parallettes Bars — a compact alternative to benches for inverted pressing, handstand holds, and other calisthenics work
- Handstand Bars — useful for athletes who want a more handstand-specific training setup with wrist-friendly handles
- Wrist Wraps — helpful for added wrist support during heavy inverted pressing sessions
- Resistance Bands Set — great for shoulder warm-ups, mobility drills, and progression work
- Exercise Mat — improves floor grip and adds a cleaner, safer setup area around the benches
Tip: Prioritize stable support equipment and wrist comfort first. For this exercise, control and setup quality matter more than adding extra tools.