Elevated Pike Push-Up from Deficit with Parallettes: Form, Sets, Tips & FAQ
Learn how to do the Elevated Pike Push-Up from Deficit with Parallettes for stronger shoulders, better overhead pressing strength, and handstand push-up progression. Includes form tips, sets by goal, common mistakes, FAQs, and recommended equipment.
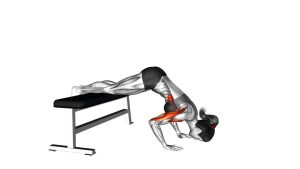
Elevated Pike Push-Up from Deficit with Parallettes
This exercise demands strong shoulder stability, body control, and solid pressing mechanics. The goal is to keep the hips high, stack pressure into the shoulders, and lower the head between the hands with control. It should feel like a vertical press using bodyweight, not like a standard horizontal push-up. Smooth tempo and clean positioning matter more than chasing extra reps.
Quick Overview
| Body Part | Shoulders |
|---|---|
| Primary Muscle | Anterior deltoids (front shoulders) |
| Secondary Muscle | Lateral deltoids, triceps, upper chest, serratus anterior, core |
| Equipment | Parallettes or push-up bars, box/bench/chair for foot elevation |
| Difficulty | Advanced |
Sets & Reps (By Goal)
- Strength: 3–5 sets × 4–8 reps, 90–150 sec rest
- Muscle building: 3–4 sets × 6–10 reps, 60–90 sec rest
- Handstand push-up progression: 3–5 sets × 3–6 clean reps, 90–120 sec rest
- Control and skill work: 2–4 sets × 4–6 slow reps with a 2–3 second lowering phase
Progression rule: First improve range of motion, control, and rep quality. Then raise the feet slightly higher, slow the eccentric, or add reps only when your shoulder position stays strong and stable.
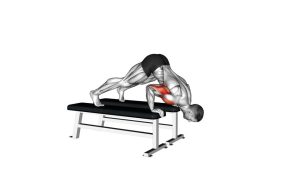
Setup / Starting Position
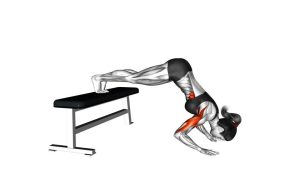
- Place the parallettes: Set them shoulder-width apart on a flat, non-slip surface.
- Elevate the feet: Put your feet on a bench, box, or sturdy platform behind you.
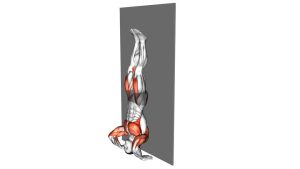
- Lift into a pike position: Hips stay high so your torso angles more vertically.
- Grip firmly: Hold the parallettes with straight wrists and locked-in shoulders.
- Brace the body: Tighten the core, keep legs engaged, and maintain a neutral neck.
- Shift weight forward slightly: This helps line the press more directly into the shoulders.
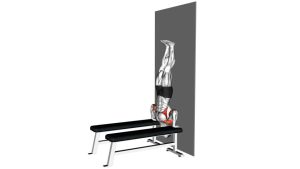
Tip: The higher the feet and the more vertical the torso, the closer this exercise becomes to a handstand push-up pattern.
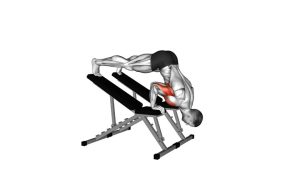
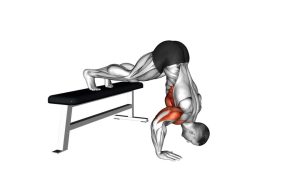
Execution (Step-by-Step)
- Start tall through the shoulders: Push strongly into the parallettes and keep the elbows extended at the top.
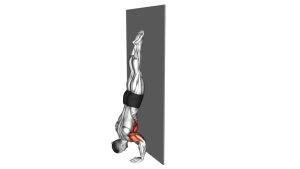
- Lower under control: Bend the elbows and bring your head down between your hands.
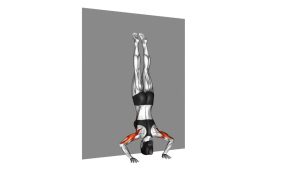
- Use the deficit: Let the head travel below hand level so the shoulders move through a deeper range of motion.
- Keep hips high: Do not let the body flatten into a regular push-up position.
- Pause briefly at the bottom: Stay controlled without collapsing into the shoulders or neck.
- Press back up: Drive through the hands, extend the elbows, and return to the top pike position.
- Reset each rep: Re-establish balance, shoulder tension, and body alignment before repeating.
Pro Tips & Common Mistakes
- Keep the hips elevated: This preserves the vertical pressing angle and keeps the shoulders as the main driver.
- Use full but controlled depth: The deficit is valuable only when you can control the bottom position.
- Don’t flare the elbows too much: Slight natural flare is okay, but excessive flare reduces stability.
- Avoid collapsing the neck: Lower the body with the shoulders and arms, not by dumping pressure into the head or upper traps.
- Brace the core: A loose midsection makes balance harder and leaks force during the press.
- Progress gradually: Master normal pike push-ups and elevated pike push-ups before adding a deep deficit.
- Use stable equipment: Shaky parallettes or an unstable bench can ruin the movement pattern and increase injury risk.
FAQ
What muscles does the Elevated Pike Push-Up from Deficit with Parallettes work?
It mainly targets the front deltoids. The triceps, lateral delts, upper chest, serratus anterior, and core also assist with pressing and stabilization.
Is this exercise good for handstand push-up progression?
Yes. It is one of the best progressions for building the shoulder strength, pressing angle, and control needed for stricter handstand push-ups.
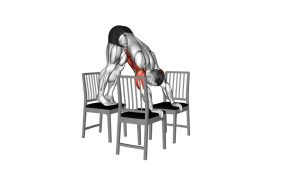
Why use parallettes instead of the floor?
Parallettes create a deficit, allowing a deeper range of motion at the bottom. That deeper press can improve shoulder strength and hypertrophy when performed with control.
How high should I elevate my feet?
Use a height that lets you keep your hips high and press mostly through the shoulders. Higher feet increase difficulty, but only if you can maintain balance and clean form.
Who should avoid this exercise?
Beginners, or anyone with wrist pain, shoulder irritation, poor overhead control, or difficulty stabilizing in pike positions, should first build strength with easier pike push-up variations before attempting this one.
Recommended Equipment
- Parallettes — essential for creating the deficit and improving wrist comfort during pressing
- Push-Up Bars — a simpler alternative to parallettes for extra depth and neutral wrist positioning
- Plyometric Box — useful for stable foot elevation and adjustable exercise difficulty
- Non-Slip Exercise Mat — helps keep your setup secure and protects the floor during bodyweight training
- Wrist Wraps — optional support if your wrists fatigue during high-tension pressing work
Tip: Choose stable, non-slip equipment first. Better setup quality usually improves both safety and performance in advanced bodyweight presses.