Handstand Push-Up Against the Wall: Form, Sets, Tips & FAQ
Learn how to perform the Handstand Push-Up Against the Wall with proper form, setup, reps by goal, coaching tips, common mistakes, FAQs, and recommended equipment for safer shoulder-focused training.
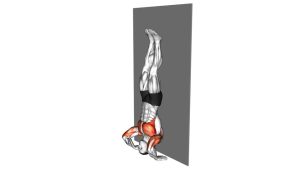
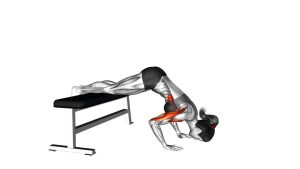
Handstand Push-Up Against the Wall
This movement rewards strength, positioning, and patience. The goal is not to crash the head into the floor or over-arch the back to finish reps. Instead, aim for a smooth descent, a stable bottom position, and a strong vertical press back to lockout. The wall helps with balance, but the rep should still be powered by the shoulders and triceps—not momentum.
Quick Overview
| Body Part | Shoulders |
|---|---|
| Primary Muscle | Anterior deltoids |
| Secondary Muscle | Triceps, lateral deltoids, upper chest, upper traps, serratus anterior, core |
| Equipment | Bodyweight, wall, floor space (optional: ab mat, parallettes, chalk) |
| Difficulty | Advanced |
Sets & Reps (By Goal)
- Strength: 4–6 sets × 1–5 reps, 2–3 min rest
- Muscle building: 3–5 sets × 4–8 reps, 90–120 sec rest
- Skill practice: 3–5 sets × 2–4 clean reps, stop before form breaks down
- Progression work: 3–4 sets × 3–6 reps using partial range, ab mat, or parallettes as needed
Progression rule: First improve control and consistency, then add reps. Only increase range of motion or difficulty when you can keep your body stacked and avoid excessive arching or head dumping.
Setup / Starting Position
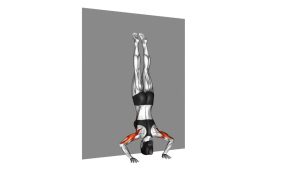
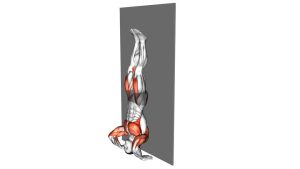
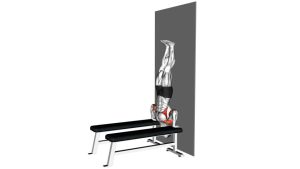
- Face the wall setup: Place your hands on the floor about shoulder-width apart and kick up into a wall-supported handstand.
- Hand position: Spread your fingers wide and grip the floor for balance. Hands can be straight or turned slightly outward if that feels better on the wrists.
- Body line: Keep your ribs down, glutes tight, and legs together. Let the heels rest lightly against the wall.
- Shoulder position: Push tall through the shoulders at the top so you are active, not hanging into the joints.
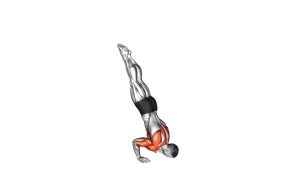
- Head path: Choose a controlled descent path so the head moves slightly forward between the hands, not straight down into the wrists.
Tip: Newer athletes often perform better with an ab mat under the head or parallettes to reduce wrist stress and improve hand placement.
Execution (Step-by-Step)
- Brace at the top: Start in a stable wall handstand with straight arms, active shoulders, and a tight core.
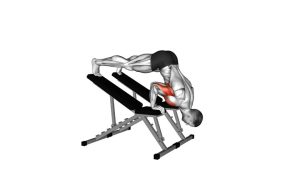
- Lower under control: Bend the elbows and lower yourself slowly. Let the head travel slightly forward as the elbows bend.
- Reach the bottom: Lower until the head lightly touches the floor or target pad. Do not collapse into the neck.
- Press vertically: Drive through the hands and extend the elbows to push your body back to the top position.
- Finish tall: Return to full lockout with the shoulders active and body stacked before starting the next rep.
Pro Tips & Common Mistakes
- Think “push the floor away”: This helps create a strong lockout and active shoulder position.
- Control the descent: The eccentric phase builds strength and protects the bottom position.
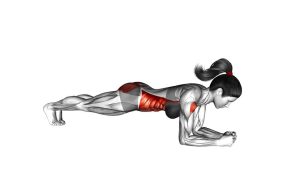
- Keep the core tight: Avoid banana-back alignment by squeezing the glutes and pulling the ribs down.
- Don’t bounce off the floor: A light touch is enough. Crashing down increases stress on the neck and head.
- Use the right range: Full range is great only if you can own it. Partial-range reps are better than sloppy full reps.
- Warm up wrists and shoulders: Skipping prep work often makes this exercise feel worse than it needs to.
- Avoid excessive elbow flare: Some flare is natural, but too much can reduce power and stability.
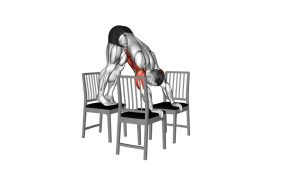
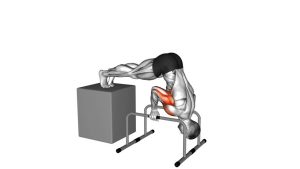
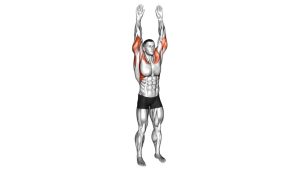
- Train prerequisites: Pike push-ups, wall handstand holds, and dumbbell overhead presses can help build the foundation.
FAQ
What muscles does the handstand push-up against the wall work?
It mainly targets the front deltoids, while the triceps, lateral delts, upper chest, upper traps, and core support the movement.
Is this exercise good for building shoulder size and strength?
Yes. It is one of the most demanding bodyweight vertical pressing exercises. It can build impressive shoulder and triceps strength when you perform it with control and enough training volume.
What if I cannot do a full wall handstand push-up yet?
Start with pike push-ups, feet-elevated pike push-ups, wall handstand holds, or reduced-range handstand push-ups using an ab mat or cushions. Build strength gradually before chasing full-depth reps.
Should my head go straight down between my hands?
Not exactly. In most strong reps, the head travels slightly forward on the way down so the forearms and pressing angle stay more efficient. Think “down and slightly forward,” then press back up.
How often should I train wall handstand push-ups?
Most people do well with 1–3 focused sessions per week depending on recovery, overall pressing volume, and experience level. Advanced athletes may tolerate more practice if intensity is managed well.
Recommended Equipment (Optional)
- Parallette Bars — useful for neutral wrist positioning, extra range of motion, and more comfortable pressing mechanics
- Handstand Push-Up Pad / Ab Mat — gives the head a safer target and helps with progression work
- Gym Chalk — improves grip if your hands slide or sweat during inverted training
- Shoulder Resistance Bands — great for warm-ups, shoulder activation, and accessory work between sessions
- Wrist Wraps — optional support if wrist extension is a limiting factor during pressing
Tip: Accessories should improve comfort and progression, not replace good mobility, control, and smart programming.