Kneeling Fist-to-Palm Switch: Forearm Mobility, Grip Control, Sets, Tips & FAQ
Learn the Kneeling Fist-to-Palm Switch to improve forearm control, wrist mobility, grip coordination, and finger strength with step-by-step form, sets, mistakes, FAQs, and equipment.
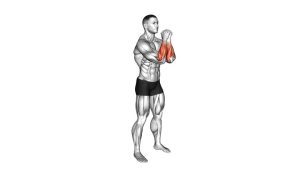
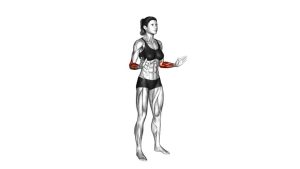
Kneeling Fist-to-Palm Switch
This exercise is especially useful as a forearm warm-up, wrist mobility drill, grip-preparation movement, or low-impact hand control exercise before curls, rows, pull-ups, calisthenics, kettlebell work, or sports that require strong hands. Because the athlete performs it from a kneeling position with the arms extended in front of the body, the movement encourages posture control while keeping the main focus on the hands, wrists, and forearms.
The movement should look smooth: close the fingers into a fist, rotate and open into a palm, briefly control the end position, then close back into a fist without rushing. Every repetition should feel deliberate, light-to-moderate, and repeatable. Avoid aggressive gripping, fast snapping, shoulder shrugging, or forcing the wrist beyond a comfortable range.
Quick Overview
| Body Part | Forearms |
|---|---|
| Primary Muscle | Forearm flexors and forearm extensors |
| Secondary Muscle | Wrist stabilizers, finger flexors, finger extensors, grip-control muscles, light shoulder stabilizers |
| Equipment | No equipment required |
| Difficulty | Beginner — ideal for warm-ups, mobility, coordination, and low-impact wrist conditioning |
Sets & Reps (By Goal)
- Wrist and forearm warm-up: 1–2 sets × 10–15 switches per hand position, slow and smooth.
- Grip coordination: 2–3 sets × 12–20 reps, focusing on full finger opening and controlled closing.
- Forearm endurance: 2–4 sets × 20–30 seconds of continuous switching, resting 30–60 seconds.
- Mobility practice: 1–3 sets × 8–12 slow reps, pausing briefly in both the fist and open-palm positions.
- Desk break / recovery flow: 1–2 easy sets × 30–45 seconds with relaxed breathing and no strain.
Progression rule: First improve smoothness, range, and control. After that, increase time under tension, add slower pauses, or perform more total reps. Do not progress by squeezing harder if it causes wrist or finger discomfort.
Setup / Starting Position
- Kneel on the floor: Place both knees on a mat or soft surface. Keep your hips stacked over your knees.
- Stand tall through the torso: Keep your chest lifted, ribs controlled, and spine neutral. Avoid leaning backward or collapsing forward.
- Extend the arms forward: Bring both arms in front of your body around chest height. Keep elbows slightly soft instead of locked.
- Start with fists: Close both hands into controlled fists. Grip firmly enough to form the shape, but do not crush the hands.
- Set the shoulders: Relax the traps, keep the neck long, and avoid shrugging as the hands move.
- Brace lightly: Keep the core gently engaged so the body stays still while the wrists and fingers do the work.
Tip: If kneeling bothers your knees, place a folded towel or exercise mat underneath them. You can also perform the same drill seated or standing.
Execution (Step-by-Step)
- Begin in the fist position: Keep both hands closed with controlled tension. Wrists should stay aligned, not collapsed inward or bent backward excessively.
- Start the switch: Slowly begin opening the fingers while rotating the wrist position into the palm-facing phase. Move gradually instead of snapping the hands open.
- Open into a palm: Extend the fingers until the hands form a flat, open palm. Keep the fingers long but not aggressively hyperextended.
- Control the end range: Pause briefly in the open-palm position. Feel the forearm extensors and wrist stabilizers working.
- Return to a fist: Close the fingers back down with the same level of control. Let the forearm flexors work without over-gripping.
- Keep the arms still: Do not swing the elbows, shrug the shoulders, or bounce the torso to create momentum.
- Repeat smoothly: Continue alternating between fist and palm with a steady rhythm and clean wrist alignment.
Pro Tips & Common Mistakes
Pro Tips
- Move with intention: Treat every switch like a coordination drill, not a speed drill.
- Open the whole hand: Extend through the fingers evenly instead of letting only the thumb or index finger dominate.
- Control both directions: The closing phase matters just as much as the opening phase.
- Use a moderate squeeze: Make a solid fist, but avoid crushing tension that causes cramping.
- Keep the wrists clean: Avoid collapsing the wrists inward or bending them too far backward.
- Breathe normally: Do not hold your breath during the switching pattern.
Common Mistakes
- Moving too fast: Speed reduces control and turns the drill into random hand flapping.
- Over-gripping the fist: Excessive squeezing can create unnecessary forearm fatigue and finger tension.
- Shrugging the shoulders: The traps should not dominate a hand and forearm drill.
- Locking the elbows: Keep a slight bend so the arms stay controlled and comfortable.
- Forcing wrist range: Stay within a smooth, pain-free range instead of chasing extreme rotation.
- Uneven hand action: Try to make both hands open and close at the same time with similar range.
FAQ
What muscles does the Kneeling Fist-to-Palm Switch work?
It mainly works the forearm flexors, forearm extensors, finger flexors, finger extensors, and wrist stabilizers. The shoulders and core also help lightly by keeping the arms and torso steady.
Is this a strength exercise or a mobility exercise?
It is both, but it is best understood as a control and mobility drill. It improves wrist awareness, finger coordination, grip control, and forearm activation without needing heavy resistance.
Should I squeeze the fist as hard as possible?
No. Use a controlled fist, not a maximum-effort crush. Too much squeezing can cause cramping and reduce the smoothness of the switch. Aim for clean control rather than maximum tension.
Can beginners do this exercise?
Yes. This is beginner-friendly because it requires no equipment and uses a low-impact range of motion. Beginners should move slowly and keep the reps pain-free.
Why perform it kneeling instead of standing?
Kneeling reduces lower-body movement and makes it easier to focus on the hands, wrists, and forearms. It also encourages a tall torso and controlled posture while the arms stay extended.
Can this help before lifting weights?
Yes. It works well before curls, rows, pull-ups, deadlifts, kettlebell training, or any movement where the wrists and grip need to feel ready. Use it as part of a warm-up, not as a fatiguing finisher before heavy grip work.
What should I do if my wrists feel stiff?
Reduce the range, slow the tempo, and keep the hands relaxed. You can also perform fewer reps and gradually build up as your wrists feel more comfortable.
Can I do this exercise every day?
Yes, if it stays light and pain-free. Daily practice works well for mobility and coordination, but reduce volume if you feel lingering soreness, cramping, or irritation in the wrists or fingers.
Recommended Equipment
- Exercise Mat — provides knee comfort and a stable surface for kneeling wrist and forearm drills.
- Adjustable Hand Grip Strengthener — useful for building grip strength alongside coordination-based hand exercises.
- Finger Extensor Trainer — helps strengthen finger opening muscles that support the palm-opening phase.
- Wrist and Forearm Strengthener — adds progressive resistance for wrist flexion, extension, and forearm conditioning.
- Therapy Putty / Hand Exercise Putty — excellent for finger control, grip endurance, and hand-strength accessory work.
Tip: Equipment is optional for this exercise. Master the no-equipment version first, then use tools to build extra grip strength, finger extension strength, and forearm endurance.