Diamond Push-Up: Proper Form, Triceps Benefits, Sets, Tips & FAQ
Learn how to do the Diamond Push-Up with proper form to target your triceps, chest, shoulders, and core. Includes setup, execution, sets by goal, mistakes, FAQs, and equipment.
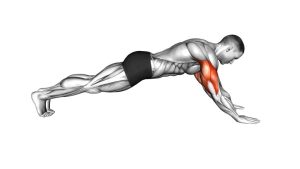
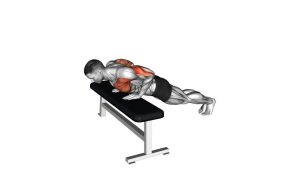
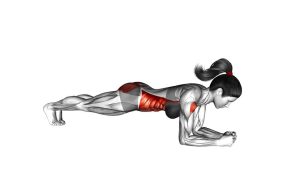
Diamond Push-Up
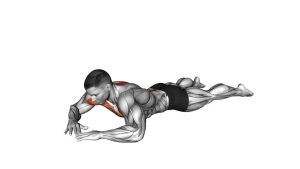
This movement works best when the body moves as one solid unit. First, the hands form a diamond shape under the chest. Then, the elbows stay close to the ribs as the body lowers under control. Finally, the triceps press the floor away until the arms return to a strong plank position. Although the exercise looks simple, it requires good shoulder control, wrist comfort, core tension, and clean elbow tracking.
Quick Overview
| Body Part | Triceps |
|---|---|
| Primary Muscle | Triceps brachii |
| Secondary Muscle | Pectoralis major, anterior deltoids, serratus anterior, core stabilizers |
| Equipment | No equipment required; optional exercise mat or push-up handles |
| Difficulty | Intermediate; advanced for beginners because of the narrow hand position |
Sets & Reps (By Goal)
- Strength: 3–5 sets × 4–8 reps with 90–150 seconds rest.
- Muscle growth: 3–4 sets × 8–15 reps with 60–90 seconds rest.
- Endurance: 2–4 sets × 12–20 controlled reps with 45–75 seconds rest.
- Beginner progression: 2–3 sets × 6–10 reps from knees or with hands elevated.
- Finisher: 1–2 sets near technical failure after your main pressing work.
Progression rule: Add reps first. After that, slow the lowering phase, pause at the bottom, or move from knee diamond push-ups to full plank diamond push-ups.
Setup / Starting Position
- Start on the floor: Place your hands under your chest with thumbs and index fingers close together.
- Create the diamond: Form a small triangle or diamond shape, but keep the wrists comfortable.
- Set your plank: Step both feet back until your body forms a straight line from head to heels.
- Brace your core: Tighten your abs and glutes so your hips do not sag during the rep.
- Relax your neck: Look slightly ahead of your hands and keep your head aligned with your spine.
- Set the shoulders: Keep the shoulders stable and avoid shrugging toward the ears.
If the full version is too difficult, elevate your hands on a bench or perform the exercise from your knees. As a result, you can build strength while keeping clean form.
Execution (Step-by-Step)
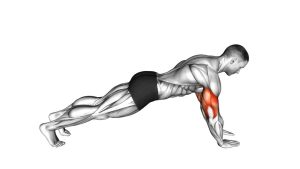
- Begin in a strong plank: Keep your body straight, core tight, and hands close together under the chest.
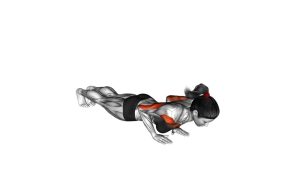
- Lower slowly: Bend your elbows and guide them back close to your ribs.
- Keep tension: Continue lowering until your chest approaches your hands without collapsing your shoulders.
- Pause briefly: Hold the bottom position for a moment while maintaining full-body control.
- Press the floor away: Drive through your palms and extend your elbows to push back up.
- Finish tall: Return to the top plank position without locking the elbows aggressively.
- Repeat with control: Keep each rep smooth, steady, and aligned.
Pro Tips & Common Mistakes
Pro Tips
- Use a narrow but comfortable hand position: The hands do not need to touch perfectly if your wrists feel stressed.
- Control the descent: Lower for 2–3 seconds to increase triceps tension.
- Keep elbows tucked: This improves triceps activation and helps protect the shoulders.
- Brace before every rep: A tight core keeps the hips from dropping.
- Push through the whole palm: This keeps the wrists more stable and helps distribute pressure.
- Use regressions when needed: Knee or incline diamond push-ups are useful for building clean strength.
Common Mistakes
- Letting the hips sag: This reduces core control and places stress on the lower back.
- Flaring the elbows: This shifts tension away from the triceps and may irritate the shoulders.
- Dropping the head: Keep the neck neutral instead of reaching the face toward the floor.
- Using a painful hand shape: Adjust the hand position if the wrists feel compressed.
- Rushing reps: Fast reps often reduce range of motion and control.
- Stopping halfway down: Use a full but comfortable range to train the triceps effectively.
FAQ
What muscles do diamond push-ups work?
Diamond push-ups primarily work the triceps brachii. However, they also train the chest, front shoulders, serratus anterior, and core because the body must stay stable throughout the movement.
Are diamond push-ups better than regular push-ups?
They are not automatically better; instead, they are more specific. Regular push-ups train the chest more evenly, while diamond push-ups place more demand on the triceps. Therefore, both variations can be useful.
Why do diamond push-ups hurt my wrists?
Wrist pain often happens when the hands are forced too close together or the wrists are bent aggressively. To fix this, separate the hands slightly, warm up the wrists, or use push-up handles.
Can beginners do diamond push-ups?
Yes, but many beginners should start with an easier variation. For example, knee diamond push-ups or incline diamond push-ups reduce the load while still teaching the same movement pattern.
How low should I go during a diamond push-up?
Lower until your chest comes close to your hands while your elbows stay controlled and your shoulders feel stable. However, do not force extra depth if it causes pain or loss of form.
How often should I train diamond push-ups?
Most people can train them 2–3 times per week. Additionally, advanced athletes may use them more often if total pressing volume and recovery are managed well.
Recommended Equipment
- Exercise Mat — provides wrist, knee, and floor comfort during push-up training.
- Push-Up Handles — help keep the wrists more neutral and may reduce wrist discomfort.
- Resistance Bands Set — useful for assisted push-up progressions, triceps work, and upper-body warm-ups.
- Workout Wrist Wraps — provide light wrist support during pressing movements.
- Weighted Vest — adds progressive overload once bodyweight diamond push-ups become easy.
Tip: Equipment is optional. However, a mat and push-up handles can make the exercise more comfortable, especially if your wrists or knees are sensitive.