Straight-Arm Crunch: Proper Form, Benefits, Sets, Tips & FAQ
Learn how to do the Straight-Arm Crunch with proper form. Build stronger abs with step-by-step technique, sets by goal, common mistakes, FAQs, and recommended equipment.
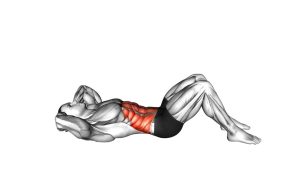
Straight-Arm Crunch
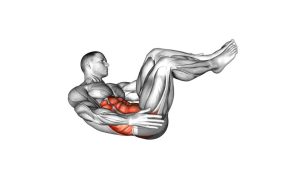
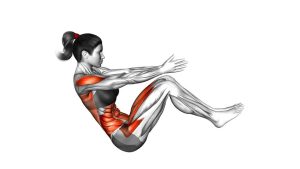
This exercise is excellent for training the rectus abdominis, especially the upper-abdominal region, while also teaching controlled spinal flexion. Because the arms remain straight, many people are tempted to swing them forward for momentum. The best version of the Straight-Arm Crunch is slow, quiet, and precise. Your arms should travel with your torso, but your abs should create the lift.
Use this movement in home workouts, beginner core sessions, ab finishers, or bodyweight waist training routines. It does not require equipment, but a comfortable exercise mat can make the movement easier to perform with proper control.
Quick Overview
| Body Part | Abs |
|---|---|
| Primary Muscle | Rectus abdominis |
| Secondary Muscle | Obliques, transverse abdominis, hip flexors as light stabilizers |
| Equipment | No equipment required; exercise mat optional |
| Difficulty | Beginner to intermediate |
Sets & Reps (By Goal)
- Beginner core control: 2–3 sets × 8–12 reps with a slow tempo.
- Ab hypertrophy / muscle burn: 3–4 sets × 12–20 reps with a 1-second squeeze at the top.
- Core endurance: 2–4 sets × 20–30 controlled reps without using momentum.
- Workout finisher: 2–3 rounds × 30–45 seconds, resting 30–60 seconds between rounds.
- Tempo challenge: 3 sets × 8–10 reps using 2 seconds up, 1 second hold, and 3 seconds down.
Progression rule: First improve control, tempo, and top-position squeeze. After that, increase reps or add a light resistance option such as a small medicine ball only if your neck and lower back stay relaxed.
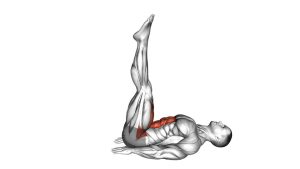
Setup / Starting Position
- Lie on your back: Position yourself flat on the floor or on an exercise mat.
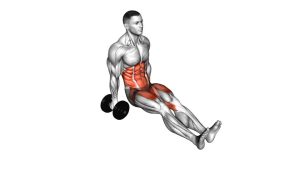
- Set your legs: Keep the knees bent with feet flat for better control. A more advanced version can be done with legs extended, but bent knees are usually better for strict form.
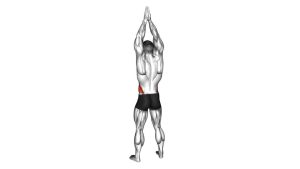
- Extend your arms: Reach both arms straight overhead or slightly above the chest depending on your mobility. Keep elbows long but not locked aggressively.
- Brace lightly: Draw the ribs down and gently tighten the abs before moving.
- Keep your neck neutral: Maintain a small space between chin and chest. Do not jam the chin down.
- Relax your shoulders: Avoid shrugging before the rep starts. Your arms should be long, but your traps should not take over.
Execution (Step-by-Step)
- Begin from a stable position: Lie back with your arms straight, core lightly braced, and lower body steady.
- Exhale and curl upward: Start the crunch by lifting the head, shoulders, and upper back from the floor.
- Reach with straight arms: Let your arms travel forward naturally, but do not swing them to create momentum.
- Lift only into a crunch: Stop when your shoulder blades are clearly off the floor and your abs are fully contracted. This is not a full sit-up.
- Squeeze at the top: Pause briefly and contract the abs while keeping the neck relaxed.
- Lower under control: Slowly return the upper back, shoulders, and head to the floor.
- Reset before the next rep: Keep your ribs controlled and avoid bouncing into the next repetition.
Pro Tips & Common Mistakes
Pro Tips
- Lead with the ribs: Imagine your ribcage curling toward your pelvis rather than your head reaching toward your knees.
- Use your breath: Exhale during the crunch to help the abs contract harder.
- Keep the arms honest: The arms should stay straight, but they should not create the movement.
- Pause at the top: A short squeeze improves abdominal tension and prevents rushed reps.
- Control the lowering phase: The eccentric portion is where many people lose tension. Lower slowly.
Common Mistakes
- Swinging the arms: This reduces ab work and turns the movement into a momentum-based exercise.
- Pulling the neck forward: Keep the neck long and relaxed instead of forcing the chin toward the chest.
- Turning it into a sit-up: The Straight-Arm Crunch should mainly lift the upper back, not the entire torso.
- Arching the lower back: Keep the ribs controlled and avoid letting the lower back flare excessively.
- Rushing reps: Fast reps usually reduce tension and increase compensation.
- Holding the breath: Breath-holding can create unnecessary pressure and make the movement feel stiff.
FAQ
What muscles does the Straight-Arm Crunch work?
The Straight-Arm Crunch mainly works the rectus abdominis, especially the upper portion of the abs. The obliques and deeper core muscles also help stabilize the torso during the movement.
Is the Straight-Arm Crunch better than a regular crunch?
It is not automatically better, but it is usually more challenging because the straight-arm position increases leverage. This can make the abs work harder if the movement is performed slowly and without swinging.
Should my arms stay straight the whole time?
Yes, the arms should stay mostly straight. However, they should remain relaxed enough that you are not creating shoulder tension. The abs should lift the torso, not the arms.
Why do I feel this exercise in my neck?
Neck strain usually happens when you lead with the head, tuck the chin too hard, or rush the movement. Keep your neck neutral, exhale as you crunch, and focus on lifting the shoulder blades with your abs.
Can beginners do the Straight-Arm Crunch?
Yes. Beginners can perform it with bent knees, a small range of motion, and slow reps. If it feels too difficult, start with a standard crunch before progressing to the straight-arm version.
How high should I lift during the crunch?
Lift until your shoulder blades come off the floor and your abs are strongly contracted. You do not need to sit all the way up. A shorter, controlled crunch is usually more effective than a large, sloppy rep.
Can this exercise reduce belly fat?
The Straight-Arm Crunch strengthens and trains the abdominal muscles, but fat loss depends on overall calorie balance, nutrition, and full-body activity. Use it as part of a complete workout and diet plan.
Recommended Equipment
- Exercise Mat — provides comfort and support for floor-based crunches.
- Ab Mat — supports the lower back and helps improve abdominal range of motion.
- Light Medicine Ball — useful for advanced straight-arm crunch progressions.
- Core Sliders — helpful for pairing crunch work with additional core exercises.
- Foam Roller — useful for thoracic mobility and recovery after core sessions.
Choose equipment that improves comfort and control. The Straight-Arm Crunch does not require gear, so equipment should support better form rather than make the movement rushed or sloppy.