Standing Side Bend Bent Arm: Oblique Stretch, Form, Sets & Tips
Learn the Standing Side Bend Bent Arm to stretch and activate obliques with clean posture, controlled lateral flexion, setup tips, FAQs, and gear.
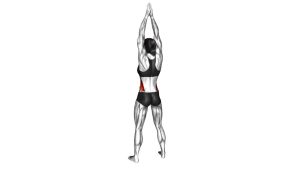
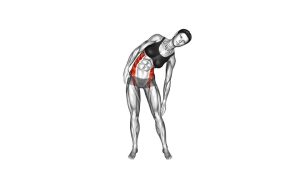
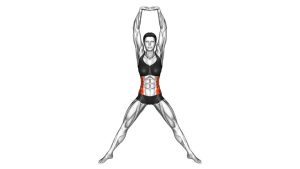
Standing Side Bend (Bent Arm)
This movement works best when it feels smooth, balanced, and controlled. Instead of forcing a deep lean, focus on a clean side bend through the waist while keeping the lower body steady. As a result, the exercise becomes useful for warming up the core, improving side-body mobility, and practicing better trunk control.
Quick Overview
| Body Part | Core |
|---|---|
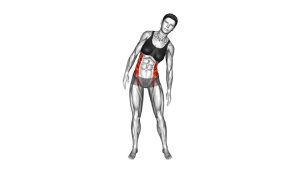
| Primary Muscle | Obliques |
| Secondary Muscle | Rectus abdominis, quadratus lumborum, spinal stabilizers |
| Equipment | None |
| Difficulty | Beginner |
Sets & Reps (By Goal)
- Mobility warm-up: 2 sets × 8–12 reps per side with a slow tempo.
- Core control: 2–3 sets × 10–15 reps per side while keeping the hips steady.
- Side-body stretch: 2 sets × 20–30 seconds per side with calm breathing.
- Desk-break reset: 1–2 sets × 6–10 reps per side using a comfortable range.
Progression rule: First improve control and range quality. Then, if needed, add more reps or slightly longer holds without turning the movement into a twist.
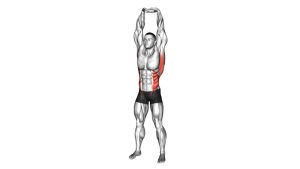
Setup / Starting Position
- Stand tall: Place your feet about hip-width apart and keep your weight balanced.
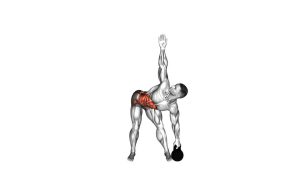
- Raise one arm: Bend one arm overhead so the elbow stays slightly flexed.
- Relax the other arm: Let the opposite arm hang naturally by your side.
- Stack your posture: Keep the chest open, shoulders relaxed, and head neutral.
- Brace lightly: Gently tighten the midsection before you begin the side bend.
Execution (Step-by-Step)
- Start upright: Stand tall with the bent arm overhead and your torso centered.
- Bend sideways: Slowly lean your torso toward the side opposite the raised arm.
- Keep the hips steady: Avoid pushing the hips far to the side or shifting your feet.
- Pause briefly: Hold the side-bend position for a moment while breathing smoothly.
- Return with control: Use your obliques to bring the torso back to the upright position.
- Repeat evenly: Complete all reps on one side, then switch arms and repeat on the other side.
Pro Tips & Common Mistakes
- Move through the waist: Let the trunk bend sideways instead of collapsing through the shoulders.
- Avoid twisting: Keep the chest facing forward throughout the rep.
- Control both directions: The return phase matters as much as the bend.
- Do not bounce: A smooth range protects the lower back and improves muscle control.
- Keep the neck neutral: Let the head follow the torso naturally without cranking it sideways.
- Use even reps: Train both sides equally to support balanced core mobility.
FAQ
What muscles does the Standing Side Bend (Bent Arm) work?
It mainly targets the obliques. Additionally, the quadratus lumborum and other trunk stabilizers assist as the torso bends and returns to center.
Is this exercise a stretch or a strength movement?
It can be used as both. With slow reps, it trains core control. With longer holds, it works more like a side-body mobility stretch.
Should I use weight for this exercise?
The version shown is bodyweight. Therefore, beginners should master the no-equipment form first before adding external resistance.
How far should I bend?
Bend only as far as you can control without twisting, bouncing, or shifting your lower body. A moderate, clean range is better than a forced deep lean.
Can I do this exercise every day?
Yes, many people can use it daily as a light mobility drill. However, keep the effort easy and reduce the volume if your lower back or side waist feels irritated.
Recommended Equipment (Optional)
- Exercise Mat — useful for warm-ups, stretching, and floor-based core work after side bends.
- Full-Length Workout Mirror — helps you check whether the torso bends sideways without rotating.
- Resistance Bands Set — helpful for pairing this drill with core and posture activation exercises.
- Foam Roller — useful for general thoracic mobility and post-workout recovery.
- Yoga Block — helpful for supported stretching and controlled mobility sessions.
Tip: Equipment is optional for this exercise. However, simple tools can improve comfort, feedback, and consistency during your warm-up routine.