Kettlebell Windmill: Safe Form, Core Strength, Sets & Tips
Learn the Kettlebell Windmill for core strength, shoulder stability, hip mobility, and controlled side-hinge form with tips, sets, FAQs, and gear.
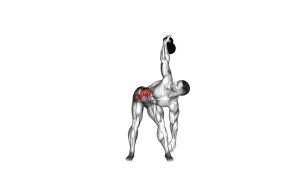
Kettlebell Windmill
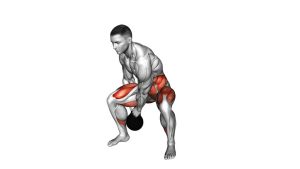
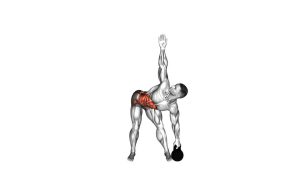
This exercise works best when the kettlebell remains stable above the shoulder and the torso moves around it. As shown in the video, the lifter begins tall, keeps the overhead elbow straight, tracks the kettlebell with the eyes, and lowers through a slow side hinge. Because the movement challenges the shoulder and core at the same time, start light and master position before adding load.
Quick Overview
| Body Part | Core |
|---|---|
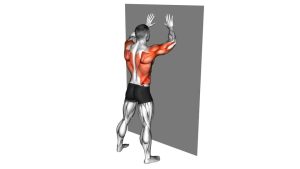
| Primary Muscle | Obliques |
| Secondary Muscle | Shoulders, glutes, hamstrings, spinal stabilizers, hips |
| Equipment | Kettlebell |
| Difficulty | Intermediate |
Sets & Reps (By Goal)
- Technique practice: 2–3 sets × 3–5 reps per side with a very light kettlebell.
- Core strength: 3–4 sets × 5–8 reps per side with slow control.
- Shoulder stability: 2–4 sets × 4–6 reps per side, pausing briefly at the bottom.
- Mobility and control: 2–3 sets × 5–6 reps per side using a smooth, pain-free range.
Progression rule: First improve your range, balance, and overhead control. Then, increase weight slowly only when every rep stays stable and smooth.
Setup / Starting Position
- Stand wide: Place your feet wider than shoulder-width so you have a stable base.
- Turn the feet slightly: Angle the feet to allow the hips to shift comfortably during the side hinge.
- Lock the kettlebell overhead: Press or place the kettlebell overhead with the elbow straight and wrist stacked.
- Set the shoulder: Keep the shoulder active without shrugging aggressively.
- Look up: Keep your eyes on the kettlebell so the overhead position stays controlled.
- Let the free arm hang: The non-working hand should be ready to slide down the leg as you descend.
Before lowering, make sure the kettlebell, wrist, elbow, and shoulder feel stacked. If the weight feels unstable while standing still, reduce the load before beginning the rep.
Execution (Step-by-Step)
- Brace lightly: Inhale, tighten the core, and keep the ribs controlled.
- Shift the hips: Push the hips away from the kettlebell side to start the windmill pattern.
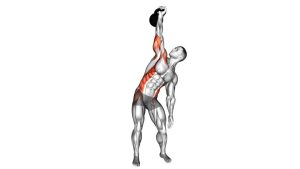
- Lower sideways: Tilt the torso under control while keeping the chest open and the overhead arm vertical.
- Slide the free hand down: Let the lower hand travel down the leg toward the shin or ankle.
- Keep watching the bell: Maintain visual contact with the kettlebell as your torso lowers.
- Reach your safe depth: Stop when you can no longer keep the back controlled, the shoulder stable, or the arm stacked.
- Drive back up: Push through the feet, bring the hips back to center, and return to a tall standing position.
- Reset at the top: Stabilize the kettlebell before beginning the next repetition.
Pro Tips & Common Mistakes
- Move from the hips: The windmill is a hip-shift and side-hinge pattern, not a loose forward bend.
- Keep the elbow locked: A bending overhead arm usually means the kettlebell is too heavy or poorly stacked.
- Do not rush the descent: Slow reps help you maintain balance, shoulder control, and core tension.
- Avoid rounding the spine: Lower only as far as your mobility allows while keeping the torso controlled.
- Do not chase the floor: Touching the ground is not required. Quality matters more than depth.
- Keep the chest open: If the chest collapses downward, reduce range and refocus on rotation control.
- Use a lighter kettlebell first: Because the bell is overhead, small form errors become more noticeable.
- Reset between reps: Each rep should start from a stable, upright position.
FAQ
What muscles does the kettlebell windmill work?
The kettlebell windmill mainly trains the obliques and deep core stabilizers. Additionally, it challenges the shoulders, glutes, hamstrings, hips, and spinal stabilizers because the kettlebell remains overhead while the torso moves.
Is the kettlebell windmill a beginner exercise?
It is usually better for intermediate trainees because it requires overhead stability, hip mobility, and core control. However, beginners can practice the pattern without weight or with a very light kettlebell first.
Should I touch the floor during the kettlebell windmill?
No. Touching the floor is not necessary. Instead, stop where you can keep the kettlebell stacked, the spine controlled, and the movement smooth.
Why should I look at the kettlebell?
Looking at the kettlebell helps you monitor the overhead position. As a result, it becomes easier to keep the arm vertical and avoid letting the weight drift forward.
What weight should I use for kettlebell windmills?
Start with a light kettlebell that you can hold overhead without shaking, bending the elbow, or losing shoulder position. Once your reps are stable, gradually increase the load.
Recommended Equipment
- Cast Iron Kettlebell — a classic option for learning windmills, presses, swings, and strength drills.
- Competition Kettlebell — useful if you prefer a consistent bell size across different weights.
- Non-Slip Exercise Mat — helps provide traction and comfort during warm-ups and mobility preparation.
- Kettlebell Wrist Wraps — can reduce wrist irritation while learning overhead kettlebell positioning.
- Gym Chalk — improves grip security when performing overhead kettlebell movements.
Tip: Choose equipment that improves control, not just intensity. For this exercise, a stable overhead position is more important than using a heavy kettlebell.